
Integra LS Sedan L4-1834cc 1.8L DOHC MFI (1999)
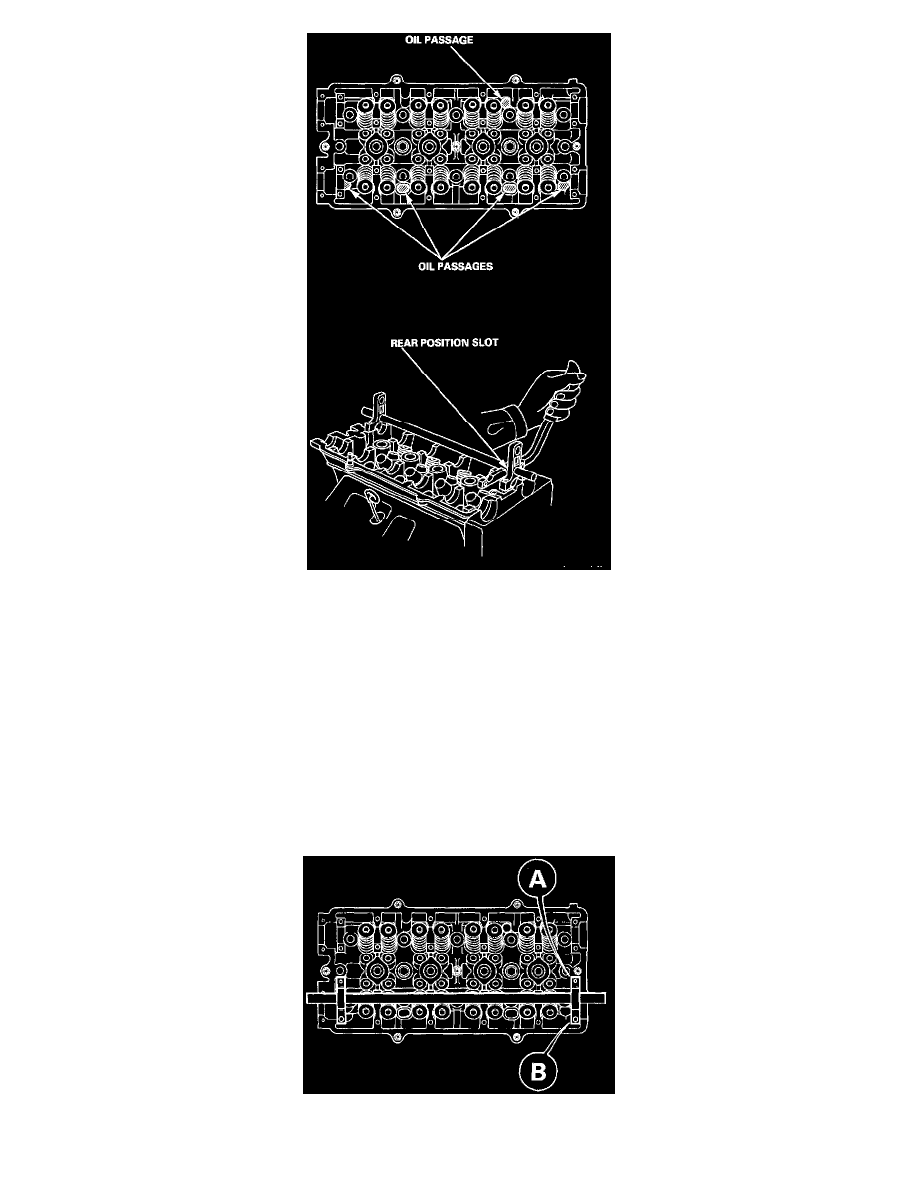
10. Position the lever arm under the cross shah so the lever is perpendicular to the shah and the compressor attachment rests on top of the retainer for
the spring being compressed. Use the rear position slot on the lever as shown.
NOTE: Put shop towels over the oil passages to prevent the valve keepers from falling into the cylinder head.
11. Using a downward motion on the lever arm, compress the valve spring and remove the keepers from the valve stem. Slowly release pressure on the
spring.
12. Repeat step 11 for the other valve in that cylinder.
13. Remove the valve seals.
14. Install the valve seals.
15. Install the springs, the retainers and the keepers in reverse order of removal.
16. Repeat steps 9 to 15 for the other three cylinders.
Exhaust Valve Seals
17. Using the 6 mm bolts supplied with the tool, mount the two uprights to the cylinder head at the end camshaft holders. The uprights fit as shown.
18. Insert the cross shah through the bottom hole of the two uprights.
19. Select the 7/8 inch diameter short compressor attachment and fasten the attachment to the No. 4 hole of the lever arm with the speed pin supplied.