
Integra LS Sedan L4-1834cc 1.8L DOHC MFI (1999)
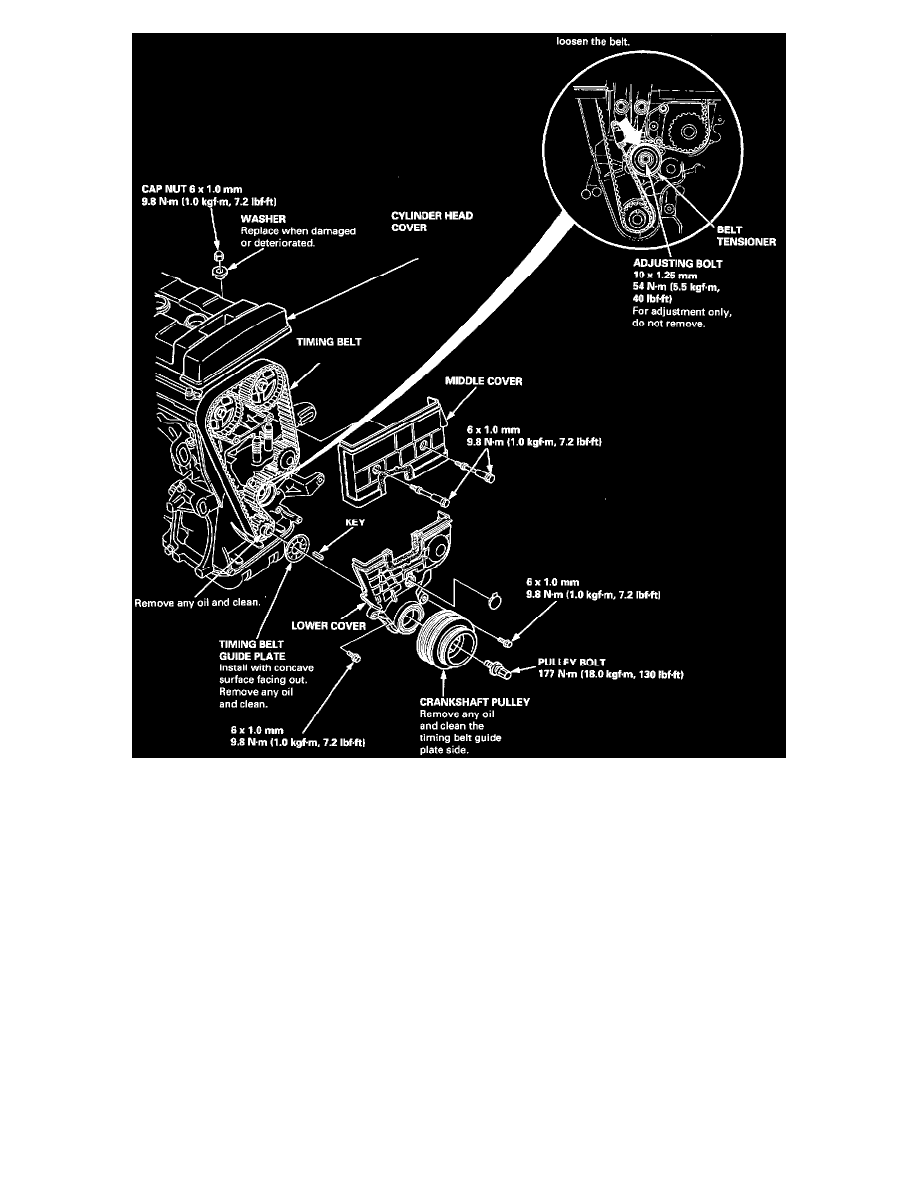
7. Remove the cylinder head cover.
8. Remove the pulley bolt and crankshaft pulley.
9. Remove the middle cover and the lower cover.
NOTE:
-
Do not use the middle cover and lower cover for storing removed items.
-
Clean the middle cover and lower cover before installation.
10. Loosen the adjusting bolt 180°.
11. Push the tensioner to remove tension from the timing belt, then retighten the bolt.
12. Remove the timing belt from the pulleys.
NOTE: Replace the camshaft and crankshaft seals if there are signs of oil leakage.
INSTALLATION
Install the timing belt in the reverse order of removal. Only key points are described here.
NOTE: Clean the middle cover and lower cover before installation.