
Integra LS Sedan L4-1834cc 1.8L DOHC MFI (1999)
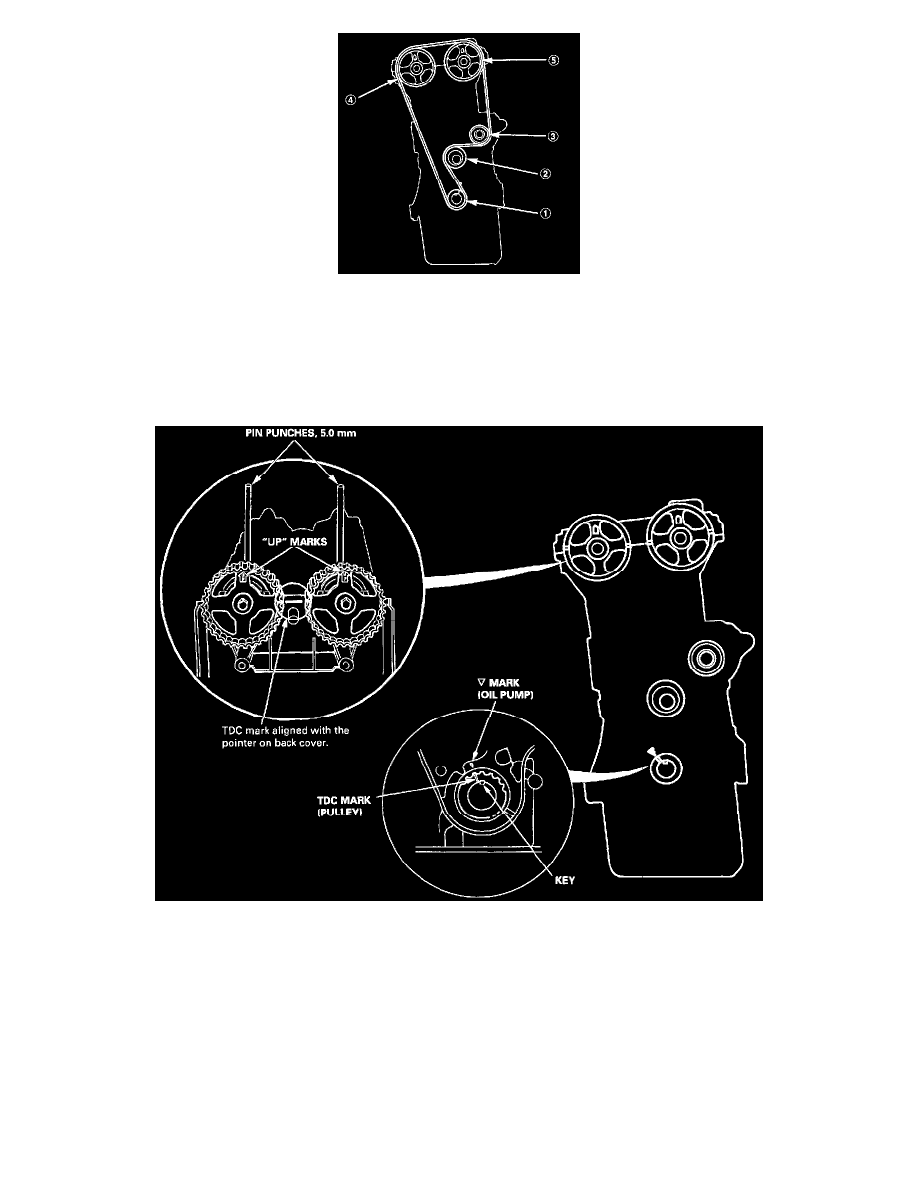
1. Position the crankshaft and the camshaft pulleys as shown before installing the timing belt.
A. Set the crankshaft so that the No. 1 piston is at top dead center (TDC) . Align the groove on the teeth side of the timing belt drive pulley to the
V pointer on the oil pump.
B. Align the TDC marks on intake and exhaust pulleys.
NOTE: To set the camshafts at TDC position for No. 1 piston, align the holes in the camshafts with the holes in No. 1 camshaft holders and
insert 5.0 mm pin punches in the holes.
2. Install the timing bell tightly in the sequence shown.
(1) Timing belt drive pulley (crankshaft) -> (2) Adjusting pulley -> (3) Water pump pulley -> (4) Exhaust camshaft pullets -> (5) Intake camshaft
pulley.
3. Loosen and retighten the adjusting bolt to tension the belt.
4. Remove the pin punches.
5. Rotate the crankshaft about 4 to 6 turns counterclockwise so that the belt positions on the pulleys.
6. Adjust the timing belt tension.