
Legend Coupe V6-3206cc 3.2L SOHC FI (1991)
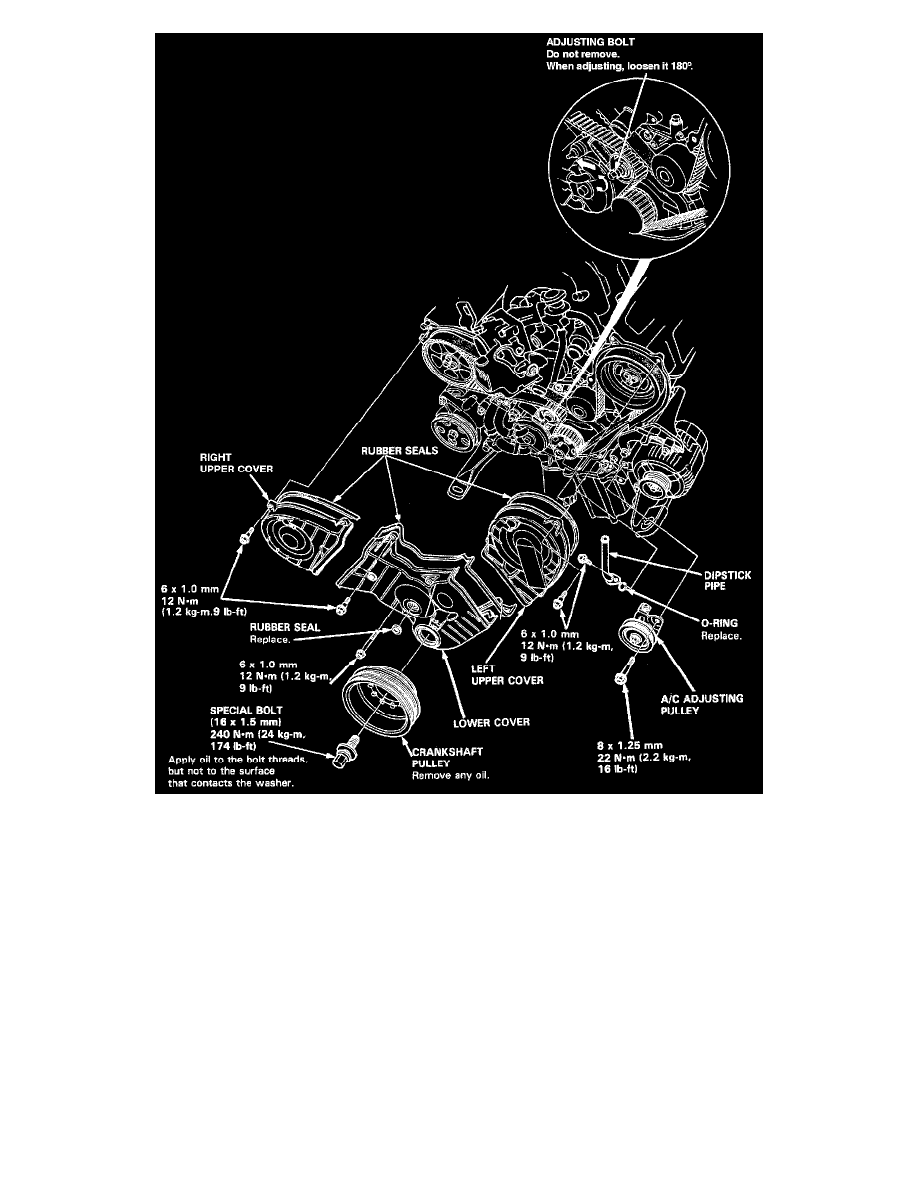
9. Remove the timing belt upper covers.
10. Turn the crankshaft so that the No. 1 piston is at top-dead-center.
11. Remove the crankshaft pulley.
12. Remove the A/C adjusting pulley.
13. Remove the dipstick pipe.
14. Remove the timing belt lower cover.
15. Loosen the timing belt adjusting bolt 180° to release the belt tension.
16. Push the tensioner to release tension from the belt, then retighten the adjusting bolt.
17. Remove the timing belt from the pulleys.
Installation
CAUTION:
- Do not rotate the crankshaft or camshafts with the timing belt removed. The pistons may hit the valves and cause damage.
- When installing the timing belt, turn the crankshaft pulley clockwise 15° past No.1 cylinder TDC. After adjusting the left and right camshaft pulleys to
TDC, turn the crankshaft pulley counterclockwise back to TDC.