
Legend Coupe V6-3206cc 3.2L SOHC FI (1991)
1. Install the timing belt in the reverse order of removal;
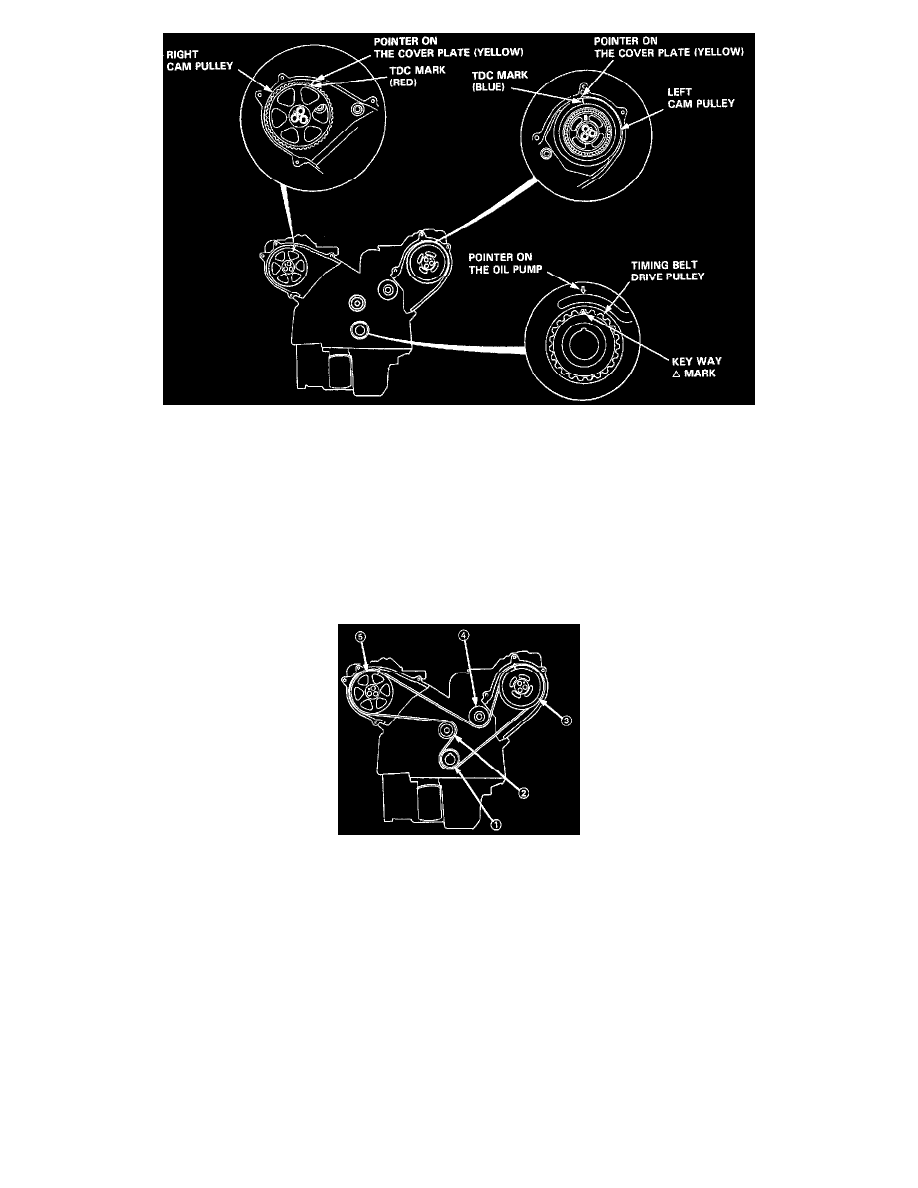
Only key points are described here.
2. Remove all spark plugs.
3. Position the crankshaft and the cam pulleys before installing the timing belt.
A. Set the crankshaft so that the No.1 piston is at top-dead-center (TDC).
NOTE: Align the (triangle) mark on the teeth side of the timing belt drive pulley to the pointer on the oil pump.
B. Align the TDC mark on the left cam pulley to the pointer on the left cover plate.
C. Align the TDC mark on the right cam pulley to the pointer on the right cover plate.
4. Install the timing belt tightly in the sequence shown.
(1)
Timing belt drive pulley (crankshaft)
(2)
Adjusting pulley
(3)
Left cam pulley
(5)
Water pump pulley
(5)
Right cam pulley.
NOTE: For easy installation, advance the right cam pulley by about a half tooth from the TDC position.
5. Loosen the adjust bolt, and retighten it after tensioning the belt.
6. Temporarily install the lower cover and crankshaft pulley.
7. Rotate the crankshaft about 5 or 6 turns clockwise so that the belt may fit in position on the pulleys.
8. Carry out timing belt tension adjustment.