
MDX V6-3.7L (2007)
Trim Panel: Service and Repair
Trim Removal/Installation - Rear Side Area
Trim Removal/Installation - Rear Side Area
Special Tools Required
KTC trim tool set SOJATP2014 *
* Available through the American Honda Tool and Equipment Program
Rear Side Trim Panel Removal/Installation
NOTE:
-
Put on gloves to protect your hands.
-
Take care not to bend or scratch the trim and panels.
-
Use the appropriate tool from the KTC trim tool set to avoid damage when removing components.
1. Remove these items:
-
Rear door sill trim
-
Rear door opening seal, as needed
-
Tailgate weatherstrip, as needed
-
Cargo floor lid
-
Rear trim panel
-
Cargo lid hinges
-
Cargo rear trim panel
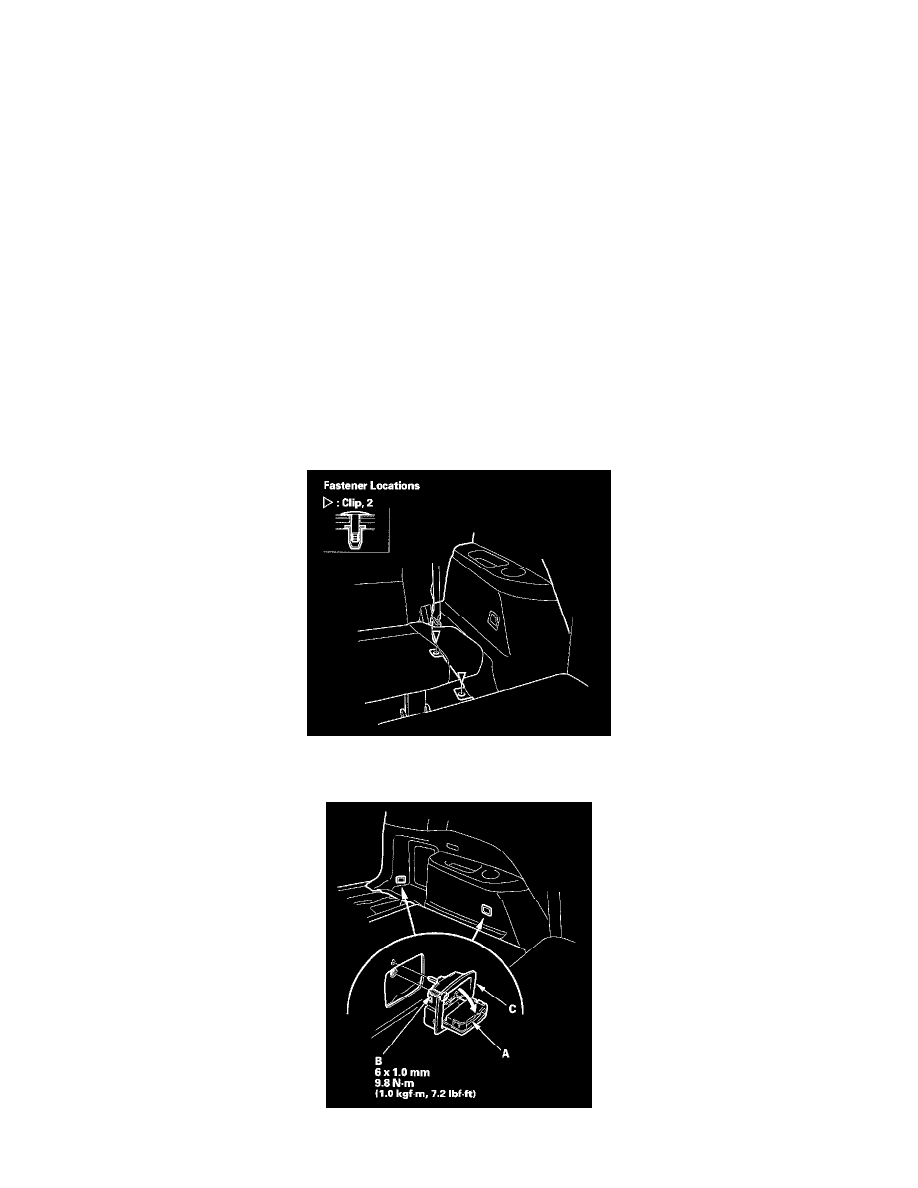
2. Raise the third row seat up, and remove the clips from under the third row seat.
3. Fold the third row seat-back forward.
4. Pry out the cover (A) and remove the bolt (B), then remove the tie down hook (C) (two places).