MDX V6-3.7L (2007)

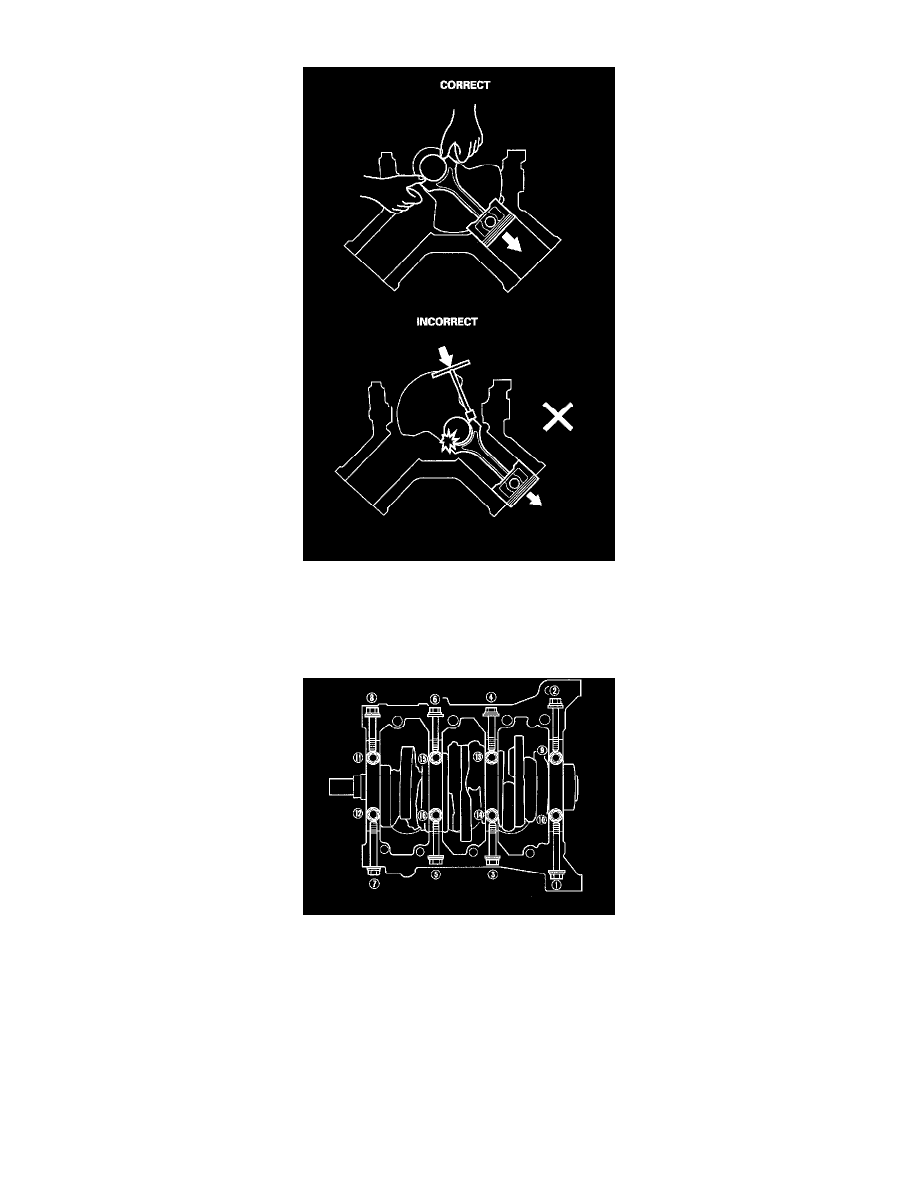
assembly by pushing on the connecting rod. Take care not to damage the crank pin or cylinder with the connecting rod.
12. Remove the bearing from the cap. Keep all caps/bearings in order.
13. Remove the upper bearing halves from the connecting rods, and set them aside with their respective caps.
14. After removing a piston/connecting rod assembly, reinstall the cap on the rod.
15. To avoid mix-up during reassembly, mark each piston/connecting rod assembly with its cylinder number.
16. Loosen the bearing cap bolts and bearing cap side bolts in sequence 1/3 turn at a time; repeat the sequence until all bolts are loosened.
17. Remove the bearing cap bolts (A) and bearing cap side bolts (B), then remove the bearing cap (C).
