
MDX V6-3.7L (2007)
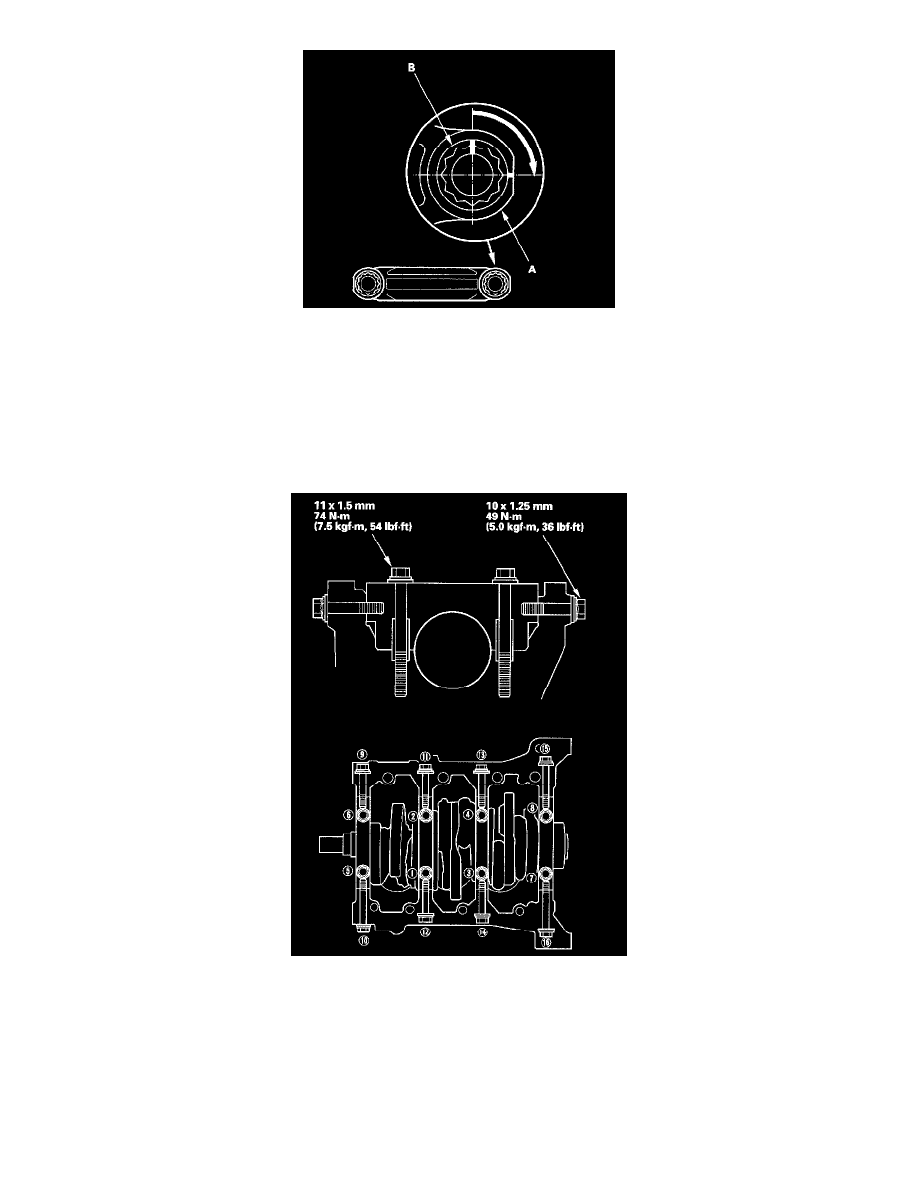
21. Tighten the bolt until the mark on the bolt head lines up with the mark on the connecting rod (turn the bolt 90°).
NOTE: Remove the connecting rod bolt if you tightened it beyond the specified angle, and go back to step 15 of the procedure. Do not loosen it
back to the specified angle.
22. Tighten the bearing cap bolts, and then the bearing cap side bolts to the specified torque in the sequence as shown. Repeat the torque sequence
again to measure the bolts are properly torqued.
NOTE: Apply new engine oil to the bolt threads and flanges.
23. Apply a light coat of multipurpose grease to the crankshaft and to the lip of the seal.
24. Drive the new crankshaft oil seal until the driver attachment bottoms on the engine block end cover.