
MDX V6-3.7L (2007)
8. Remove the EVAP canister cover, then disconnect the FTP sensor connector and the EVAP canister shut valve connector. Push the wire harness
grommet, the wire harness, and the connectors into the passenger compartment.
9. Remove the carpet. To remove the carpet, you first need to remove these parts:
^ Seats
^ Door sill trims
^ Kick panels
^ Dashboard undercovers
^ Steering joint cover
10. Remove the left and right B-pillar lower trim.
11. Remove the left and right quarter pillar trim.
NOTE:
The four upper clips on each quarter pillar trim must be replaced.
12. Remove the left and right rear side trim panels.
13. Remove the center console.
14. Remove the under-dash fuse/relay box.
15. Remove the driver's and front passengers seat belt retractors and the retractor protectors.
16. Remove the XM receiver.
17. Remove the SH-AWD control unit.
18. Remove the active damper control unit (if equipped).
19. Remove the cargo area light.
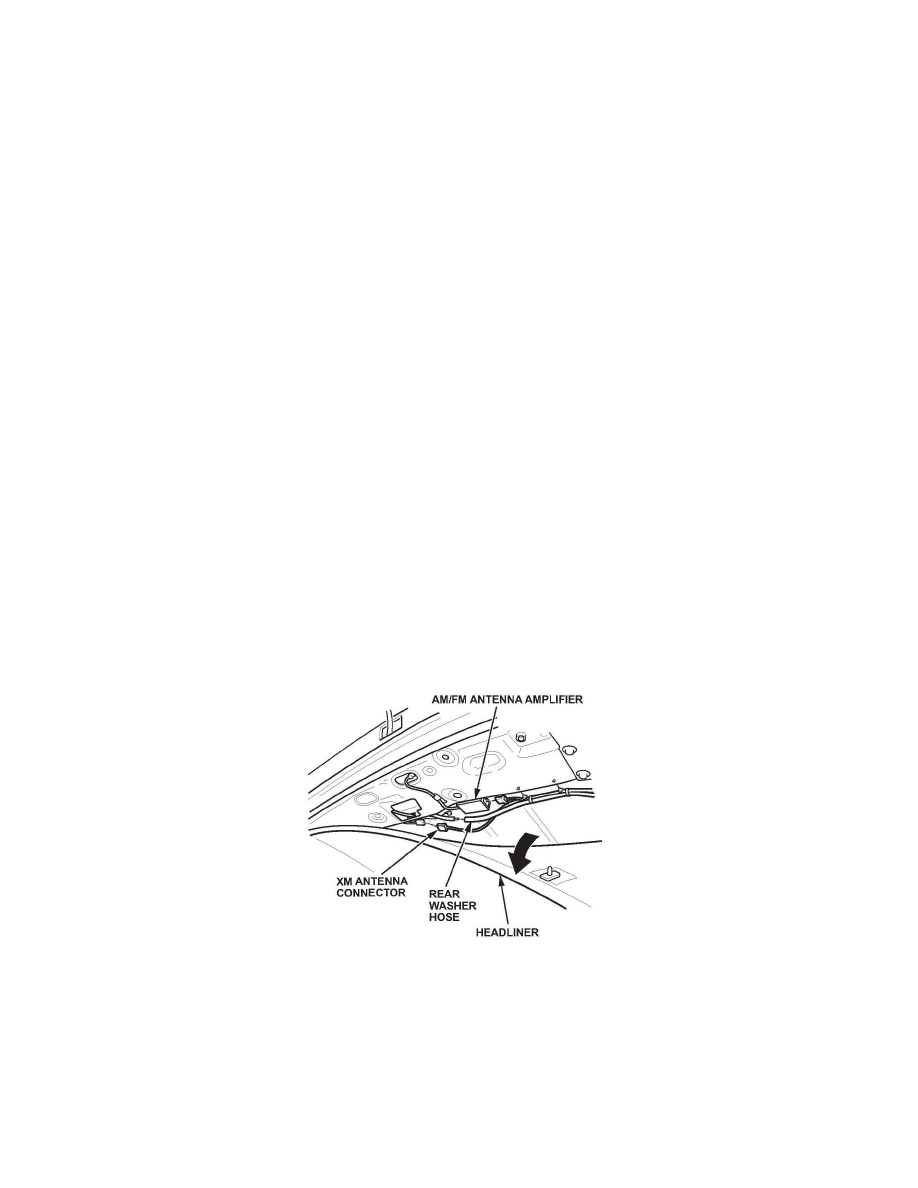
20. At the rear of the vehicle, detach the rear clip on the headliner, then carefully bend the headliner down a few inches. Disconnect the AM/FM
antenna amplifier, the XM antenna, and the rear washer hose.
21. Detach the rear washer hose clips, then push the rear washer hose, the wire harness, and the connectors into the passenger compartment.