
MDX V6-3.7L (2007)
Shifter A/T: Removal and Replacement
Shift Lever Bracket Base Replacement
Shift Lever Bracket Base Replacement
NOTE: Refer to the Shift Lever Disassembly/Reassembly during the following procedures.
1. Remove the shift lever.
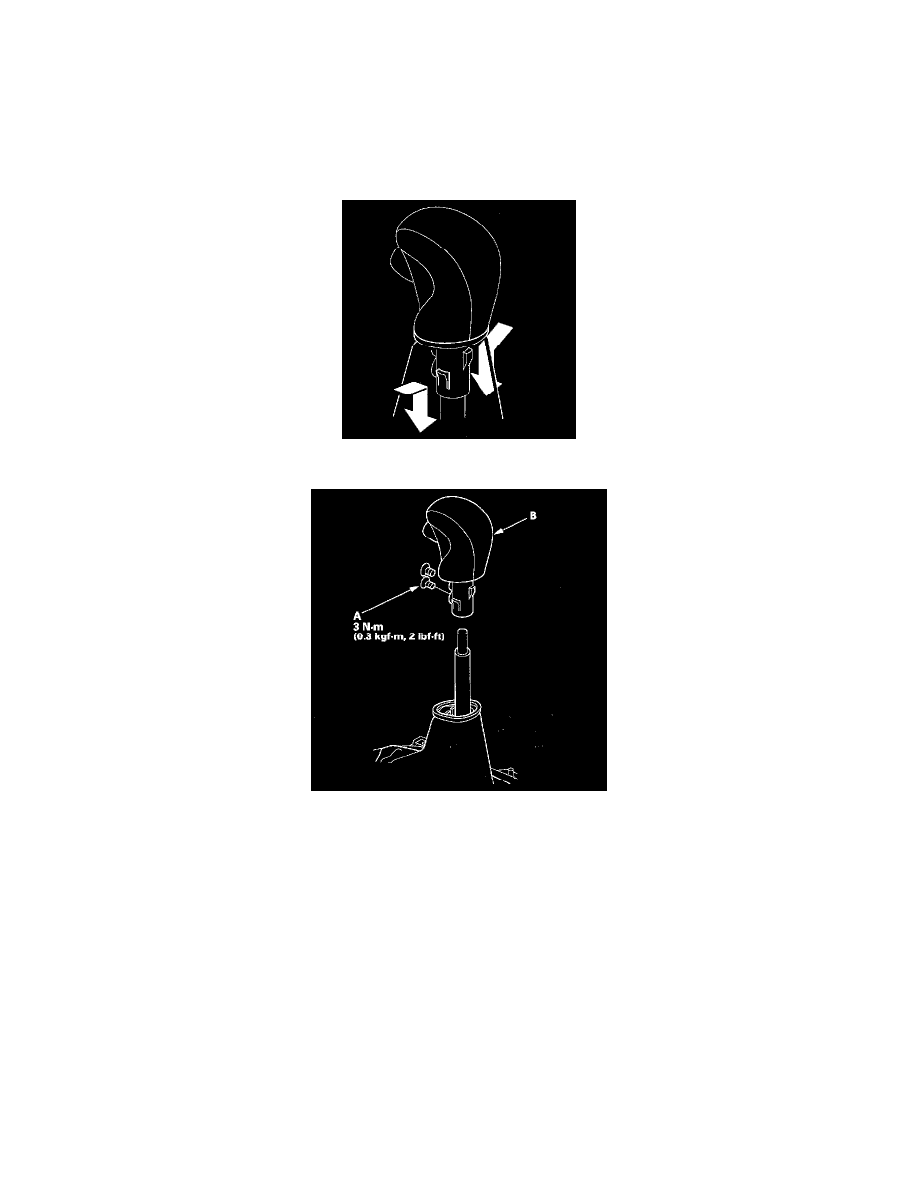
2. Grasp the shift lever boot ring, and slip it out of the shift lever knob cover.
3. Remove the screws (A) and remove the shift lever knob (B).
4. Remove the A/T gear position indicator panel light socket from the indicator panel, and remove the indicator panel from the shift lever bracket
base.
5. Remove the shift lock release.
6. Remove the shift lock solenoid and harness connector.
7. Remove the shift lock stop and stop cushion as an assembly.
8. Replace the shift lever bracket base.
9. Apply silicone grease to mounting pin of the shift lock stop, and install the shift lock stop and stop cushion over the pin.
10. Apply silicone grease to joint of the shift lock solenoid plunger and shift lock stop.
11. Install the shift lock solenoid plunger and plunger spring in the shift lock solenoid.
12. Install the shift lock solenoid by aligning the joint of the shift lock solenoid plunger with the tip of the shift lock stop, then push the shift lock
solenoid into the shift lever securely.
13. Install the shift lock release.
14. Install the A/T gear position indicator panel light bulb in its socket.
15. Install the A/T gear position indicator panel on the shift lever bracket base, and install the indicator panel light socket in the indicator panel.
16. Apply non-hardening thread lock sealant to the screw threads, install the shift lever knob, and secure it with the screws.
17. Slide the shift lever boot ring over the shift lever knob until it snaps on.
18. Install the shift lever.