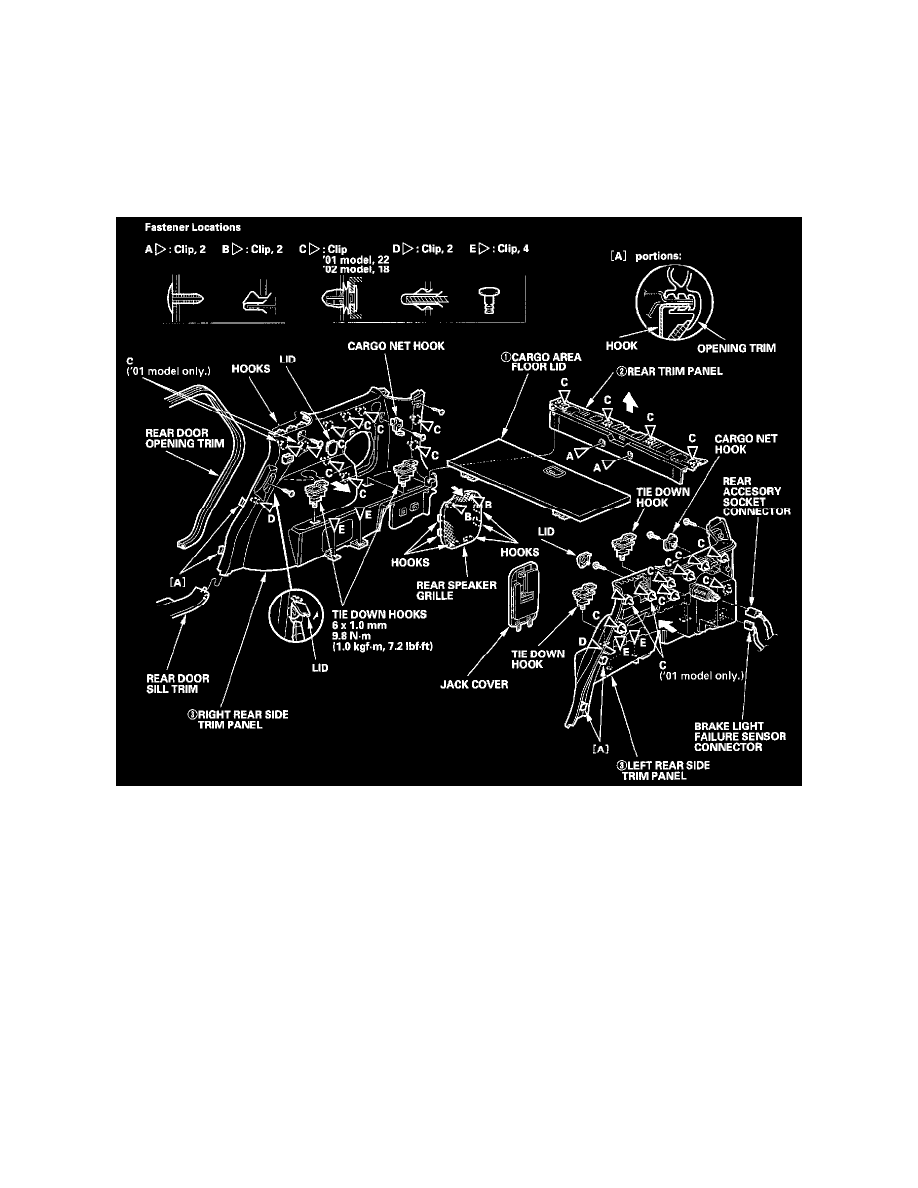
MDX V6-3471cc 3.5L (2002)

Trim Panel: Service and Repair
Trim Removal/Installation - Rear Side Lower Area
Trim Removal/Installation - Rear Side Lower Area
NOTE:
-
Put on gloves to protect your hands.
-
When prying with a flat-tip screwdriver, wrap it with protective tape to prevent damage.
-
Take care not to bend or scratch the trim and panels.
-
Be sure to disconnect the rear accessory socket and brake light failure sensor connectors when removing the left rear side trim panel.
Remove the trim in the sequence shown. To remove the rear side trim panel, remove the D-pillar trim and the third row seat. Remove the jack before
removing the left rear side trim panel.
Install the trim in the reverse order of removal, and note these items:
-
Replace any damaged clips.
-
Make sure the rear accessory socket and brake light failure sensor connectors are plugged in properly.
