
MDX V6-3471cc 3.5L (2002)
Clutch Control Solenoid Valve: Service and Repair
A/T Clutch Pressure Control Solenoid Valves A and B Test
Replacement
1. Remove the ATF cooler hose (outlet line) at the ATF cooler line. Turn the end of the cooler hose up to prevent ATF from flowing out, then plug
the line and hose.
2. Remove the ATF cooler line (outlet line) from the transmission housing.
3. Remove the harness clamp from the clamp bracket, and disconnect the connectors from A/T clutch pressure control solenoid valves A and B.
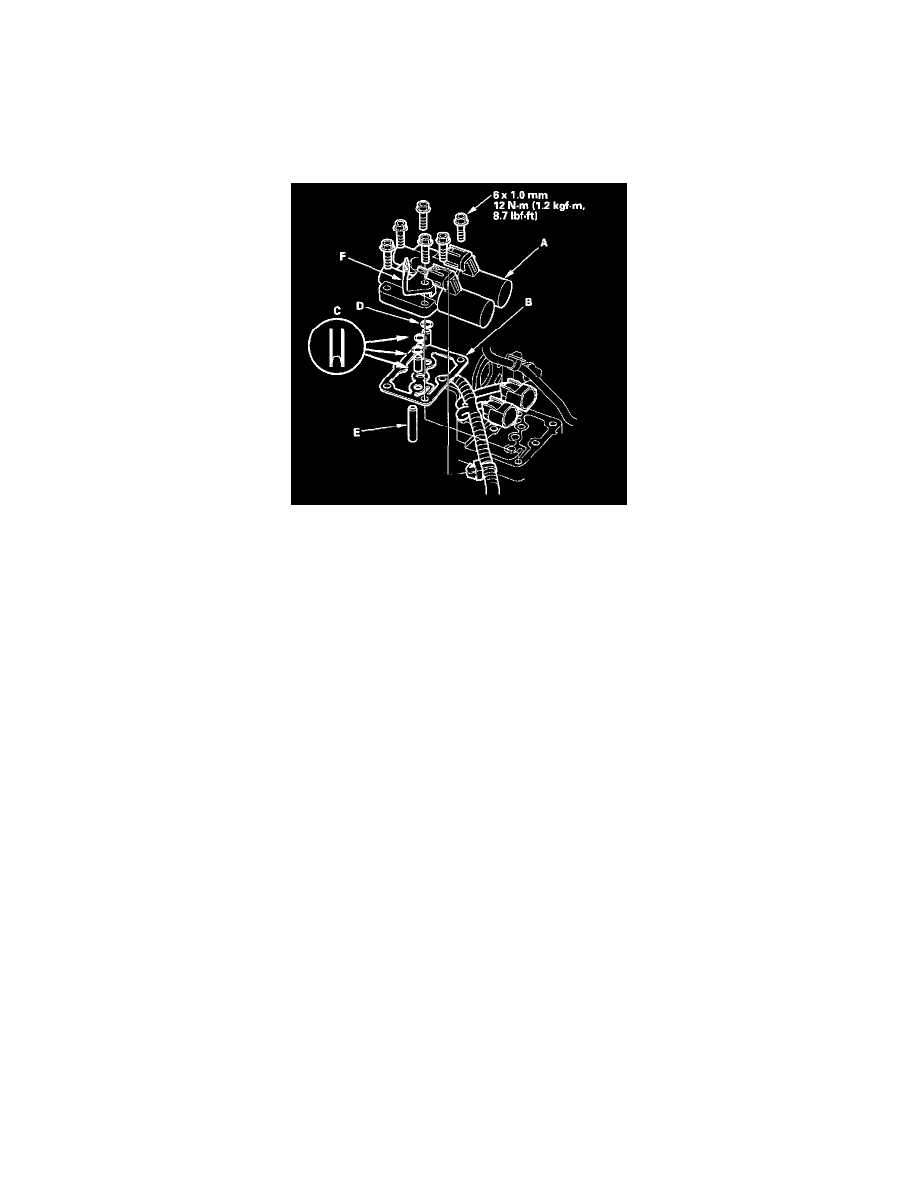
4. Remove the mounting bolts and A/T clutch pressure control solenoid valves A and B (A).
5. Clean the mounting surface and fluid passages of A/T clutch pressure control solenoid valves A and B and the transmission housing.
6. Place a new gasket (B) on the transmission housing, then install the 8 x 18 mm ATF feed pipes (C) with their filter side into the transmission
housing.
7. Install new O-rings (D) over the feed pipes, and install the 8 x 40 mm ATF feed pipe (E).
8. Install the new A/T clutch pressure control solenoid valves A and B (A) and harness clamp bracket (F).
9. Check the A/T clutch pressure control solenoid valves A and B connectors for rust, dirt, or oil, then connect them securely.
10. Install harness clamp on the clamp bracket.
11. Install the ATF cooler line (outlet line), and connect the ATF cooler hose to the cooler line.