
NSX V6-3.0L DOHC (1991)
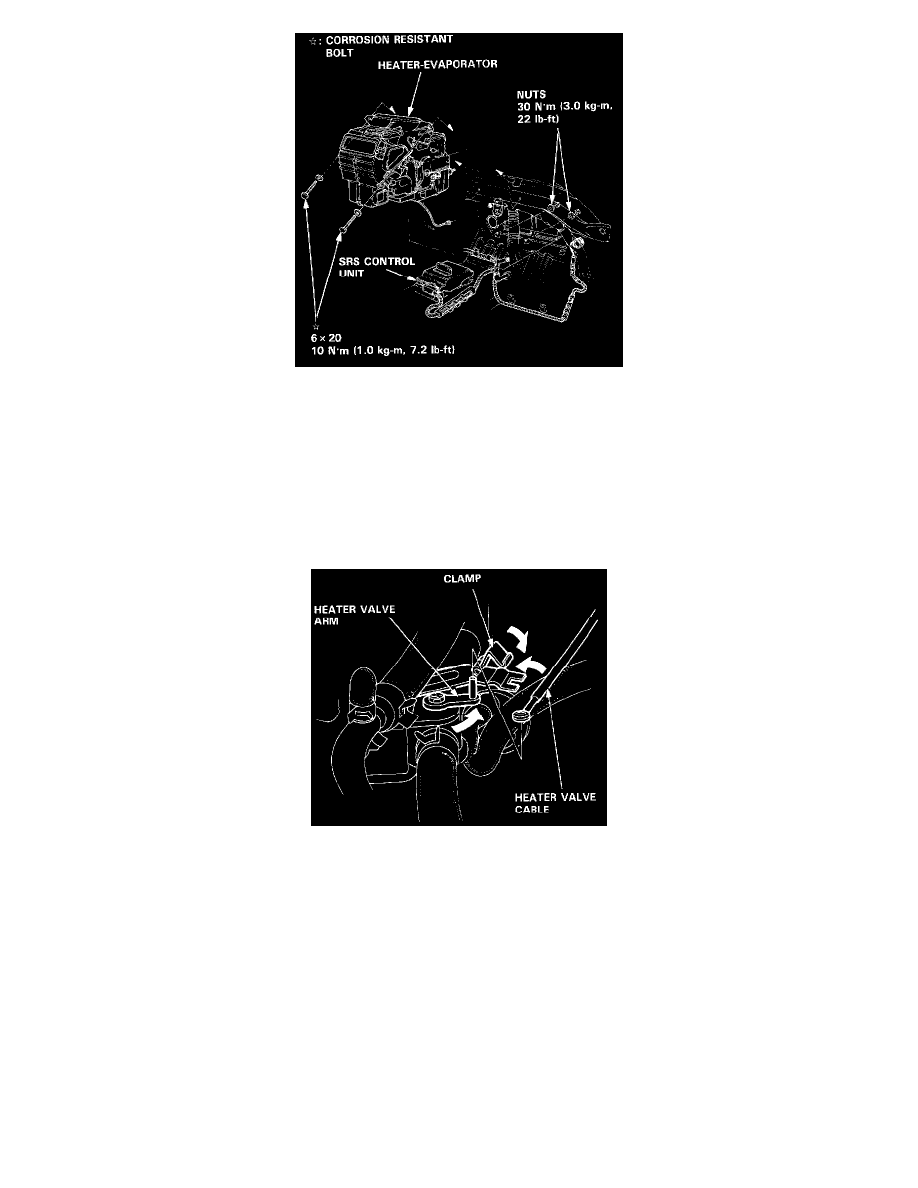
12. Remove the mounting bolts(2-under the dash) and nuts(2-under the hood), then remove the heater-evaporator through the passenger door.
13. Install in the reverse order of removal, and:
-
Apply sealant to the A/C line grommets.
-
Do not interchange the inlet and outlet heater hoses. Make sure that the hose clamps are tight.
14. Fill the radiator and reservoir tank with the proper coolant mixture. Bleed the air from the cooling system.
CAUTION: Follow the sequence described in the air bleed procedure. If you don't, you may leave air in the system which could damage the
engine.
15. If necessary, adjust the heater valve cable:
-
Set the air mix control motor at COLD position.
-
Connect the end of the cable to the heater valve arm.
-
Gently slide the cable outer housing back from the end enough to take up any slack in the cable, but not enough to make the other end move
the arm on the air mix motor. Then snap the clamp down over the cable housing.
16. Turn the blower on and make sure that there is no air leakage.
17. Charge the system, and test performance.