NSX V6-3.2L DOHC (2001)

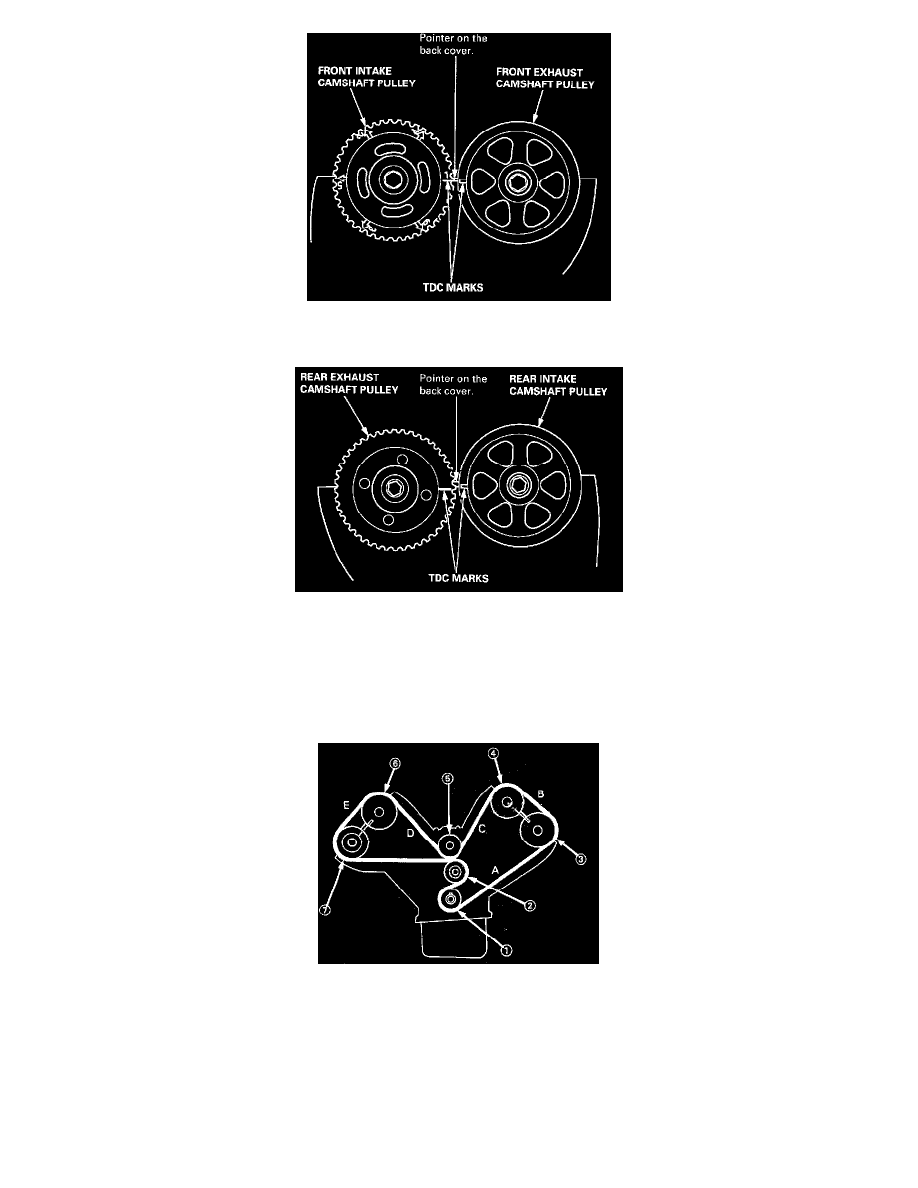
2. Set the front camshaft pulleys so that the No. 1 piston is at TDC. Align the TDC marks on the front exhaust camshaft pulley and front intake
camshaft pulley to the pointer on the back cover.
3. Set the rear camshaft pulleys so that the No. 1 piston is at TDC. Align the TDC mark on the rear intake camshaft pulley to the pointer on the back
cover. Align the rear exhaust camshaft pulley one half tooth clockwise past TDC.
4. Install the timing belt tightly in the sequence shown.
(1) Timing belt drive pulley (crankshaft) -> (2) Adjusting pulley -> (3) Front exhaust camshaft pulley -> (4) Front intake camshaft pulley -> (5)
Water pump pulley -> (6) Rear intake camshaft pulley -> (7) Rear exhaust camshaft pulley.
NOTE: Make sure the timing belt drive pulley and camshaft pulleys are at TDC.
5. Tension the timing belt between the pulleys in the sequence A to E as shown below.
6. Adjust the timing belt.
7. Install the lower cover and middle covers.
8. Install the crankshaft pulley, then tighten the pulley bolt.
