
RDX L4-2.3L Turbo (2008)
Air Bypass Valve Solenoid: Testing and Inspection
Turbocharger Bypass Control Solenoid Valve Inspection
Special Tools Required
Vacuum pump/gauge, 0-30 in.Hg, Snap-on YA4000A or equipment, commercially available
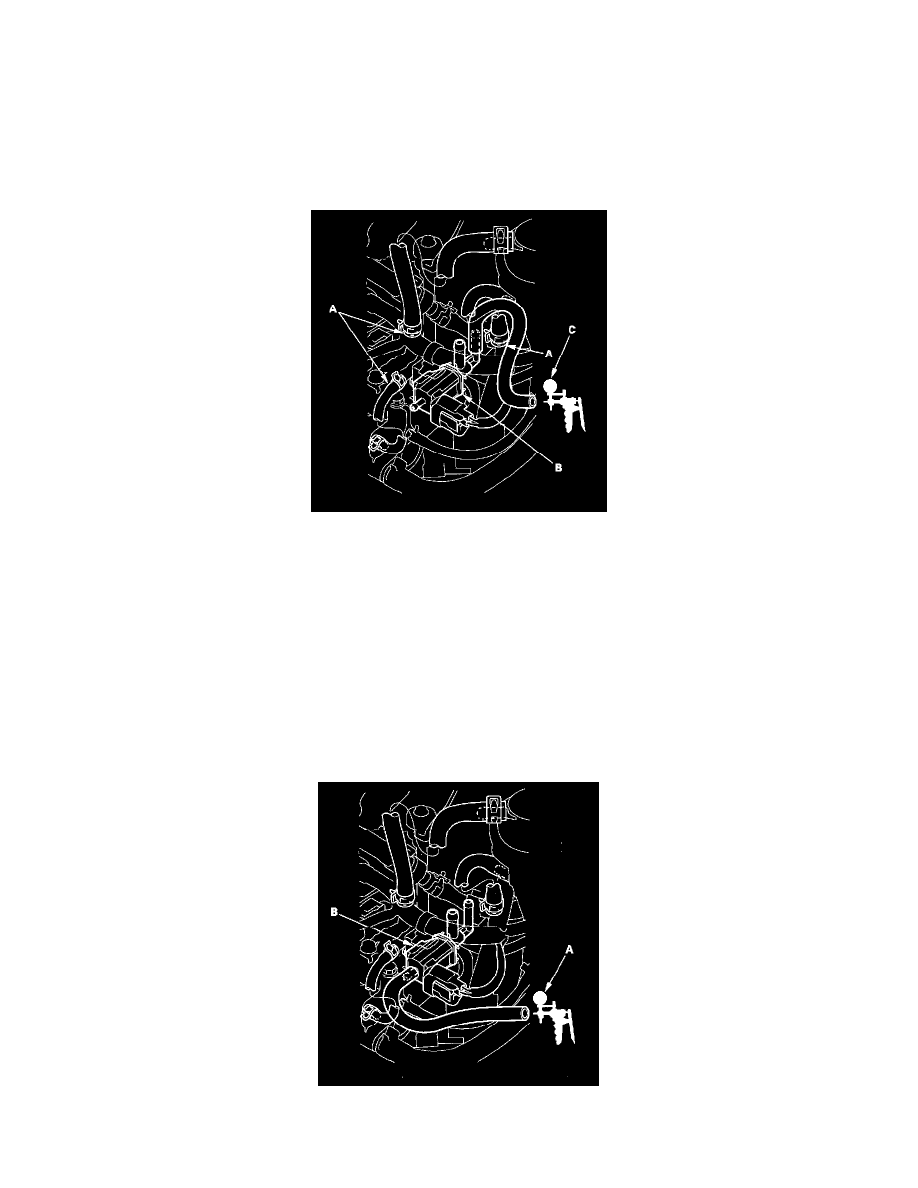
1. Remove the charge air cooler cover.
2. Disconnect the hoses (A) from the turbocharger bypass control solenoid valve (B), and connect the vacuum pump/gauge, 0-30 in.Hg (C) to the
solenoid valve as shown.
3. Apply vacuum to the port.
-
If it holds vacuum, release the vacuum, then go to step 4.
-
If it doesn't hold vacuum, replace the turbocharger bypass control solenoid valve.
4. Turn the ignition switch ON (II).
5. Select TURBOCHARGER BYPASS CONTROL SOLENOID VALVE ON in the INSPECTION MENU with the HDS.
6. Reapply vacuum to the port.
-
If it holds vacuum, replace the turbocharger bypass control solenoid valve.
-
If it doesn't hold vacuum, go to step 7.
7. Turn the ignition switch OFF, then remove the vacuum pump/gauge from the turbocharger bypass control solenoid valve.
8. Connect the vacuum pump/gauge, 0-30 in.Hg (A) to the turbocharger bypass control solenoid valve (B) as shown.
9. Apply vacuum to the port.