
RDX L4-2.3L Turbo (2008)
Seat Position Sensor: Service and Repair
Driver's Seat Position Sensor Replacement
Removal
NOTE:
-
Removal of the driver's seat position sensor must be performed according to the precautions/procedures described at the beginning of Restraint
Systems.
-
Do not turn the ignition switch ON (II), and do not connect the battery cable while removing the driver's seat position sensor.
1. Disconnect the negative cable from the battery, then wait for 3 minutes before starting work.
2. Disconnect the driver's airbag 4P connector.
3. Remove the driver's seat assembly.
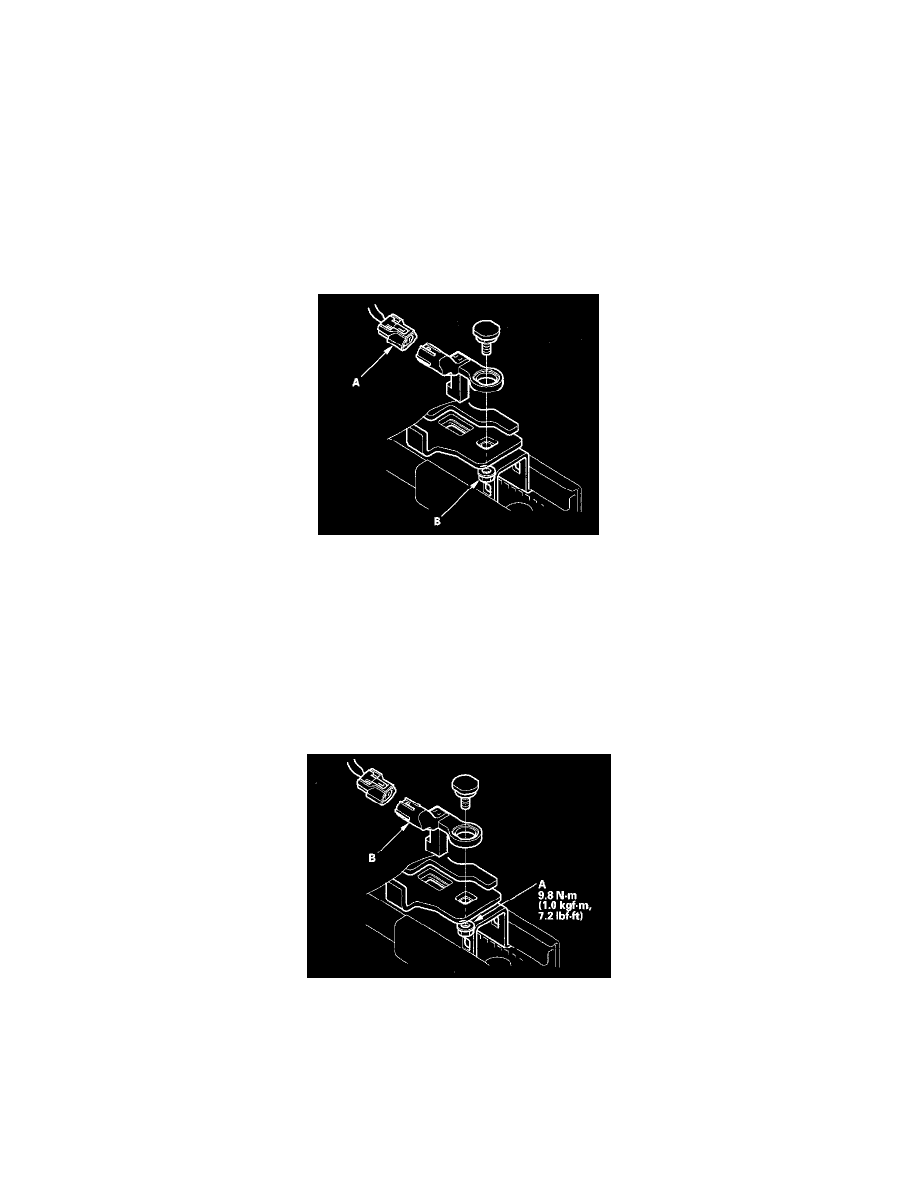
4. Disconnect the driver's seat wire harness or seat position sensor harness 2P connector (A) from the driver's seat position sensor.
5. Using a mounting nut (B), then remove the driver's seat position sensor.
Installation
NOTE:
-
Be sure to install the harness so it is not pinched or interfere with other parts.
-
Do not turn the ignition switch ON (II), and do not connect the battery cable while installing the driver's seat position sensor.
-
After installing the driver's seat position sensor, make sure it is clean. Keep it away from dust.
1. Install the new driver's seat position sensor with a mounting nut (A), then connect the driver's seat wire harness or seat position sensor harness 2P
connector to the driver's seat position sensor (B).
2. Install the driver's seat assembly.
3. Reconnect the negative cable to the battery.
4. Check the operation of the driver's seat position sensor with the HDS.