
RDX L4-2.3L Turbo (2008)
Control Arm: Service and Repair
Lower Arm B Removal and Installation
Lower Arm B Removal and Installation
Removal
1. Raise the rear of the vehicle, and support it with safety stands in the proper locations.
2. Remove the rear wheel.
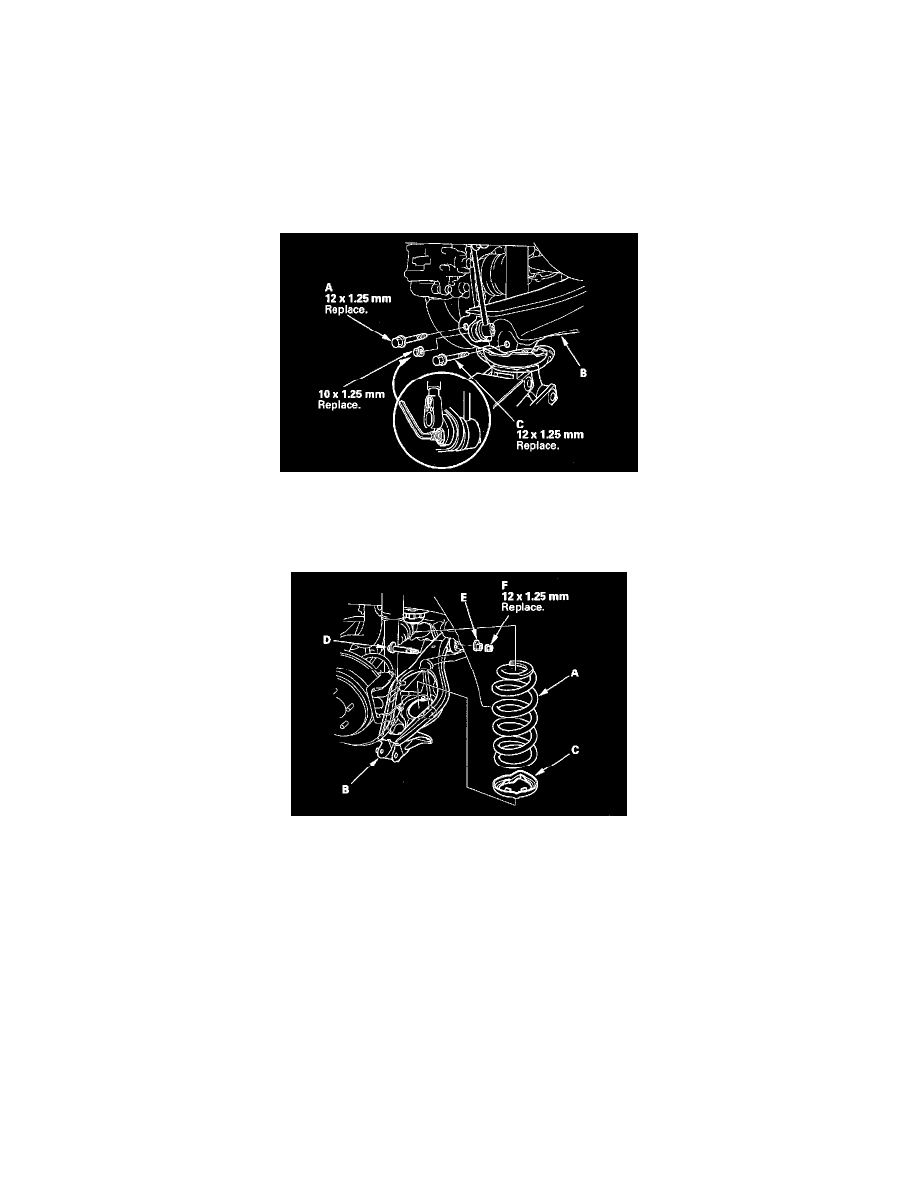
3. Position the floor jack at the connecting point of lower arm B and the lower damper mount.
4. Disconnect the stabilizer link from lower arm B.
5. Remove the flange bolt (A) that connects lower arm B to the knuckle.
6. Remove the flange bolt (C) that connects lower arm B to the damper.
7. Lower the floor jack gradually.
8. Remove the spring (A) and the lower spring cushion (C).
9. Mark the cam positions of the adjusting bolt (D) and adjusting cam (E), then remove the self-locking nut (F), adjusting cam, and adjusting bolt. Set
aside the self-locking nut and control arm mounting nut, then remove lower arm B.
Installation
1. Position lower arm B, and loosely install the new adjusting bolt (A), the adjusting cam (C), and the new self-locking nut (D).