
RDX L4-2.3L Turbo (2008)
^
If a clicking sound is heard, the valve is OK. Reconnect the connector, and install all removed parts.
^
If no clicking sound is heard, go to step 12.
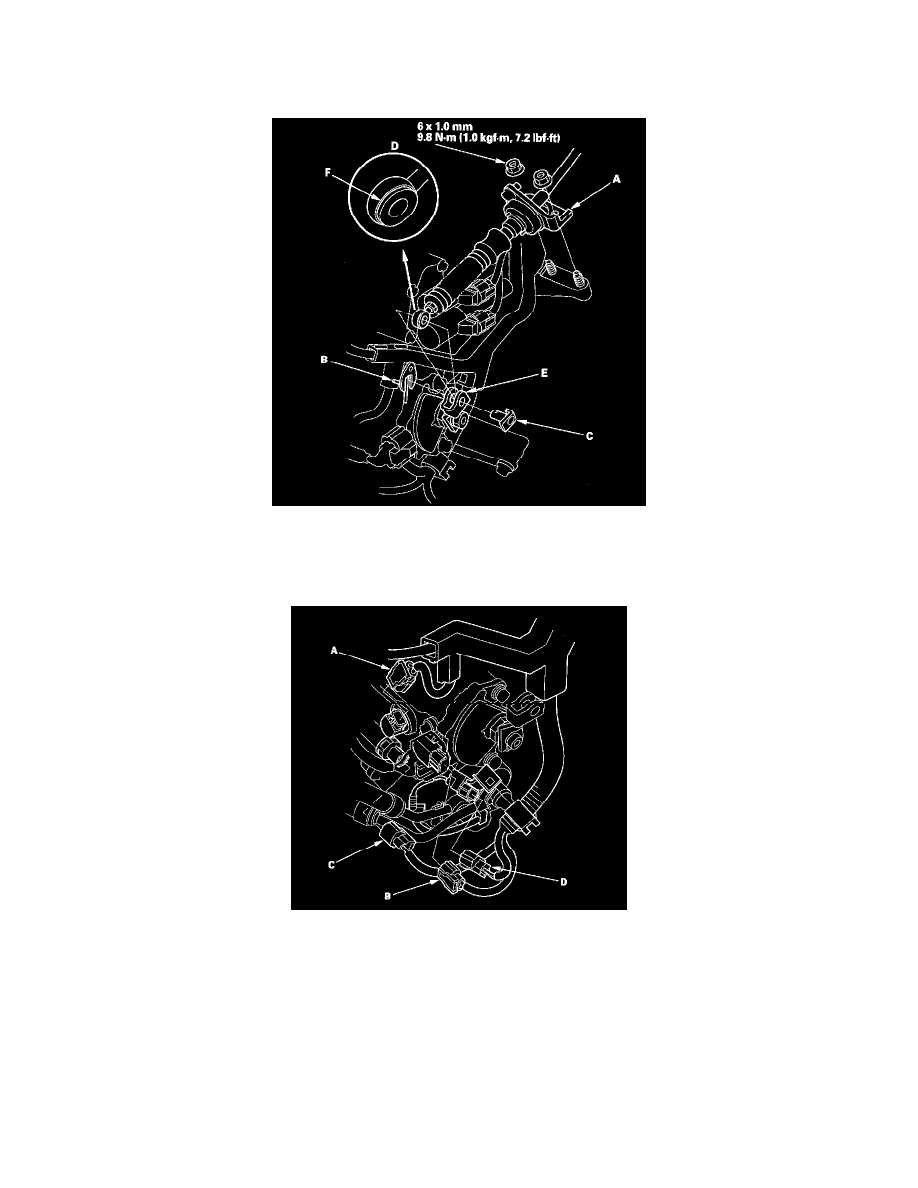
12. Remove the nuts securing the shift cable bracket (A).
13. Remove the spring clip/washer (B) and control pin (C), then separate the shift cable end (D) from the control lever (E).
14. Check the bushing (F) in the shift cable end for proper fit and wear. If the bushing is loose or worn, replace the shift cable.
15. Disconnect the input shaft (mainshaft) speed sensor connector (A), the output shaft (countershaft) speed sensor connector (B), the 3rd clutch
transmission fluid pressure switch connector (C), and the ATF temperature sensor connector (D).
16. Disconnect the A/T clutch pressure control solenoid valve A connector (A), the solenoid valve B connector (B), and the shift solenoid harness
connector (C).