RDX L4-2.3L Turbo (2008)

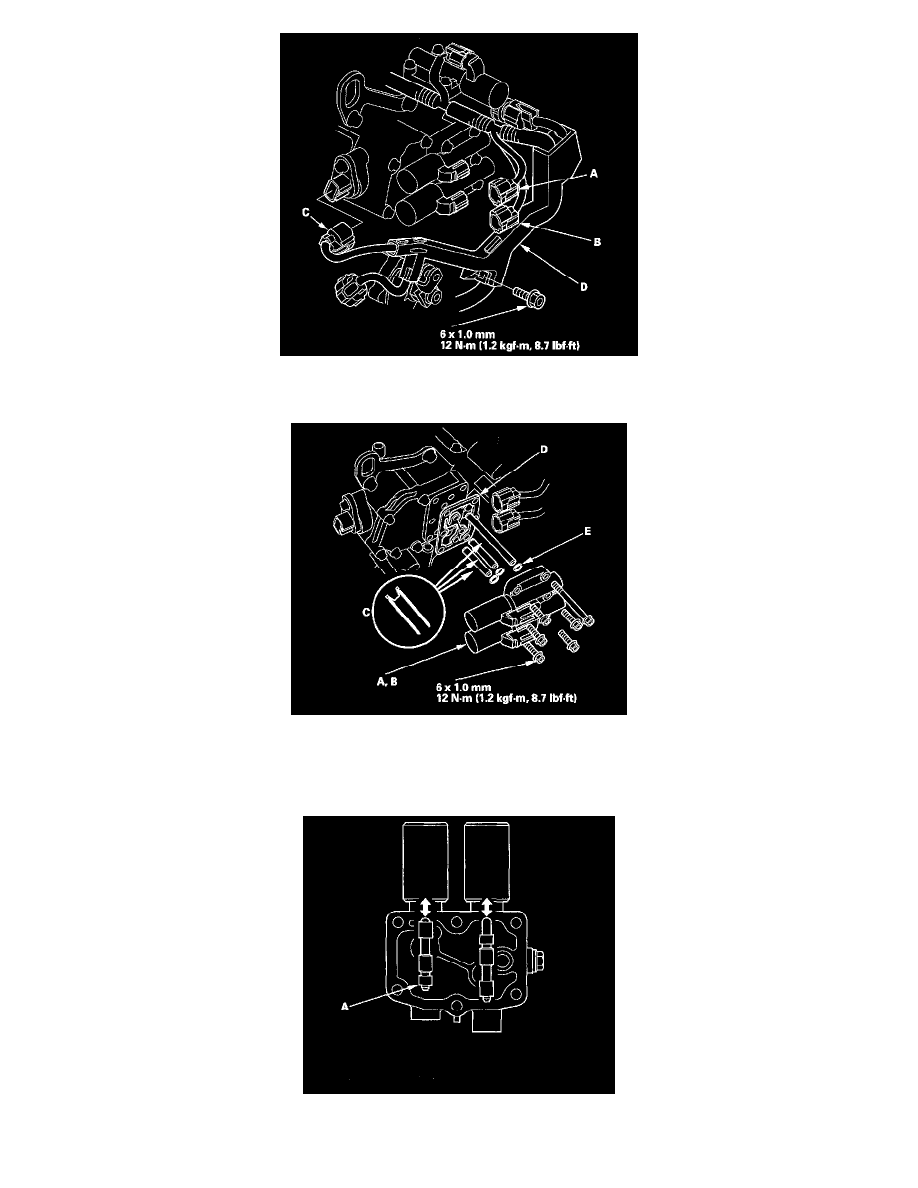
17. Remove the bolt securing the harness cover (D).
18. Remove clutch pressure control solenoid valves A and B, ATF pipes (C), gasket (D), and O-rings (E).
19. Check the fluid passage of the solenoid valve for contamination.
20. Connect a jumper wire from the negative battery terminal to A/T clutch pressure control solenoid valve A connector terminal No. 2, and connect
another jumper wire from the positive battery terminal to connector terminal No. 1. Make sure A/T clutch pressure control solenoid valve A
moves.
21. Disconnect one of the jumper wires, and check valve movement at the fluid passage in valve body mounting surface. If the valve binds or moves
sluggishly, or if the solenoid valve does not operate, replace the A/T clutch pressure control solenoid valves A and B.
