
RDX AWD L4-2.3L Turbo (2010)
Hood Latch: Service and Repair
Hood Latch Replacement
NOTE:
-
Put on gloves to protect your hands.
-
Take care not to scratch the body or related parts.
1. Remove the front bumper. See: Bumper/Front Bumper/Service and Repair
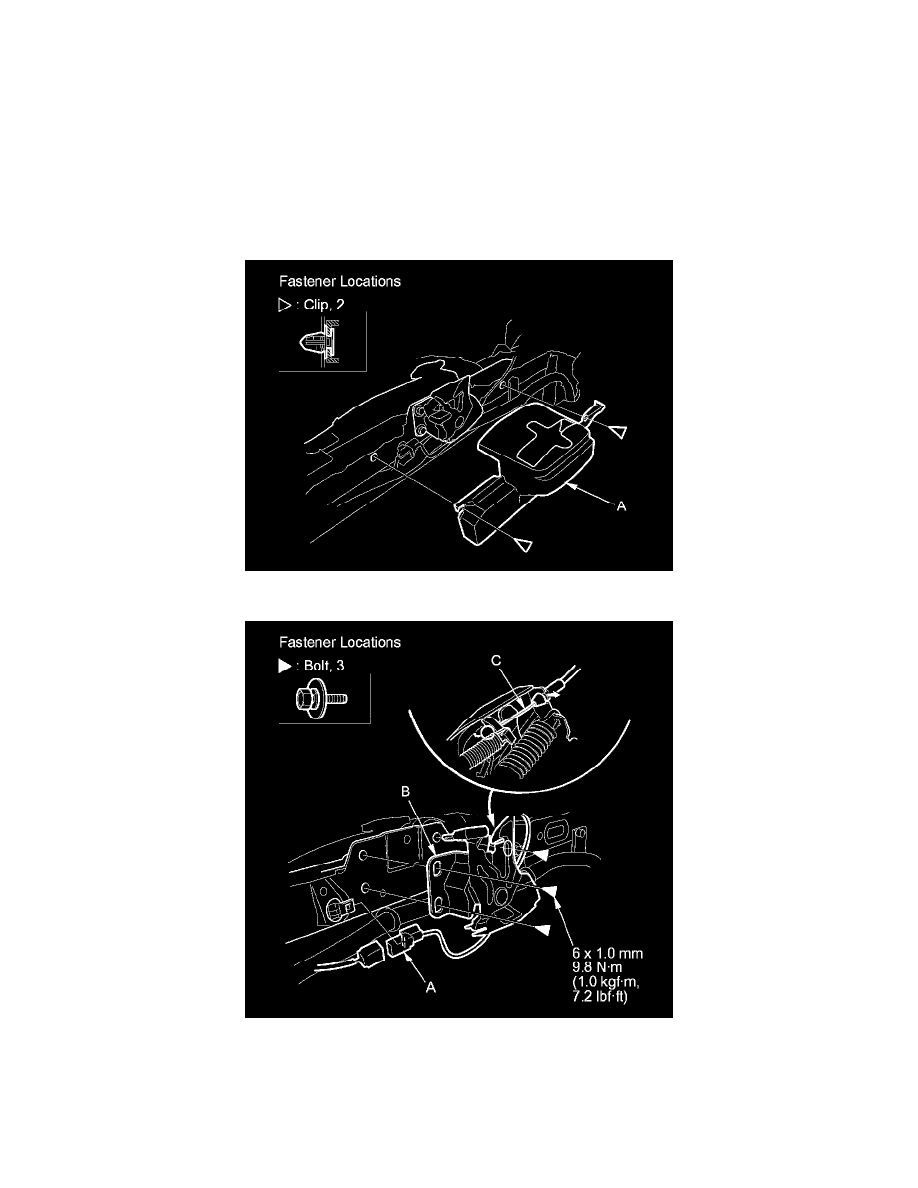
2. Detach the clips, then remove the hood lock cover (A).
3. Disconnect and detach the hood latch switch connector (A).
4. Remove the bolts, then remove the hood latch (B) from the body, and disconnect the hood opener cable (C) from the hood latch.
5. Install the latch in the reverse order of removal, and note these items:
-
If the clips are damaged or stress-whitened, replace them with new ones.
-
Apply multipurpose grease to each location of the hood latch indicated by the arrows.