
RDX AWD L4-2.3L Turbo (2010)
Compressor Clutch: Testing and Inspection
A/C Compressor Clutch Check
1. Check the armature plate for discoloration, peeling, or other damage. If there is damage, replace the clutch set See: Service and Repair.
2. Check the rotor pulley bearing play and drag by rotating the rotor pulley by hand. Also check for grease leakage from the bearing. Replace the
clutch set with a new one if it is noisy, has excessive play/drag See: Service and Repair.
NOTE: The rotor pulley and the armature plate were mated at the factory by a burnishing operation. Always replace the rotor pulley and the pressure
plate as a set. Replacing only one part of the clutch set will cause clutch slippage.
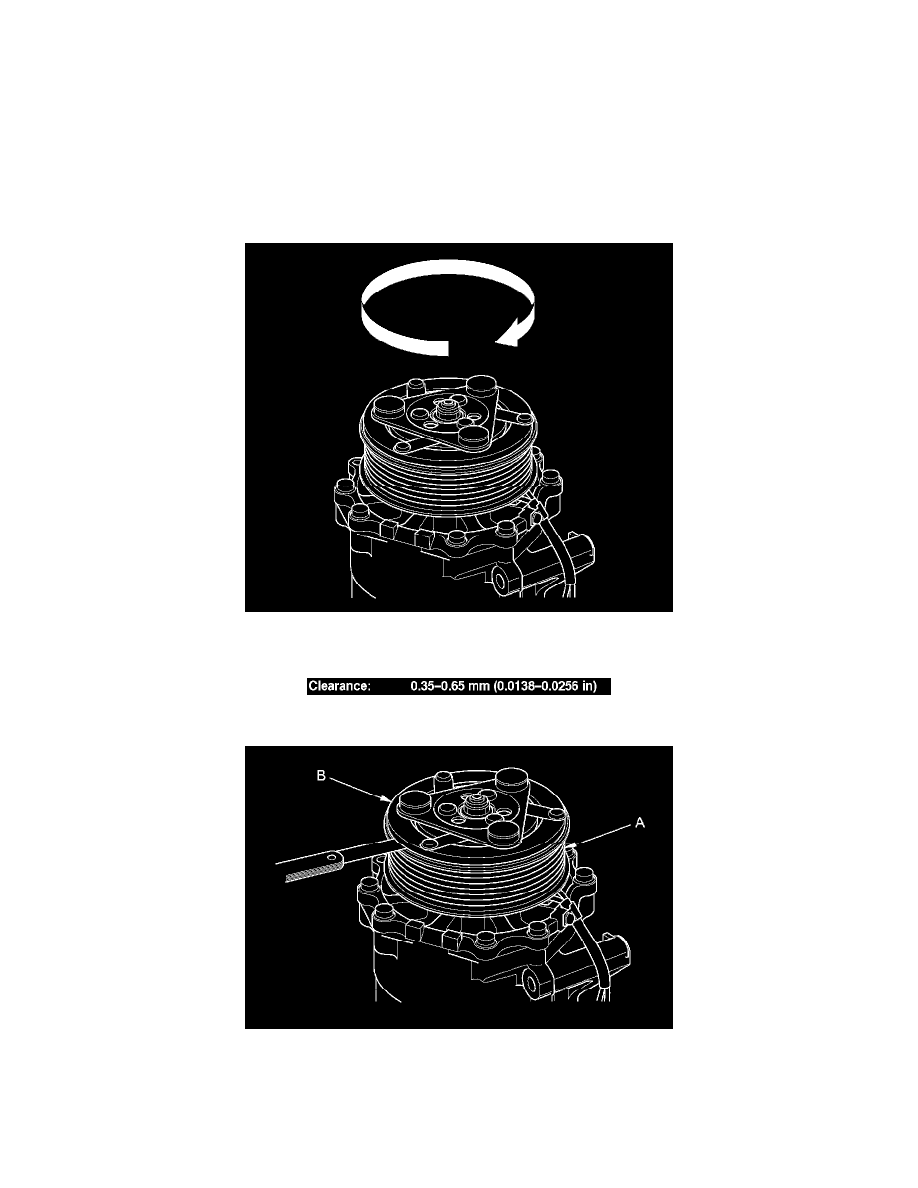
3. Measure the clearance between the rotor pulley (A) and the armature plate (B) all the way around. If the clearance is not within specified limits,
remove the armature plate See: Service and Repair and add or remove shims as needed to increase or decrease clearance.
NOTE: The shims are available in four thicknesses: 0.1 mm, 0.2 mm, 0.4 mm, and 0.5 mm.
4. Remove the armature plate See: Service and Repair, and inspect the armature plate and the rotor pulley friction surface for wear. If there is
excessive wear, roughness, or scoring, replace the clutch set.
5. Inspect the friction surfaces and the A/C compressor shaft hub for excess oil. If excess oil is present, and it is not from the engine or power
steering system, then the A/C compressor shaft seal is leaking. Replace the A/C compressor See: Service and Repair.