
RDX AWD L4-2.3L Turbo (2010)
Ball Joint: Service and Repair
Ball Joint Boot Inspection/Replacement
Ball Joint Boot Inspection/Replacement
Special Tools Required
-
Bearing Driver Attachment, 40 mm 07GAF-SE00200
-
Clip Guide, 41 mm 07974-SA50700
NOTE: Different types of ball joint boots are installed according to models (vehicle type). For replacement of them, use the same type of ball joint boots
as the original one.
Front Lower Arm
1. Check the ball joint boot for weakness, damage, cracks, and inner boot grease leaks.
NOTE:
-
If the ball joint boot is damaged with grease leaks, replace the lower arm See: Control Arm/Service and Repair/Front Lower Arm
Removal/Installation.
-
If the ball joint boot is weakness and cracks without grease leaks, go to step 2. Replace the ball joint boot.
2. Remove the lower ball joint See: Front Lower Ball Joint Replacement.
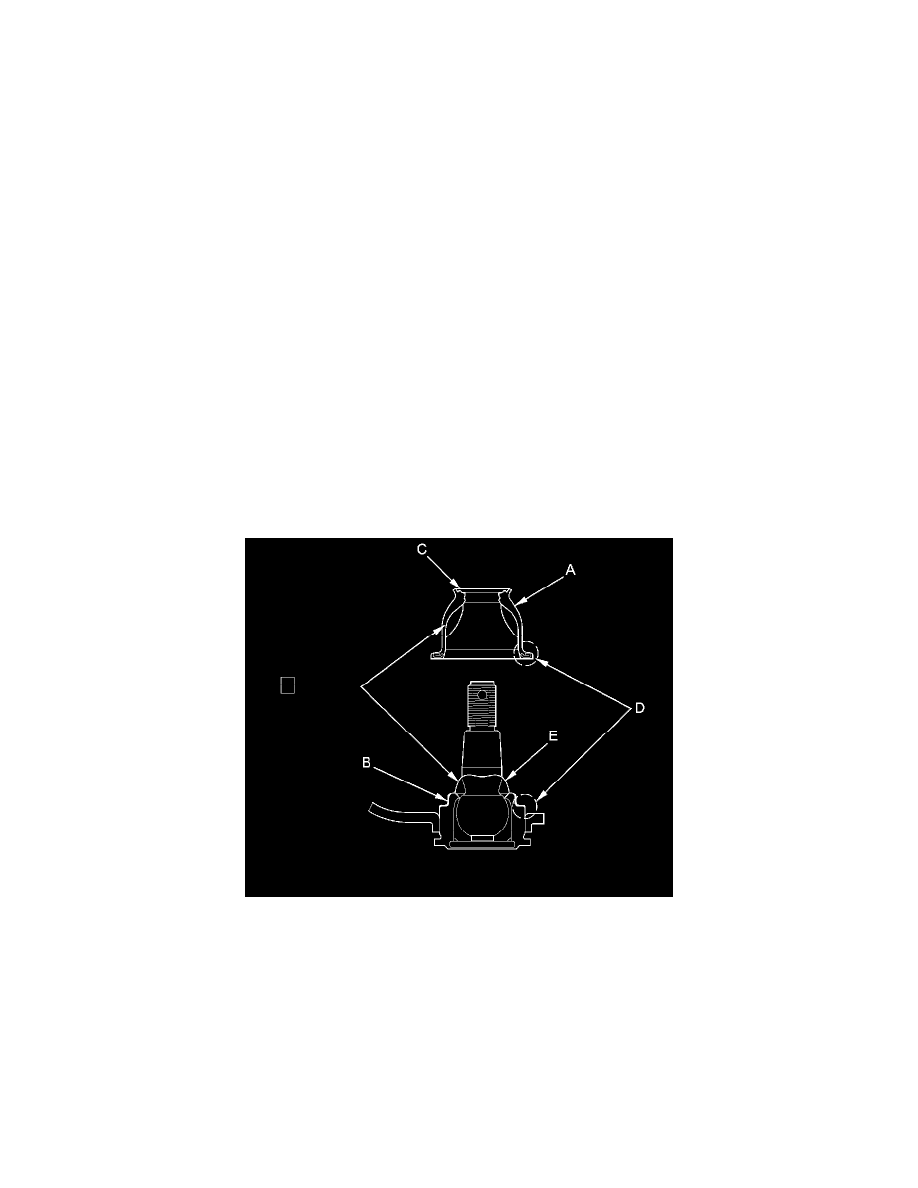
3. Remove the ball joint boot (A).
NOTE: Be careful not to damage the mating surface with ball joint boot of ball joint housing (B).
4. Pack the interior and lip (C) of a new ball joint boot with grease. Keep the grease off of the ball joint boot-to-lower ball joint mating surfaces (D).
NOTE: When the ball joint boot and the grease are bundled, use the bundled grease.
5. Pack fresh grease into the base (E). Do not let dirt or other foreign materials get into the ball joint boot.
6. Install the ball joint boot (A) using the bearing driver attachment by hand. the ball joint boot must not have a gap at the ball joint boot installation
sections (B).
NOTE:
-
Press the ball joint boot on a clean shop towel.
-
After installing, the ball joint boot on the ball joint, then squeeze it gently to force out any air, then wipe the grease off the tapered portion of
the ball joint pin (C).