
RDX AWD L4-2.3L Turbo (2010)
-
After installing the ball joint boot, check the ball pin tapered section for grease contamination, and wipe it if necessary.
7. Install the lower ball joint See: Front Lower Ball Joint Replacement.
Rear Upper Arm
1. Check the ball joint boot for weakness, damage, cracks, and inner boot grease leaks.
NOTE:
-
If the ball joint boot is damaged with grease leaks, replace the upper arm See: Control Arm/Service and Repair/Rear Upper Arm
Removal/Installation.
-
If the ball joint boot is weakness and cracks without grease leaks, go to step 2. Replace the ball joint boot.
2. Disconnect the upper arm ball joint from the knuckle See: Control Arm/Service and Repair/Rear Upper Arm Removal/Installation.
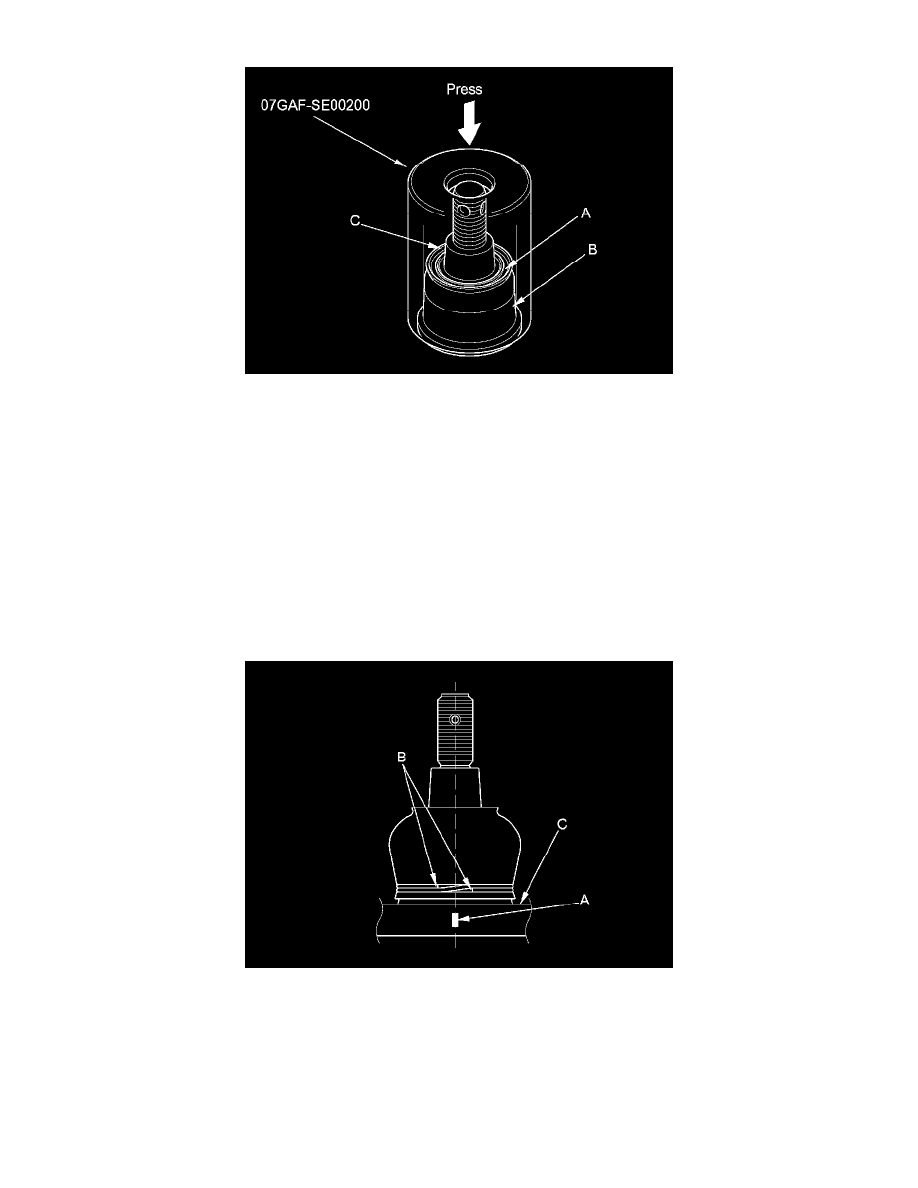
3. Paint a alignment mark (A) in the center between the both boot clip end faces (B) on the upper arm (C).
4. Remove the ball joint boot clip and the ball joint boot.
5. Pack the interior and lip (A) of a new ball joint boot with grease. Keep the grease off of the ball joint boot-to-upper arm mating surfaces (B).
NOTE: When the ball joint boot and the grease are bundled, use the bundled grease.