RDX AWD L4-2.3L Turbo (2010)

Control Arm: Service and Repair
Front Lower Arm Removal/Installation
Front Lower Arm Removal/Installation
Removal/Installation
1. Raise and support the vehicle See: Wheels and Tires/Vehicle Lifting/Service and Repair.
2. Remove the front wheel.
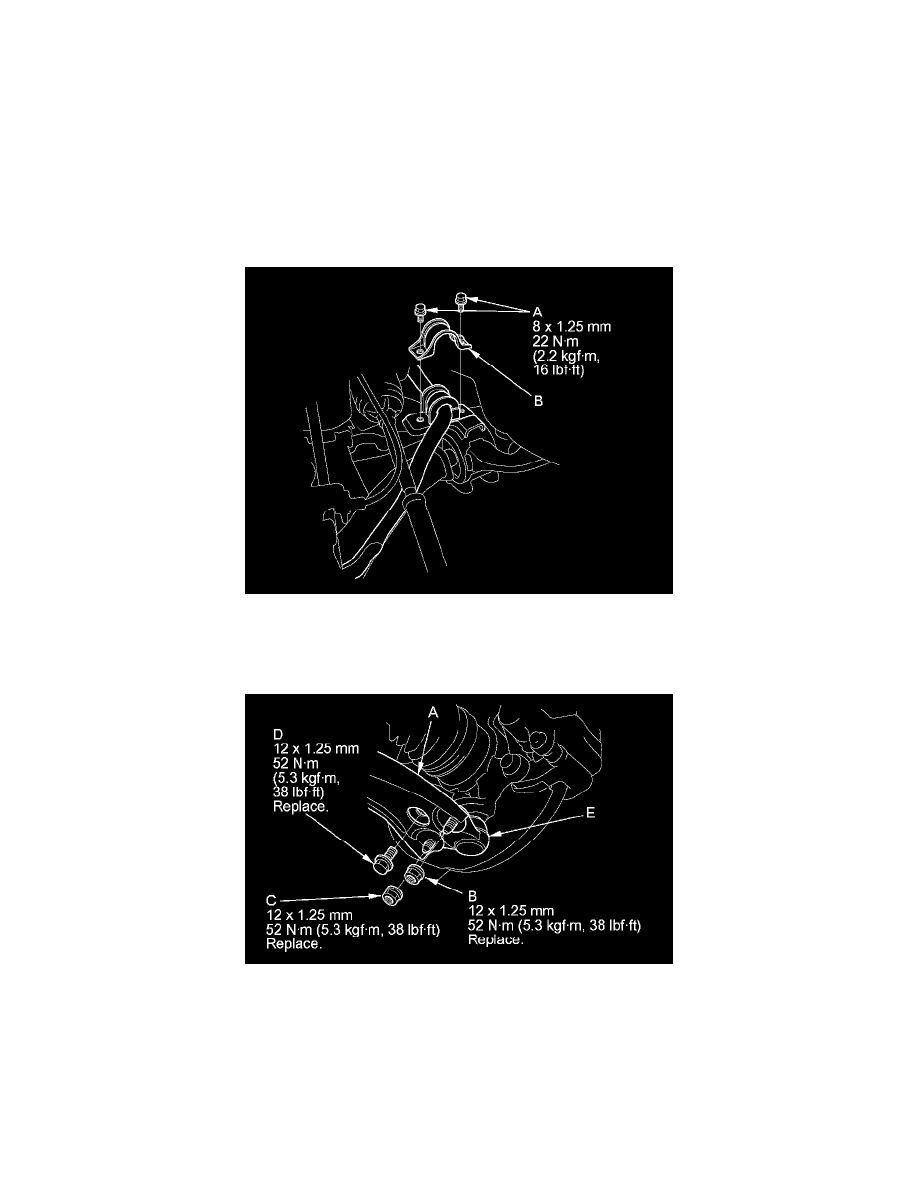
3. Remove the flange bolts (A) and the bushing holder (B).
4. Remove the flange bolt and self-locking nuts from the lower arm (A).
NOTE: During installation, loosely install the new flange bolt and new flange nuts. Then tighten them in the following order; the nut on the front (B), the
nut on the rear (C), then the bolt (D).
5. Disconnect the lower ball joint (E) from the lower arm.
6. Remove the lower arm mounting bolt (A).
NOTE: During installation, install a new mounting bolt.
