
RDX AWD L4-2.3L Turbo (2010)
Trailing Arm: Service and Repair
Rear Trailing Arm Removal/Installation
1. Raise and support the vehicle See: Wheels and Tires/Vehicle Lifting/Service and Repair.
2. Remove the rear wheel.
3. Remove the parking brake shoe See: Brakes and Traction Control/Parking Brake System/Parking Brake Shoe/Service and Repair/Removal and
Replacement.
4. Remove the parking brake cable from the backing plate See: Brakes and Traction Control/Parking Brake System/Parking Brake Cable/Service
and Repair.
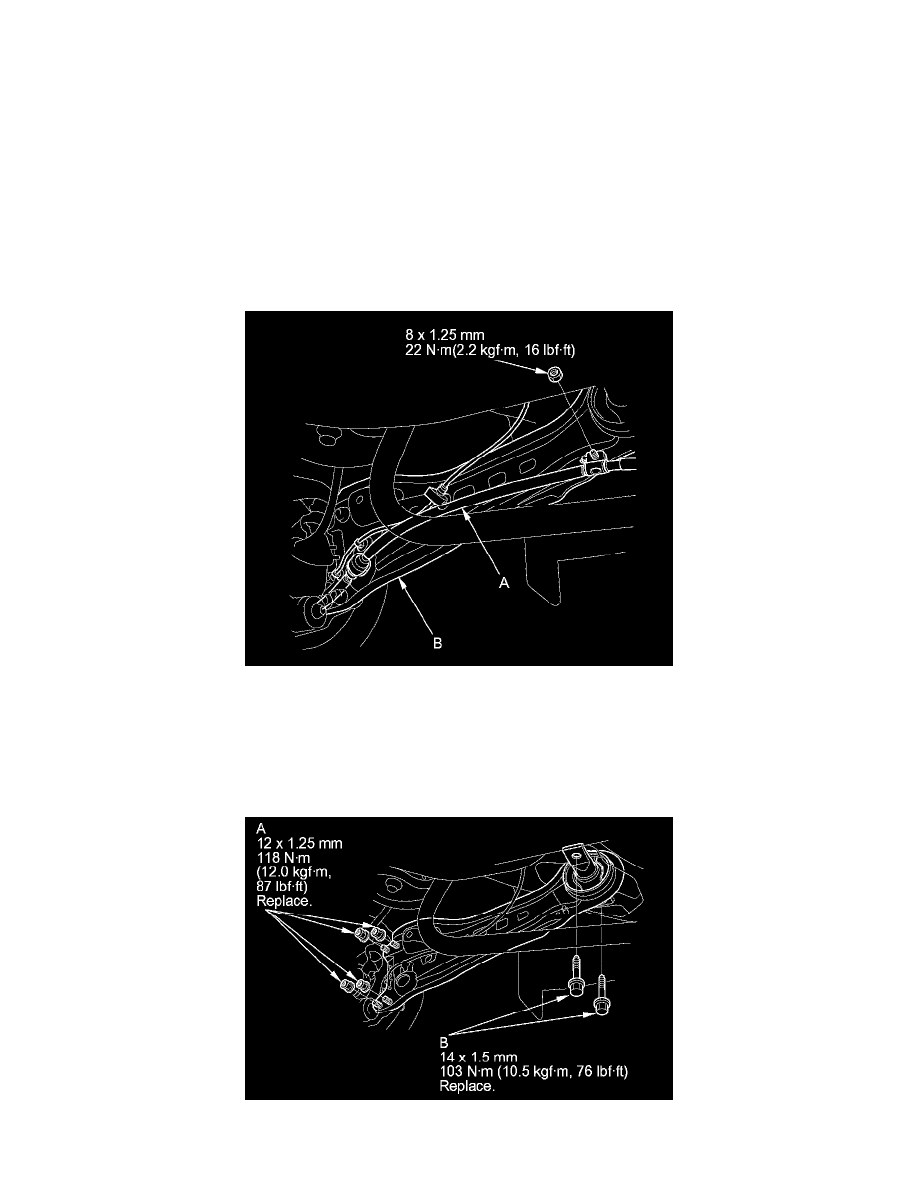
5. Remove the parking brake cable (A) from the trailing arm (B).
6. Remove the brake hose mounting bracket from the trailing arm See: Rear Knuckle/Service and Repair.
7. Position a floor jack at the connecting point of the lower arm and the knuckle.
8. Remove the self-locking nuts (A) and the flange bolts (B) from the trailing arm.
NOTE: Use a new flange bolt and a new self-locking nut during reassembly.
9. Install the trailing arm in the reverse order of removal, and note these items: