
RDX AWD L4-2.3L Turbo (2010)
Shifter A/T: Removal and Replacement
A/T Shift Lever Knob, Shift Lever Knob Cover, and Shift Lever Button Ring Replacement
A/T Shift Lever Knob, Shift Lever Knob Cover, and Shift Lever Button Ring Replacement
NOTE: Make sure not to get any silicone grease on the terminal part of the connectors and switches, especially if you have silicone grease on your hands
or gloves.
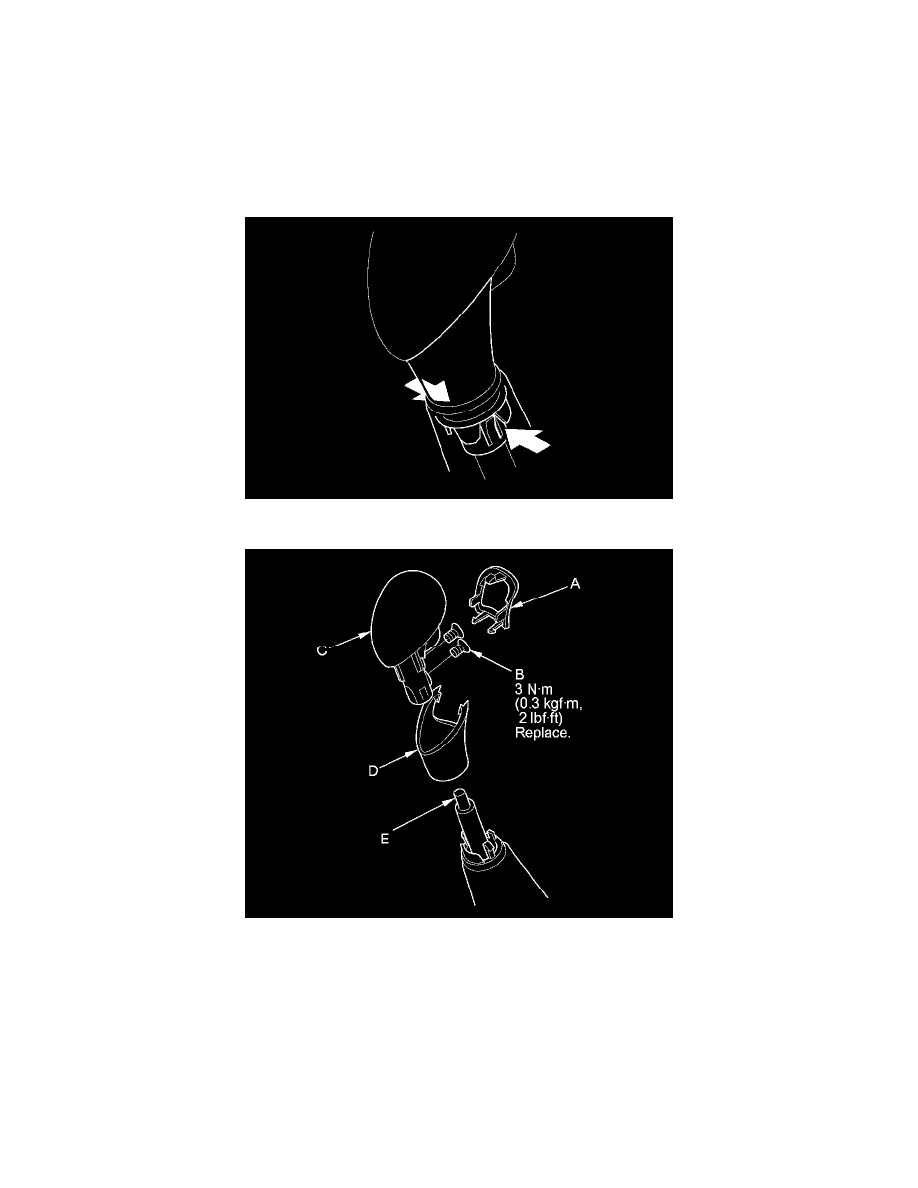
1. Grasp the shift lever boot ring, and slip it out of the shift lever knob cover.
2. Remove the shift lever button ring (A). If the shift lever button ring is only replaced, skip steps 4 thru 8 and go to step 9.
3. Remove the screws (B), then remove the shift lever knob (C).
4. Remove the shift lever knob cover (D).
5. Replace the shift lever knob or knob cover.
6. Install the shift lever knob cover over the shift lever boot ring.
7. Apply silicone grease to the top (E) of the shift lever rod.
8. Install the shift lever knob, and secure the shift lever knob with new screws.