
RL V6-3.7L (2009)
Speaker: Service and Repair
Speaker Test/Replacement
Front Door Speaker
1. Remove the front door panel. See: Body and Frame/Doors, Hood and Trunk/Doors/Front Door/Front Door Panel/Service and Repair/Front Door
Panel Removal/Installation
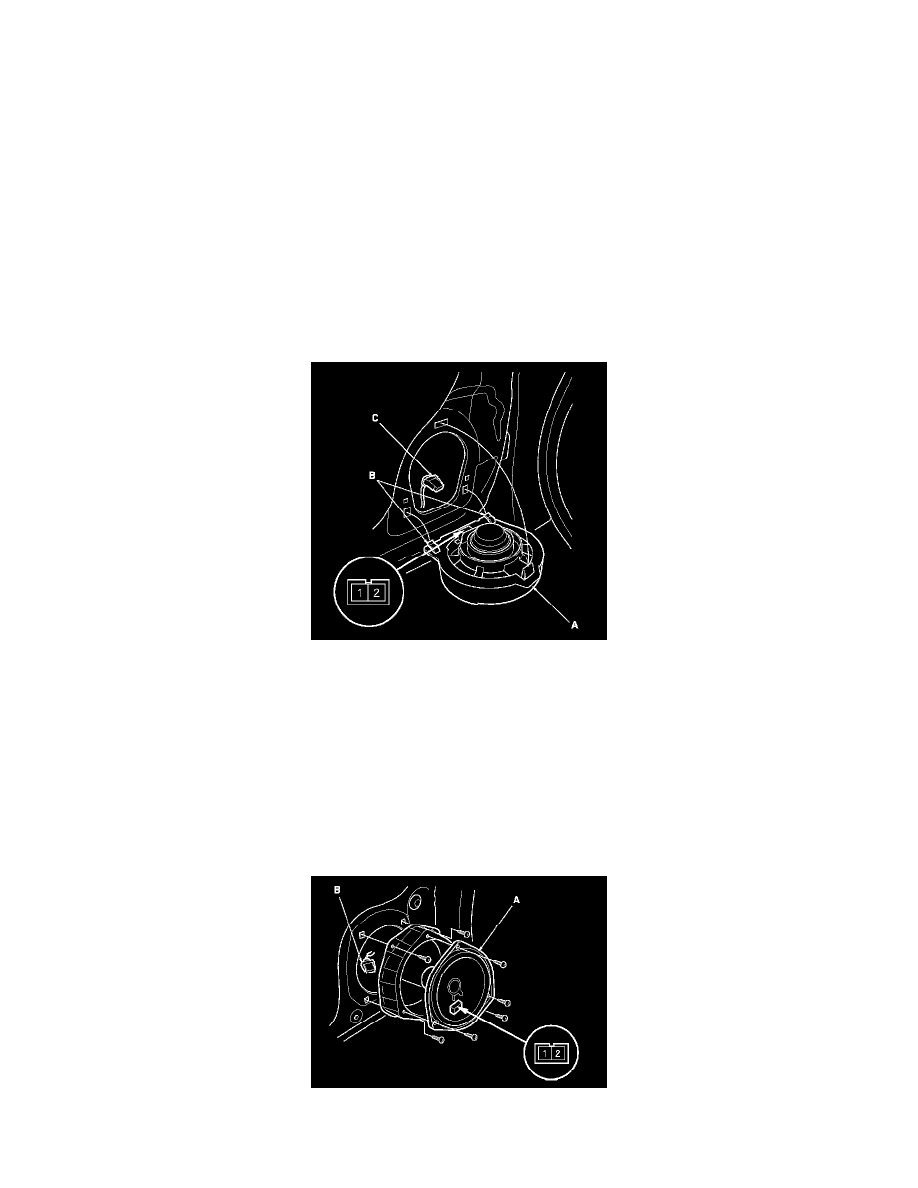
2. Pull the speaker (A) straight out, just enough to release the upper clips. Then lift the speaker straight up to release the lower clips (B).
NOTICE:
If you pull the speaker out too far from the door, you will damage the lower clips.
3. Disconnect the 2P connector (C), and remove the speaker.
4. Measure the resistance between the terminals No. 1 and No. 2. There should be about 2 Ohms.
5. If the resistance is not as specified, replace the door speaker.
Rear Door Speaker
1. Remove the rear door panel. See: Body and Frame/Doors, Hood and Trunk/Doors/Rear Door/Rear Door Panel/Service and Repair/Rear Door
Panel Removal/Installation
2. Remove the three mounting screws from the rear speaker (A).
3. Disconnect the 2P connector (B), and remove the rear door speaker.
4. Measure the resistance between the terminals No. 1 and No. 2. There should be about 2 Ohms.
5. If the resistance is not as specified, replace the door speaker.
Front Door Tweeter