RL V6-3.7L (2009)

Rear Bumper: Service and Repair
Rear Bumper Removal/Installation
Special Tools Required
-
KTC trim tool set SOJATP2014*
-
Push pin puller 07AAC-SJAA100
*Available through the Acura Tool and Equipment Program.
NOTE:
-
Have an assistant help you when removing and installing the rear bumper.
-
Take care not to scratch the rear bumper and the body.
-
Put on gloves to protect your hands.
-
Use the appropriate tool from the KTC trim tool set to avoid damage when prying components.
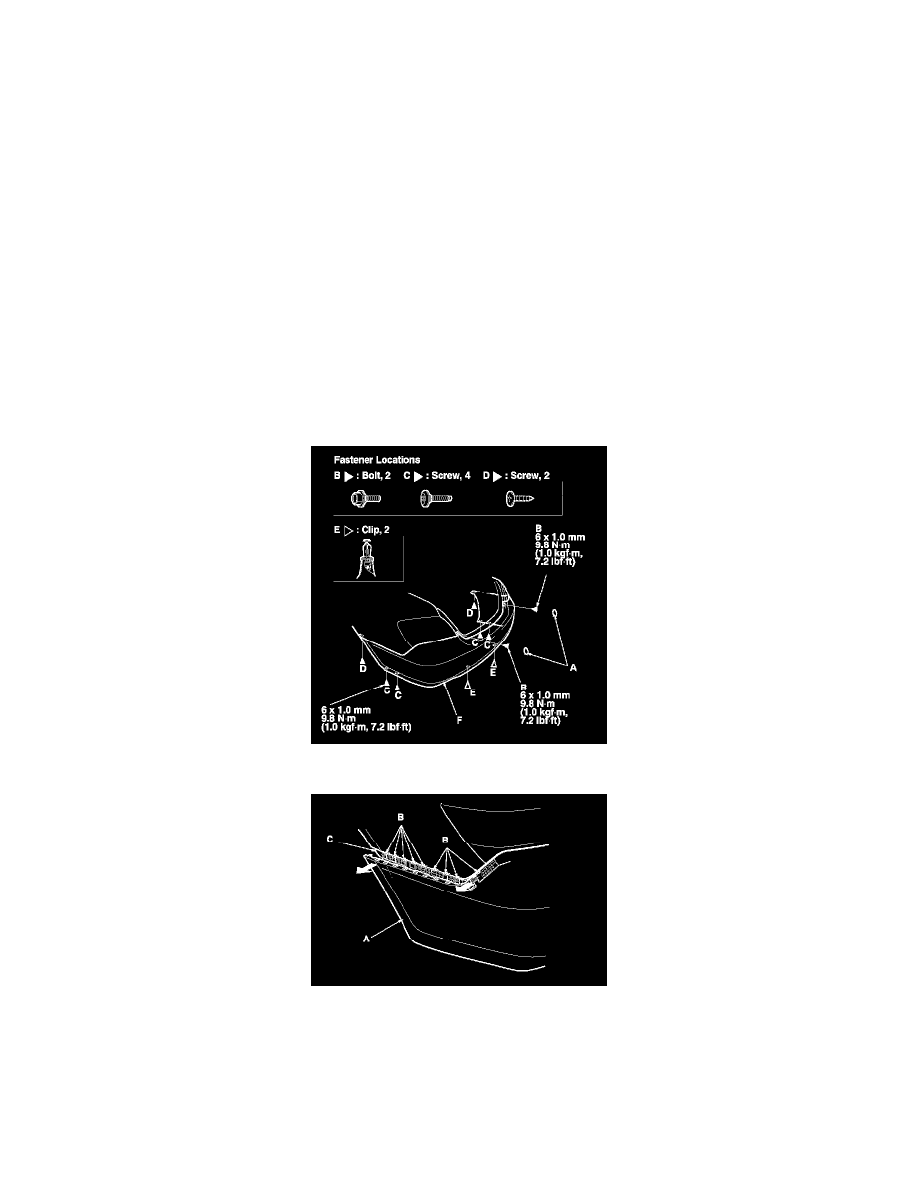
1. Remove the caps (A), then remove the bolts (B).
2. Remove the screws (C, D), and the clips (E) securing the rear bumper (F).
3. Pull on the rear bumper (A) at the wheel arch areas to release it from the hooks (B) on the side spacers (C).
4. With the help of an assistant, pull the wheel arch portion away from the side spacer (A), while pulling the rear bumper (B) to release the bumper
from the hooks (C) on the side bracket (D).
