
RL V6-3.7L (2009)
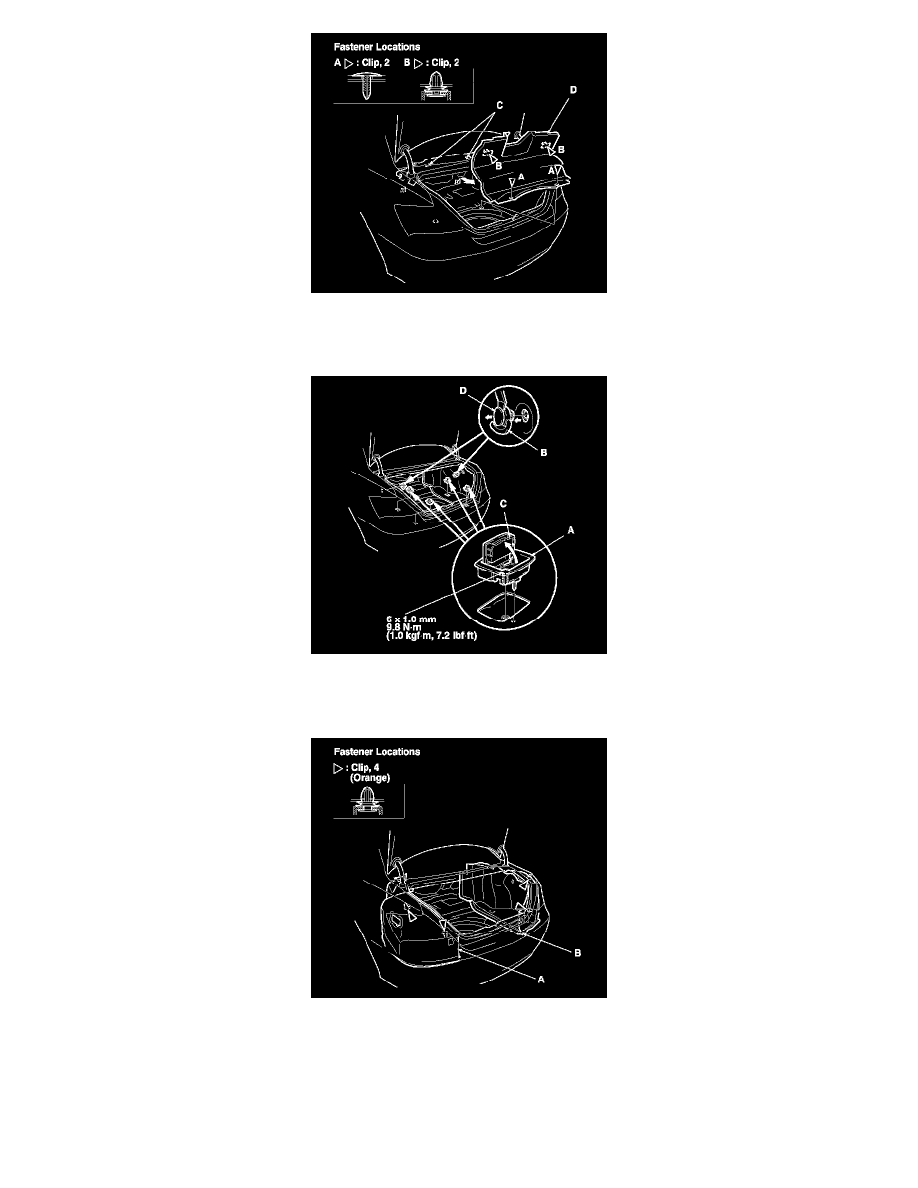
4. Remove the tie down hooks (A) and the trunk hooks (B) from both trunk side trim panels.
-1 Pry out the lids (C) with a trim tool, then remove all of the tie down hooks by unscrewing them.
-2 Pry out the caps (D) with a trim tool, then remove both trunk hooks by pulling them out.
5. Detach the clips, then remove the left trunk side trim panel (A) and the right trunk side trim panel (B) from the trunk compartment.
6. Remove the trunk light. See: Lighting and Horns/Trunk Lamp/Service and Repair
7. Lower the trunk upper trim panel (A) to detach the clips (B), and detach the clips (C) from the navigation unit bracket (D), then remove the panel
from the trunk compartment.
8. Install the trim in the reverse of removal, and note these items:
-
If the clips are damaged or stress-whitened, replace them with new ones.
-
Push the clips into place securely.