
RL V6-3.7L (2009)
Trim Panel: Service and Repair
Interior Trim Removal/Installation - A-Pillar Trim
Interior Trim Removal/Installation - A-Pillar Trim
Special Tools Required
-
KTC trim tool set SOJATP2014*
*Available through the Acura Tool and Equipment Program.
A-Pillar Trim
SRS components are located in this area. Review the SRS component locations See: Restraint Systems/Air Bag Systems/Locations and the precautions
and procedures See: Dashboard / Instrument Panel/Air Bag(s) Arming and Disarming/Service and Repair before doing repairs or service.
NOTE:
-
Follow the A-pillar trim installation procedure carefully; improper installation could cause the side curtain airbags to deploy improperly and
possibly cause injury.
-
Put on gloves to protect your hands.
-
Use the appropriate tool from the KTC trim tool set to avoid damage when prying components.
-
Take care not to scratch the trim and the panels.
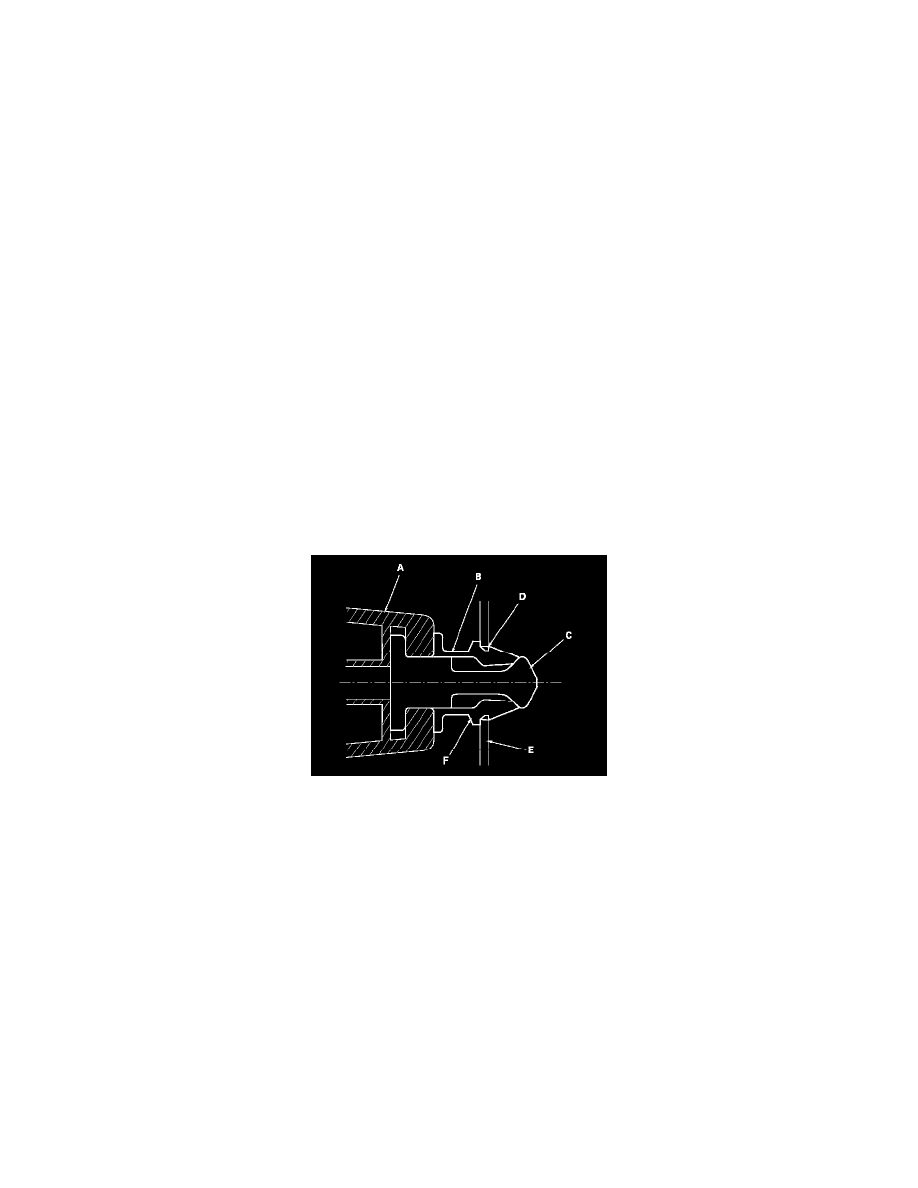
-
The upper clip in the A-pillar trim (A) consists of a plastic grommet (B) and a metal pin (C). The groove (D) in the grommet secures it to the body
panel (E). The shoulder (F) on the grommet is broken during removal, so the grommet must be replaced with a new one when the trim is
reinstalled.
1. Pull the front door opening trim away from the A-pillar as needed. See: Scuff Plate/Service and Repair/Interior Trim Removal/Installation - Front
Door Sill Area
2. Hit the upper clip with a rubber mallet. The clip is under the "SIDE CURTAIN AIRBAG" mark (A) near the top of the A-pillar trim (B). Hitting
the clip breaks the shoulder (C) on the grommet (D) and pushes the pin (E) into the grommet on the body (F).
NOTE: The grommet must be replaced with a new one when the A-pillar trim is reinstalled.