
RL V6-3.7L (2009)
14. Install the upper radiator hose and the lower radiator hose.
15. Adjust the valve clearance. See: Cylinder Head Assembly/Valve Clearance/Adjustments
16. Do the battery installation procedure. See: Starting and Charging/Battery/Service and Repair/Removal and Replacement
17. Fill the radiator with engine coolant and bleed the air out. See: Cooling System/Coolant/Service and Repair
18. Do the crankshaft position (CKP) pattern clear/CKP pattern learn procedure. See: Powertrain Management/Computers and Control
Systems/Testing and Inspection/Initial Inspection and Diagnostic Overview
Rear
1. Relieve the fuel pressure. See: Cylinder Head Assembly/Fuel Pressure Release/Service and Repair
2. Remove the quick-connect fitting cover, then disconnect the fuel feed hose. See: Powertrain Management/Fuel Delivery and Air Induction/Fuel
Line Coupler/Service and Repair/Fuel Line/Quick-Connect Fitting Removal
3. Remove the intake manifold. See: Intake Manifold/Service and Repair/Intake Manifold Removal and Installation
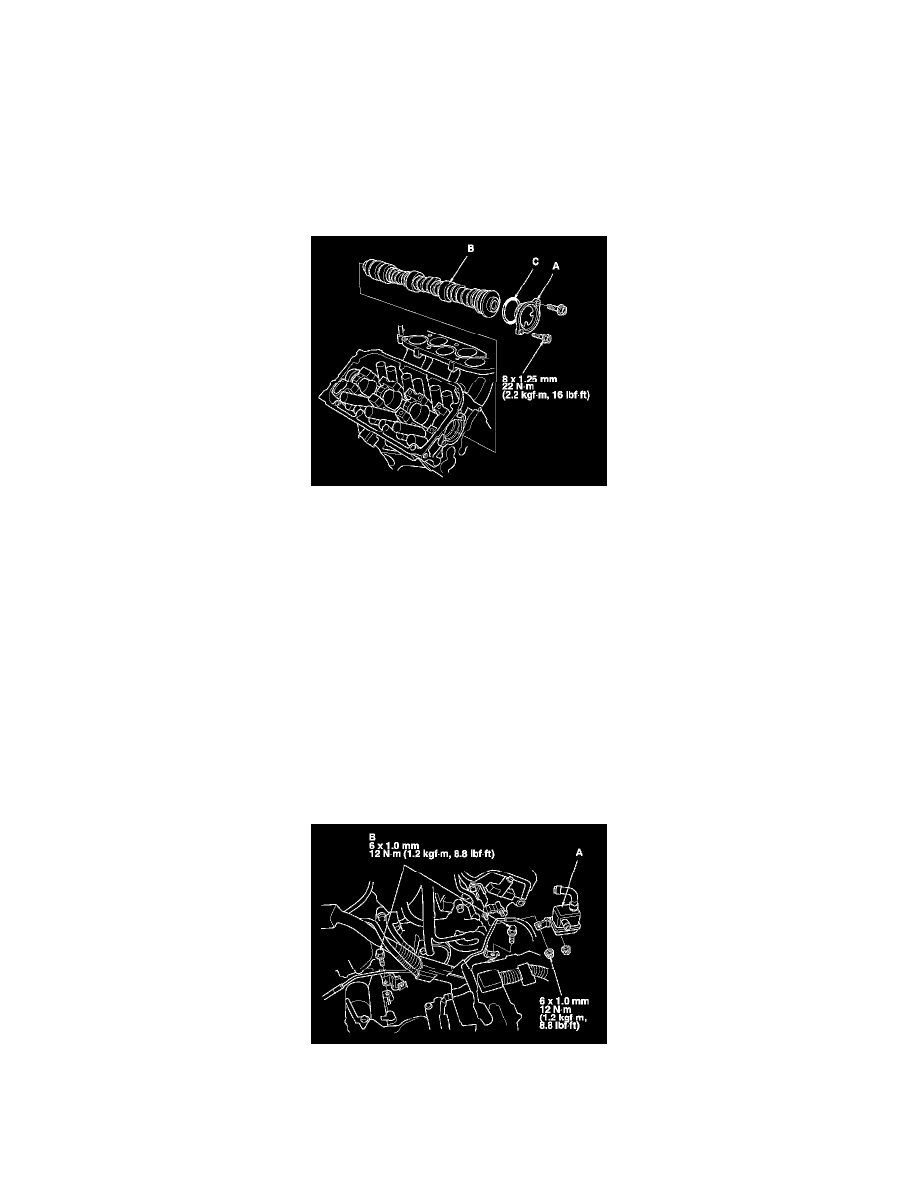
4. Remove the purge joint (A).
5. Remove the two bolts (B) securing the vacuum line.
6. Remove the timing belt. See: Timing Components/Timing Belt/Service and Repair/Timing Belt Removal
7. Remove the rocker arm assembly. See: Cylinder Head Assembly/Service and Repair/Overhaul/Rocker Arm Assembly Removal
8. Remove the rear camshaft pulley.
9. Remove the thrust cover (A), then remove the rear camshaft (B).
10. Install the rear camshaft in the reverse order of removal. Always use a new O-ring (C). Apply new engine oil to the journals and cam lobes.
11. Install the rocker arm assembly. See: Cylinder Head Assembly/Service and Repair/Overhaul/Camshaft, Rocker Arm Assembly, Camshaft Seal,