
RL V6-3.7L (2009)
Air Register: Service and Repair
Passenger's Vent Panel Removal/Installation
Passenger's Vent Panel Removal/Installation
Special Tools Required
-
KTC trim tool set SOJATP2014*
*Available through the Acura Tool and Equipment Program
NOTE:
-
Use the appropriate tool from the KTC trim tool set to avoid damage when prying components.
-
Take care not to scratch the dashboard and related parts.
1. Remove these items.
-
Center trim, both sides See: Body and Frame/Interior Moulding / Trim/Dashboard / Instrument Panel/Service and Repair/Dashboard Center
Trim Removal/Installation
-
Utility pocket housing See: Body and Frame/Interior Moulding / Trim/Utility Storage Compartment/Service and Repair/Utility Pocket
Housing Removal/Installation
-
Instrument fascia See: Body and Frame/Interior Moulding / Trim/Dashboard / Instrument Panel/Service and Repair/Instrument Fascia
Removal/Installation
-
Audio unit See: Accessories and Optional Equipment/Radio, Stereo, and Compact Disc/Service and Repair/Audio Unit Removal/Installation
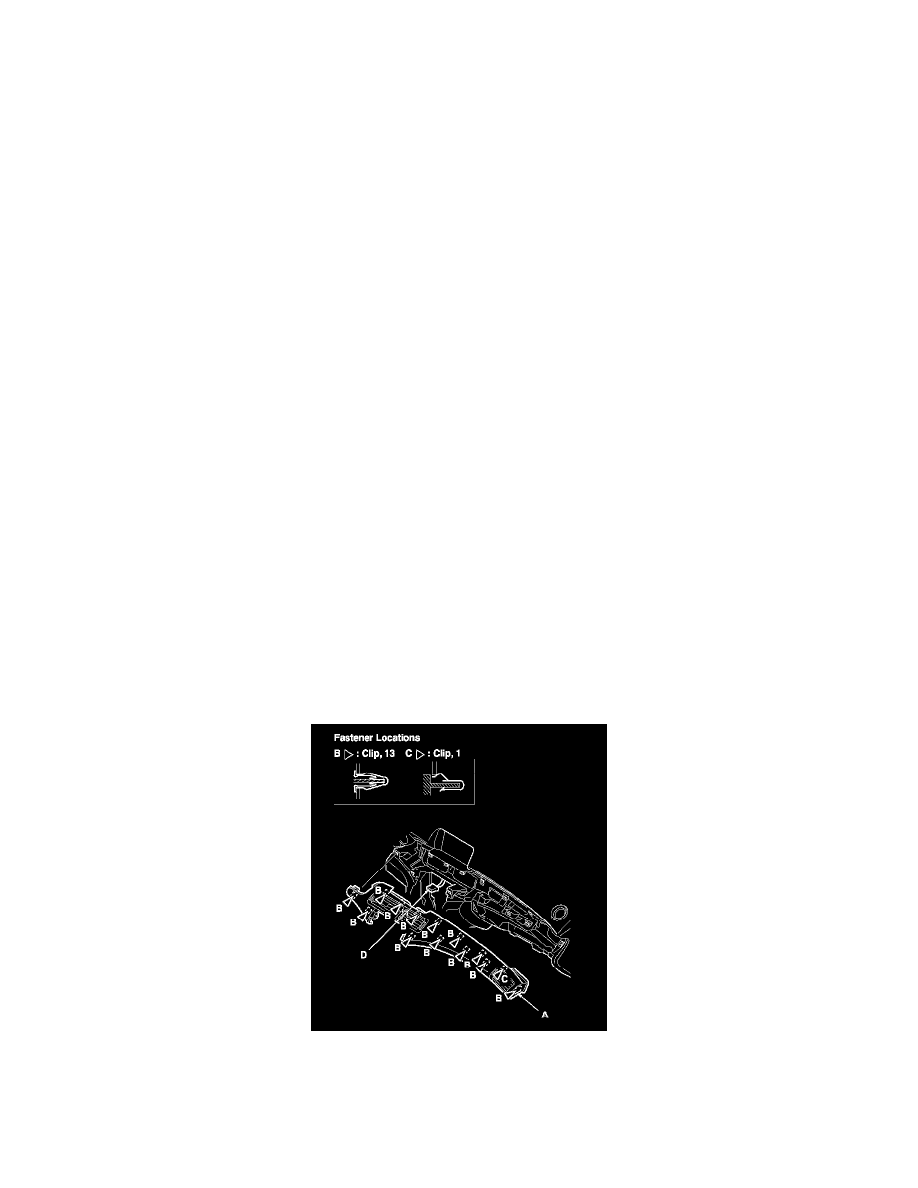
2. Remove the passenger's vent panel (A).
-1 Open the glove box.
Gently pull out the panel to release the clips (B, C).
-3 Disconnect the hazard warning switch/passenger's airbag cutoff indicator connector (D).
3. Install the panel in the reverse order of removal, and note these items:
-
Replace any damaged clips.
-
If the clips are damaged or stress-whitened, replace them with new ones.
-
Make sure the connector is plugged in properly.