
RL V6-3.7L (2009)
Heater Core Case: Service and Repair
Heater Unit/Core Replacement
SRS components are located in this area. Review the SRS component locations See: Restraint Systems/Air Bag Systems/Locations and the precautions
and procedures See: Body and Frame/Interior Moulding / Trim/Dashboard / Instrument Panel/Air Bag(s) Arming and Disarming/Service and Repair
before doing repairs or service.
1. Do the battery terminal disconnection procedure. See: Starting and Charging/Battery/Service and Repair/Procedures
2. Disconnect the A/C lines from the evaporator core. See: Evaporator Core/Service and Repair
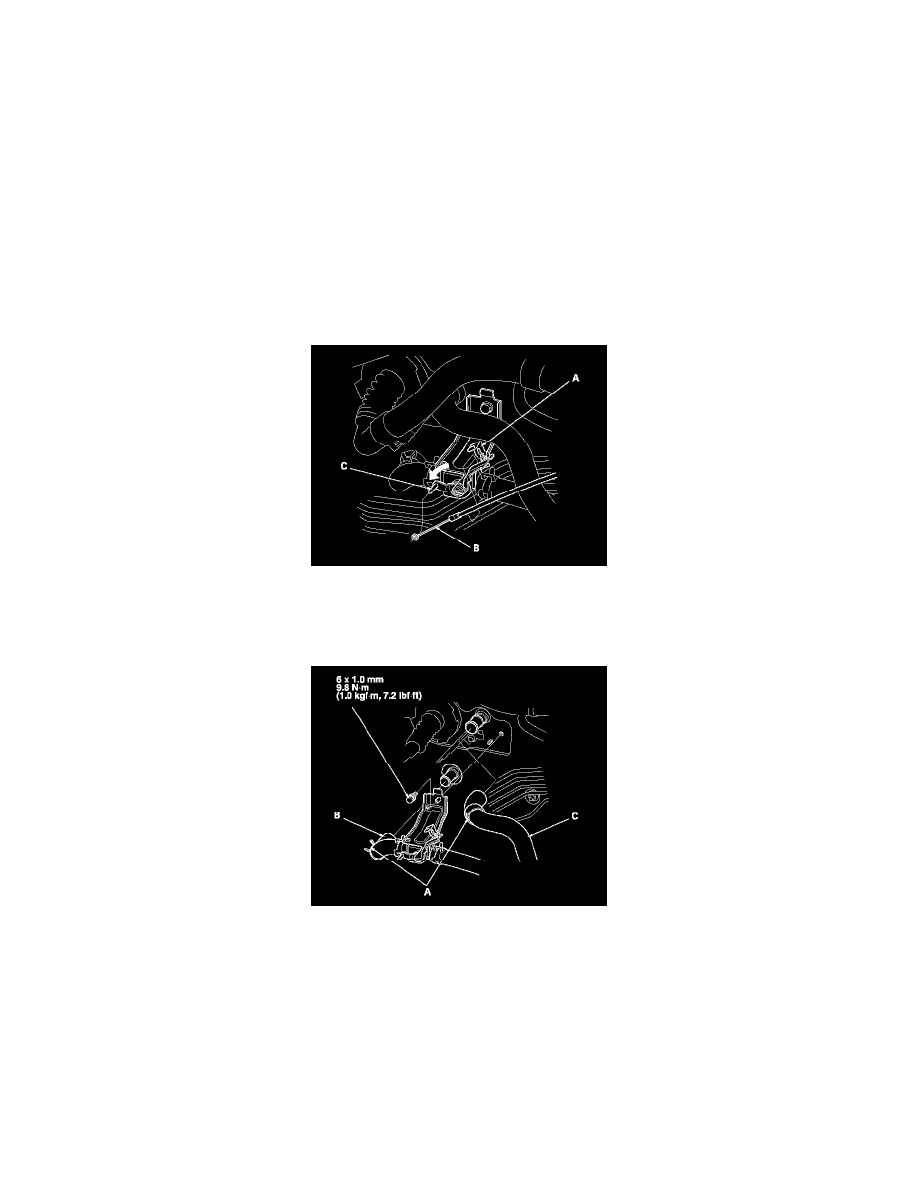
3. From under the hood open the cable clamp (A), then disconnect the heater valve cable (B) from the heater valve arm (C). Turn the heater valve
arm to the fully opened position as shown.
4. When the engine is cool, drain the engine coolant from the radiator. See: Engine, Cooling and Exhaust/Cooling System/Coolant/Service and
Repair
5. Slide the hose clamps (A) back. Remove the bolt and the water valve bracket, then disconnect the inlet heater hose (B) and the outlet heater hose
(C) from the heater unit.
Engine coolant will run out when the hoses are disconnected; drain it into a clean drip pan. Be sure not to let coolant spill on the electrical parts or
the painted surfaces. If any coolant spills, rinse it off immediately.
6. Remove the mounting nut from the heater unit. Take care not to damage or bend the fuel lines and the brake lines, etc.
7. Remove the dashboard. See: Body and Frame/Interior Moulding / Trim/Dashboard / Instrument Panel/Service and Repair/Dashboard
Replacement