
RL V6-3.7L (2009)
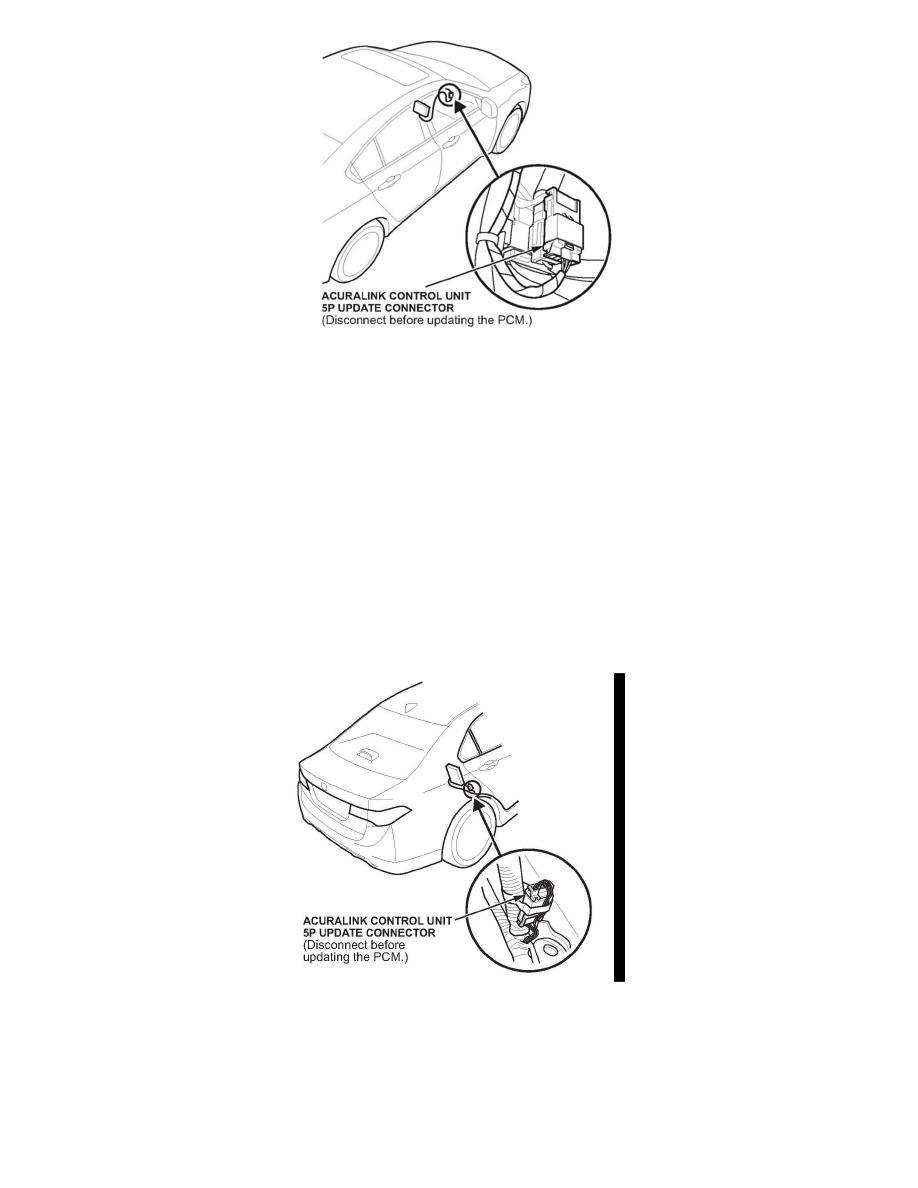
3. Locate and disconnect the AcuraLink control unit 5P update connector.
4. Do the PCM update. (Refer to the specific service bulletin for the symptom you are repairing.)
5. After you complete the PCM update, reconnect the AcuraLink control unit 5P update connector.
6. Reinstall the glove box in the reverse order of removal.
*PROCEDURE: TSX
NOTE:
This procedure is required only if you are updating the PCM.
1. Remove the rear seat right side bolster:
^ Refer to page 20-177 of the 2009 TSX Service Manual, and do steps 1 thru 4 of the Seat Side Bolster procedure, or
^ Online, enter keywords REAR SEAT, select Rear Seat Removal/Installation from the list, and do steps 1 thru 4 of the Seat Side Bolster procedure.
2. Locate and disconnect the AcuraLink control unit 5P update connector.
3. Do the PCM update. (Refer to the specific service bulletin for the symptom you are repairing.)
4. After you complete the PCM update, reconnect the AcuraLink control unit 5P update connector.
5. Reinstall the seat side bolster in the reverse order of removal.*