
RL V6-3.7L (2009)
Air Bag Control Module: Service and Repair
ODS Unit Replacement
ODS Unit Replacement
Removal
1. Do the battery terminal disconnection procedure, See: Starting and Charging/Battery/Service and Repair/Procedures then wait at least 3 minutes
before starting work.
2. Disconnect the passenger's side airbag harness 2P connector. See: Air Bag(s) Arming and Disarming/Service and Repair
3. Remove the front passenger's seat assembly See: Body and Frame/Seats/Service and Repair/Front Seat Removal/Installation and seat-back cover.
See: Body and Frame/Seats/Seat Cover/Service and Repair/Front Seat-back Cover Replacement
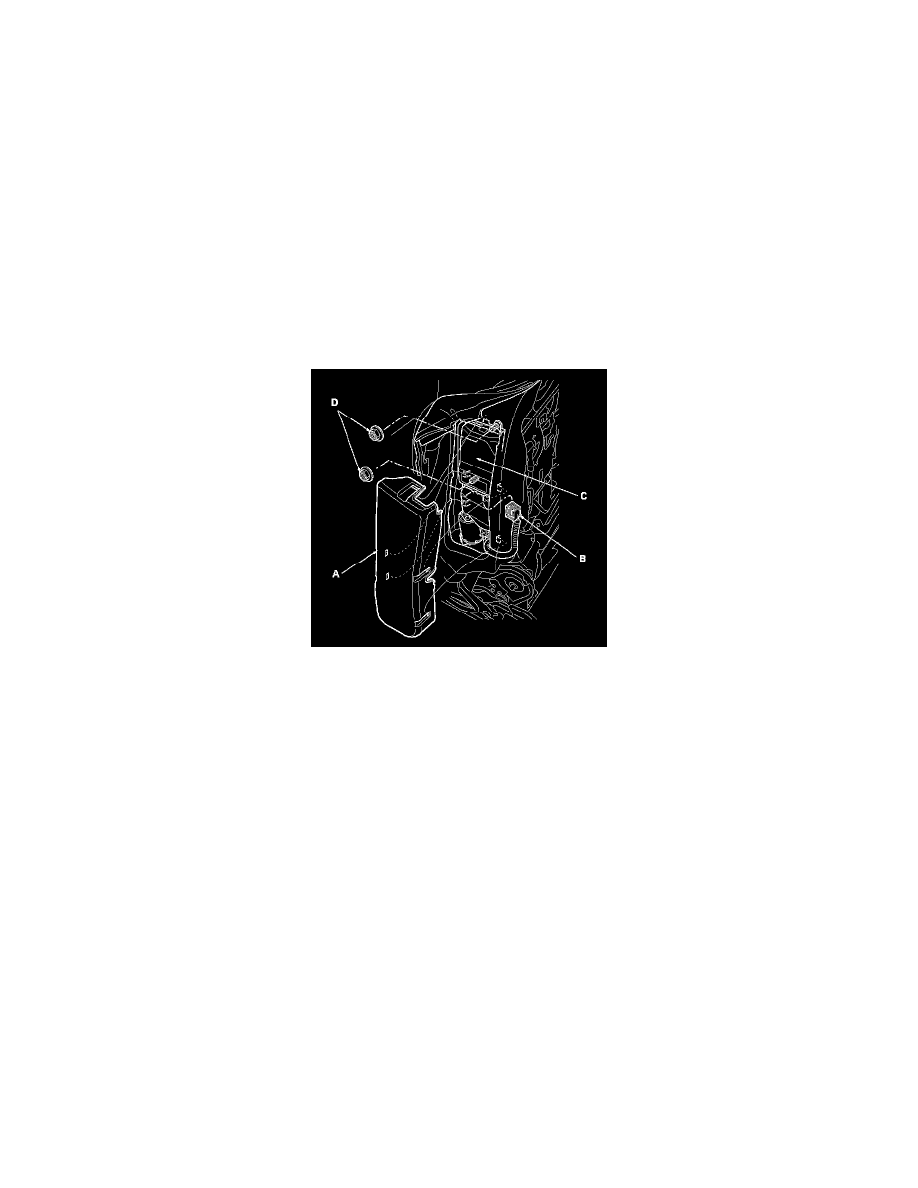
4. Remove the cover (A), then disconnect the ODS unit 18P connector (B) from the ODS unit (C).
5. Remove the two nuts (D) and the ODS unit.
Installation
1. Place the ODS unit (A) on the seat-back frame. Install and torque the two nuts (B), and connect the ODS unit harness 18P connector (C) to the
ODS unit. Reinstall the cover (D).
2. Install the seat-back cover. See: Body and Frame/Seats/Seat Cover/Service and Repair/Front Seat-back Cover Replacement
3. Install the front passenger's seat assembly, See: Body and Frame/Seats/Service and Repair/Front Seat Removal/Installation then connect the side
airbag harness 2P connector.
4. Do the battery terminal reconnection procedure. See: Starting and Charging/Battery/Service and Repair/Procedures
5. Set the seat-back in the normal position, and make sure there is nothing on the front passenger's seat.
6. Initialize the ODS unit. See: Testing and Inspection/Programming and Relearning/ODS Unit Initialization
7. Confirm proper SRS operation: Turn the ignition switch to ON (II); the SRS indicator should come on for about 6 seconds and then go off.