
RL V6-3.7L (2009)
-
Before removing the damper assembly, make a space to remove the damper assembly by rotating the steering wheel clockwise until it stops.
-
Be careful not to damage or scratch the aluminum parts. It may weaken the suspension.
Installation
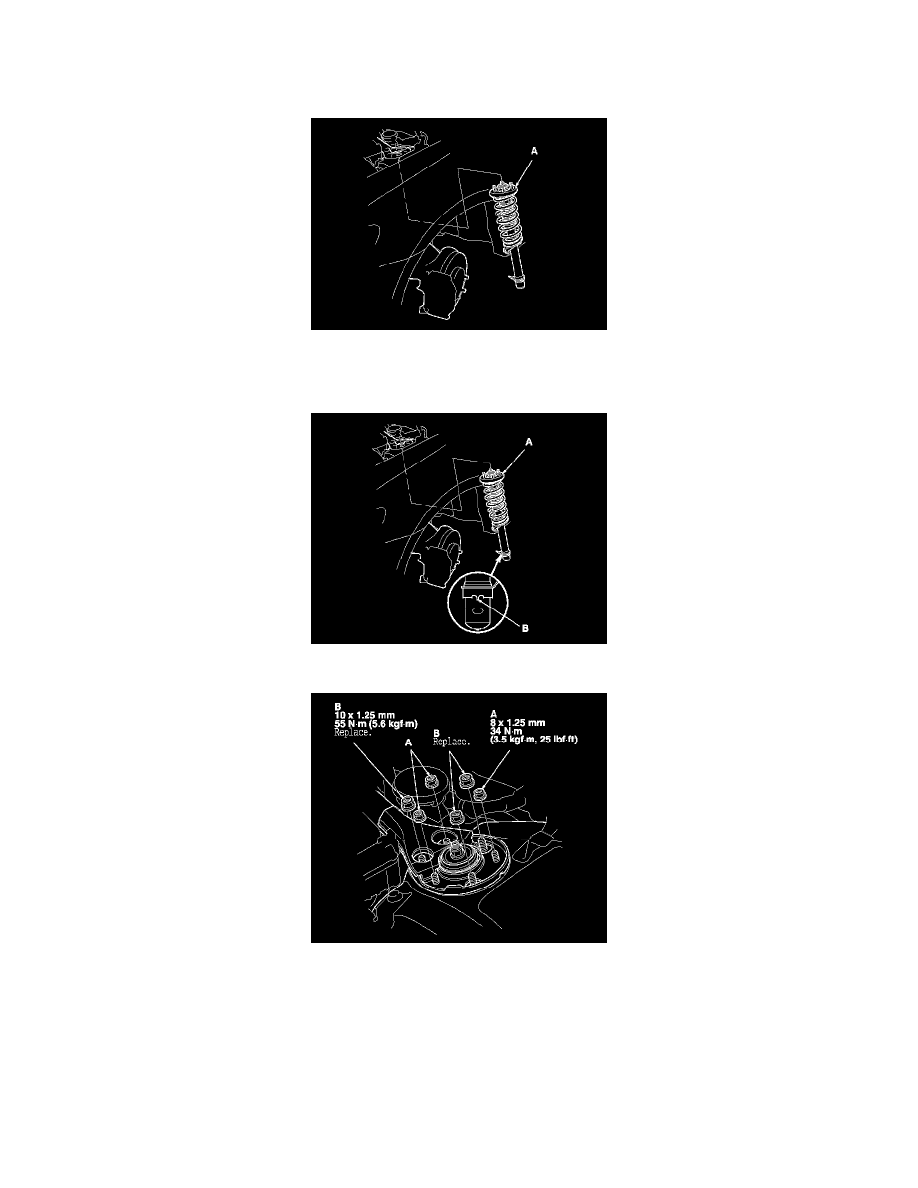
1. Position the damper assembly (A) in the body with the aligning tab (B) facing inside.
2. Loosely install the 8 mm flange nuts (A) and the 10 mm flange nuts (B) on the top of the damper.
3. Install the damper fork (A) over the driveshaft and onto the lower arm while pushing the lower arm down. Install the front damper in the damper
fork so that the aligning tab (B) is aligned with the slot (C) in the damper fork.
4. Loosely install the damper pinch bolt (D) into the damper fork.
5. Install the new flange bolt (E) to the damper fork and lower arm, then lightly tighten the new damper fork mounting nut (F).
6. Install the stabilizer link on the lower arm with the washer and the new self-locking nut, and lightly tighten them.
7. Place the floor jack under the lower arm, and raise the suspension to load it with the vehicle's weight.