
RL V6-3.7L (2009)
NOTE: Do not engrave or scribe any marks on the rolling surface.
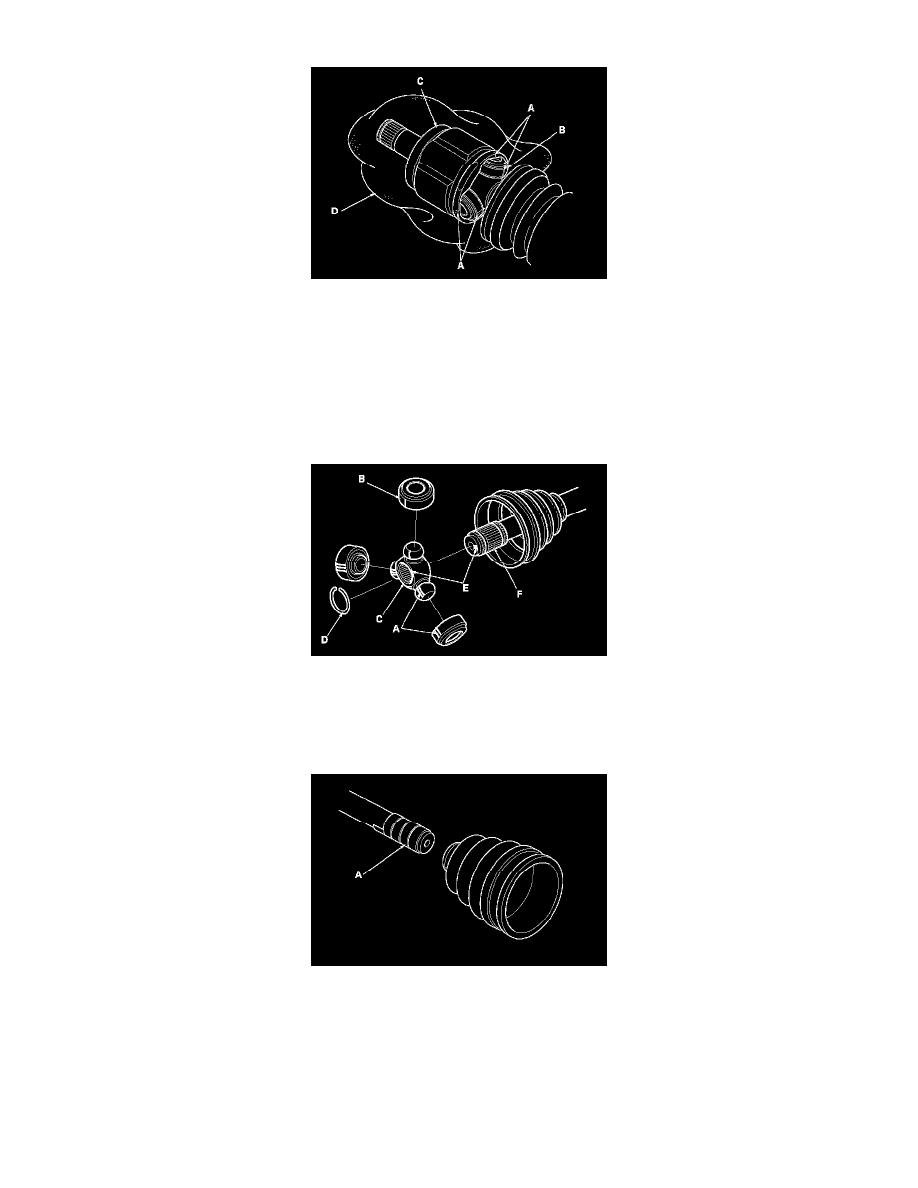
3. Make marks (A) on the rollers (B) and the spider (C) to identify the locations of the rollers on the spider, then remove the rollers.
NOTE: Do not engrave or scribe any marks on the rolling surface.
4. Remove the circlip (D).
5. Make marks (E) on the spider and driveshaft (F) to identify the position of the spider on the shaft.
6. Remove the spider.
NOTE: If necessary, use a commercially available puller.
7. Wrap the splines on the driveshaft with vinyl tape (A) to prevent damaging the boot.
8. Remove the inboard boot. Be careful not to damage the boot.
9. Remove the vinyl tape.
Outboard Joint Side
1. Remove the boot bands (A). Lift up the three tabs (B) with a screwdriver. Be careful not to damage the boot.
Ear clamp type