
RL V6-3474cc 3.5L (1998)
Evaporator Core: Service and Repair
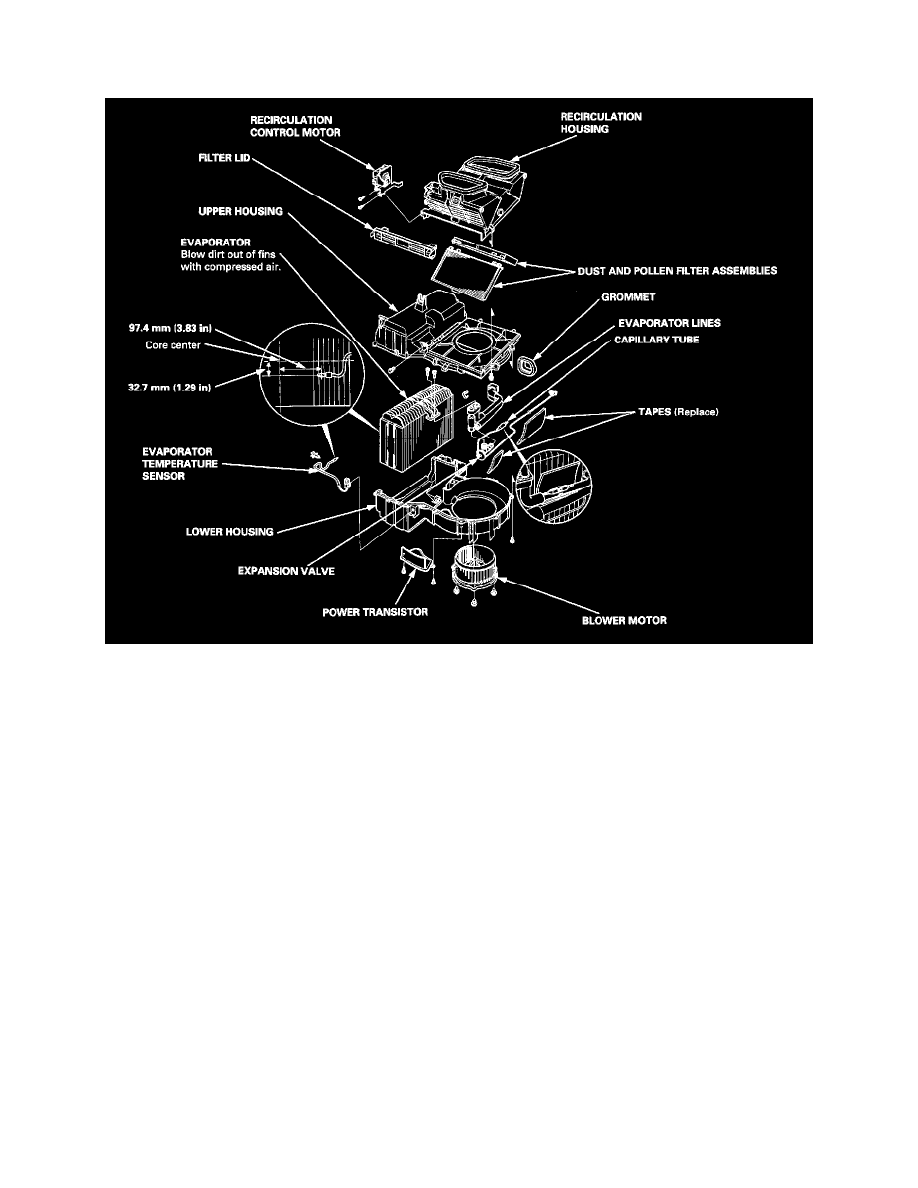
Evaporator Overhaul
Overhaul
NOTE: The blower motor and the recirculation control motor can be replaced without removing the evaporator/blower unit.
1. Remove the filter lid and the dust and pollen filter assemblies, then remove the bolts and the recirculation housing. If necessary, remove the
self-tapping screws and the recirculation control motor.
2. If necessary, remove the self-tapping screws, the blower motor, the self-tapping screws and the power transistor.
3. Pull out the evaporator temperature sensor. Remove the self-tapping screws, then carefully separate the housings. Remove the evaporator.
4. If necessary, remove the expansion valve and the evaporator lines.
NOTE: When loosening the nuts of the expansion valve, use a second wrench to hold the expansion valve. Otherwise, they can be damaged.
5. Assemble in the reverse order of disassembly. Make note of following items.
-
Replace the O-rings with new ones at each fitting and apply a thin coat of refrigerant oil before installing them.
NOTE: Be sure to use the right O-rings for HFC-134a (R-134a) to avoid leakage.
-
Install the expansion valve capillary tube with the capillary tube in contact with the outlet line directly, and wrap it with tape.
NOTE: Make sure there is no foreign matter stuck between the capillary tube and the outlet line.
-
Reinstall the evaporator temperature sensor to its original location.
-
When removing recirculation control motor, make sure that the recirculation control doors and linkage move smoothly without binding.
-
After reassembly, make sure the recirculation control motor runs smoothly.
-
Make sure that there is no air leakage.