
RL V6-3474cc 3.5L (1998)
4.
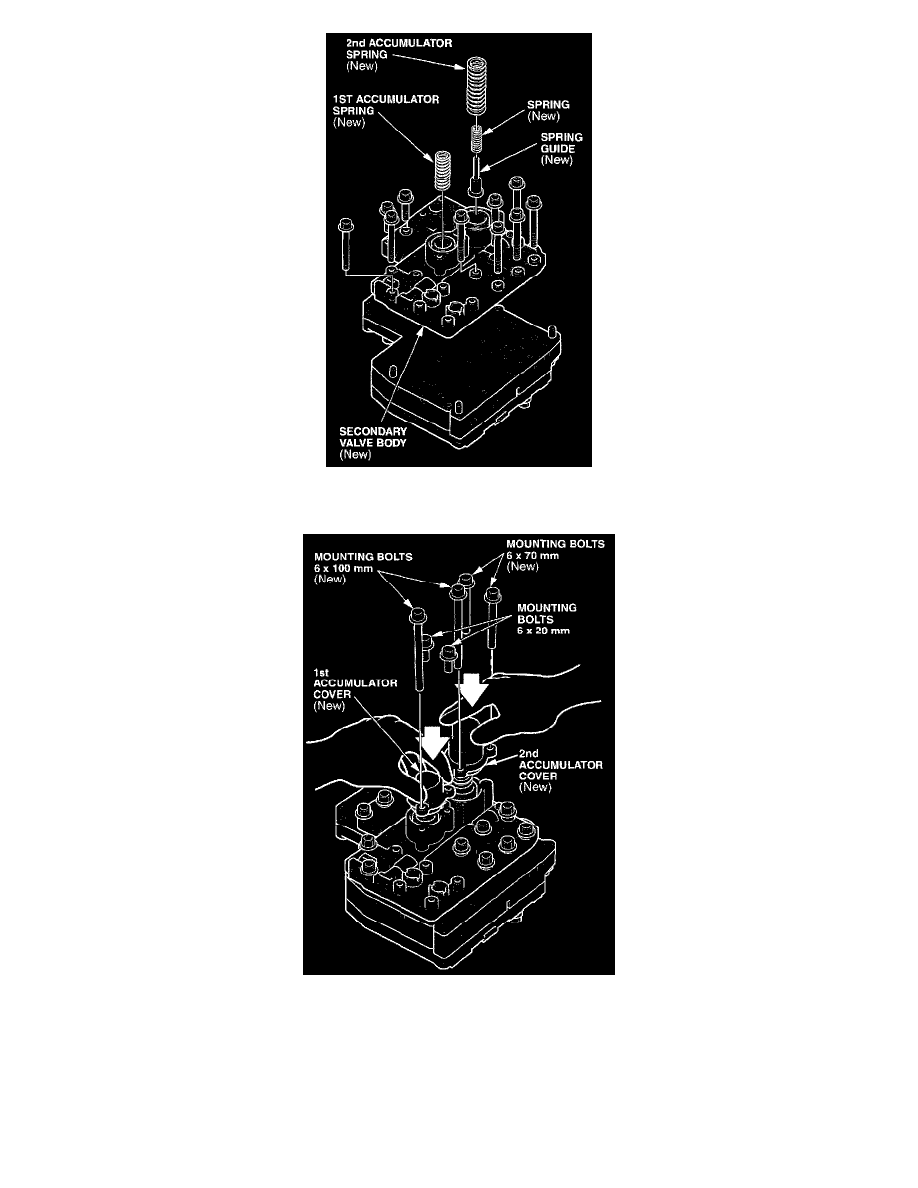
Join the new secondary valve body to the main separator plate and the main valve body. Install the new 1st accumulator spring, then install the new
spring guide with spring and the new 2nd accumulator spring.
5.
Install the new 1st and 2nd accumulator covers with the new mounting bolts (two 6 x 100 mm and two 6 x 70 mm) and the original 6 x 20 mm
mounting bolts you retained in step 3. Push the accumulator covers down, and seat them by hand. Torque the bolts to 12 N.m (8.7 lb-ft).
6.
Install the components and mounting hardware you retained in step 3. Refer to page 14-113 of the S/M for details. Torque all mounting bolts to 12
N.m (8.7 lb-ft).
7.
Reinstall the lower valve body assembly into the transmission according to page 14-112 of the S/M. Torque all mounting bolts to 12 N.m (8.7
lb-ft). Refill the transmission with Honda ATF-Z1.