
RSX L4-2.0L (2005)
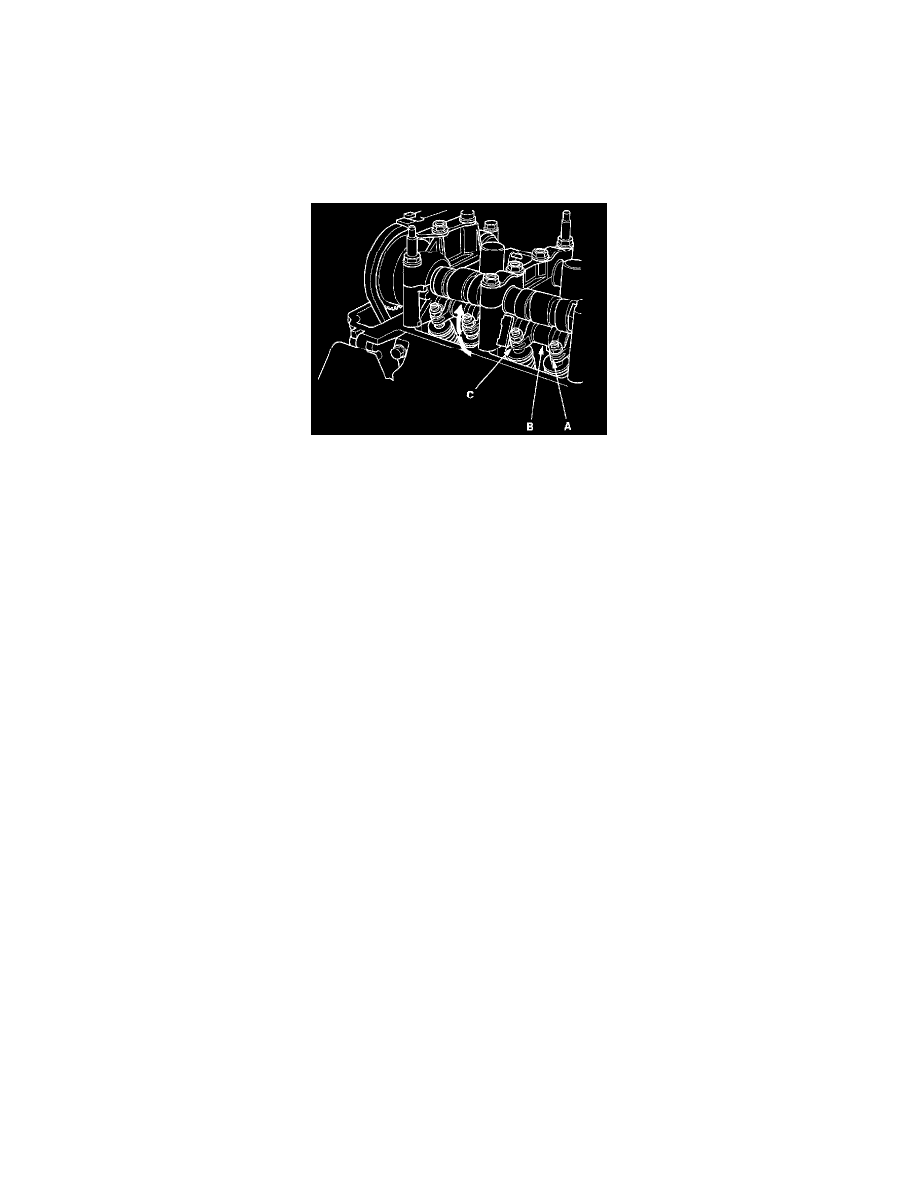
7. Remove the sealing bolt (A) from the relief hole, and install the VTEC air stopper (B).
8. Remove the No. 3 camshaft holder bolts, and install the VTEC air adapters (C) finger-tight.
9. Connect the air joint adapter (D), and air pressure regulator (E).
10. Loosen the valve on the regulator, and apply the specified air pressure.
Specified air pressure: 290 kPa (3.0 kgf/cm2, 42 psi)
NOTE: If the synchronizing piston does not move after applying air pressure; move the rocker arm up and down manually by rotating the
crankshaft.
11. With the specified air pressure applied, move the secondary rocker arm (A) for the No. 1 cylinder. The mid rocker arm (B), primary rocker arm
(C), and secondary rocker arm should move together.
^
If the mid and primary rocker arms do not move together with the secondary rocker arm, remove the mid, primary, and secondary rocker arms
as an assembly, and check that the pistons in the rocker arms move smoothly. If any rocker arm needs replacing, replace the mid, primary, and
secondary rocker arms as an assembly, and retest.
12. Remove the special tools.
13. Tighten the camshaft holder mounting bolts to 22 Nm (2.2 kgf-cm, 16 ft. lbs.).
14. Tighten the sealing bolt to 20 Nm (2.0 kgf-cm, 14 ft. lbs.).
15. Install the cylinder head cover.