
RSX L4-2.0L (2005)
Control Arm: Service and Repair
Front Suspension
Lower Arm Removal/Installation
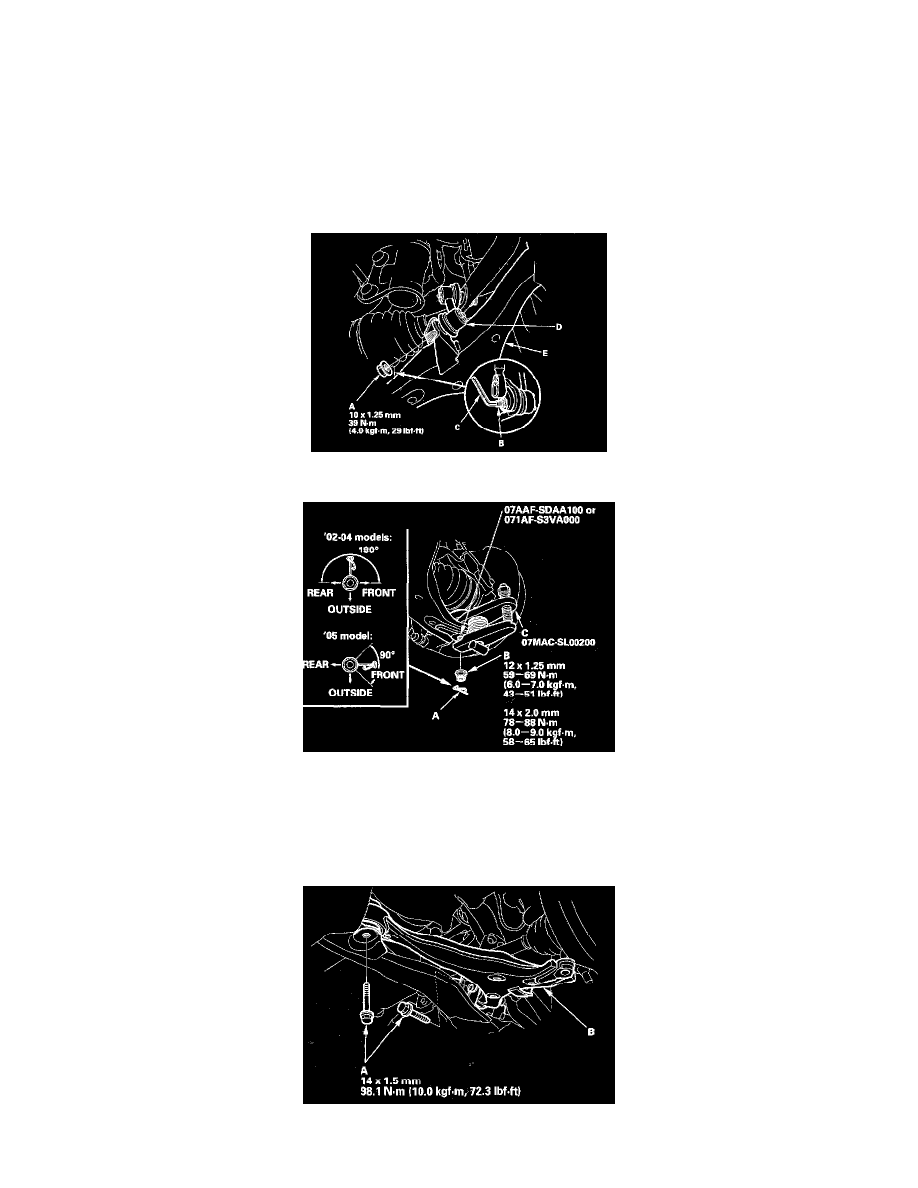
Special Tools Required
^
Ball joint thread protector, 12 mm 07AAF-SDAA100
^
Ball joint thread protector, 14 mm 071AF-S3VA000
^
Ball joint remover, 28 mm 07MAC-SL00200
1. Raise the front of the vehicle, and support it wish, safety stands in the proper locations. Remove the front wheels.
2. Remove the flange nut (A) while holding the joint pin (B) with a hex wrench (C), and disconnect the stabilizer link (D) from the lower arm (E).
3. Remove the lock pin (A) from the lower arm ball joint, and remove the castle nut (B).
NOTE: During installation, insert the lock pin into the ball joint pin from the inside to the outside of the vehicle. The closed end of the lock pin
must be in the range shown.
4. Disconnect the lower arm from the knuckle using the special tools (C).
5. Remove the flange bolts (A), and remove the lower arm (B).