
RSX L4-2.0L (2005)
Trailing Arm: Service and Repair
Trailing Arm Removal/Installation
1. Raise the rear of the vehicle, and support it with safety stands in the proper locations. Remove the rear wheels.
2. Remove the knuckle.
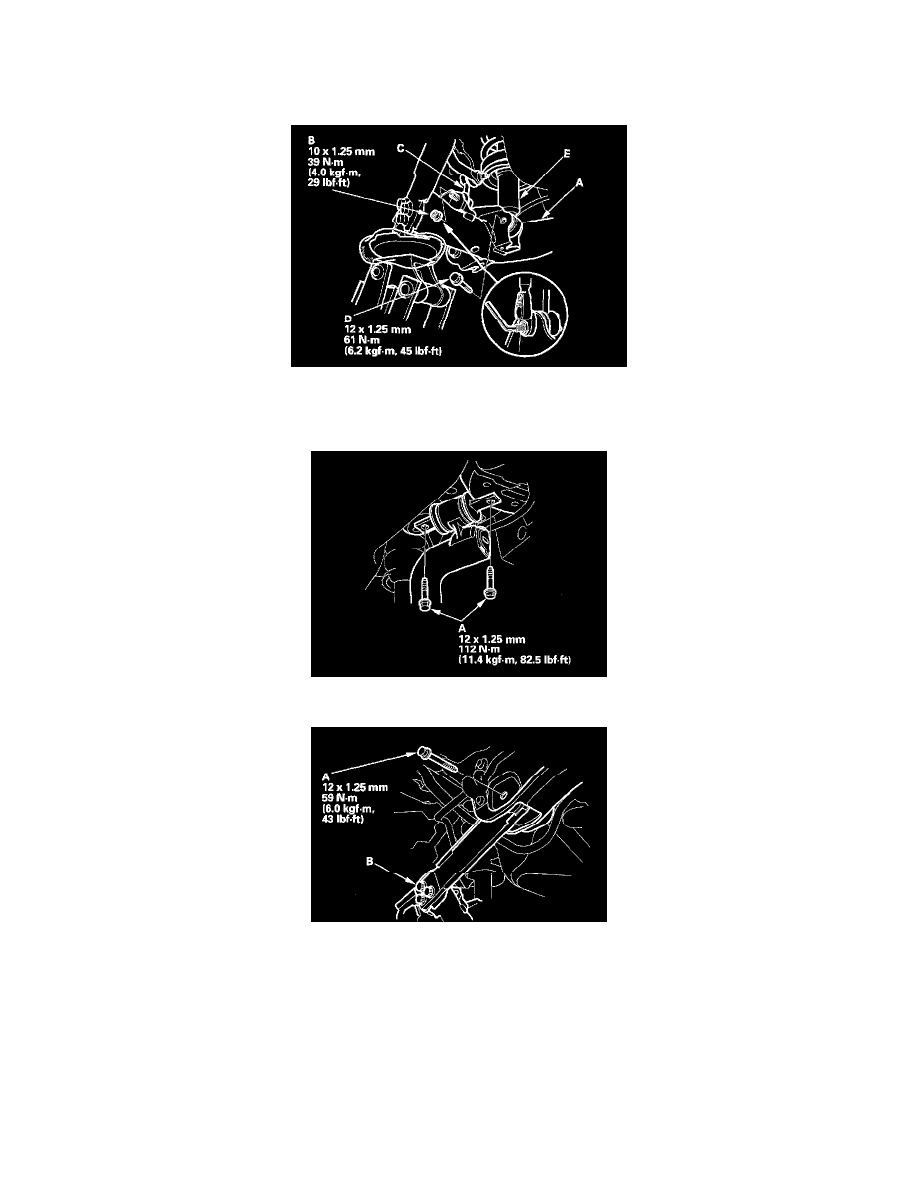
3. Place the floor jack under the trailing arm (A) to support it.
4. Remove the flange nut (B), and disconnect the stabilizer link (C) from the trailing arm.
5. Remove the flange bolt (D), and disconnect the damper (E) from the trailing arm.
6. Remove the trailing arm front mounting bolts (A).
7. Remove the trailing arm rear mounting bolt (A).
NOTICE: Do not loosen the special bolts (B) on the trailing arm.
8. Lower the jack, and remove the trailing arm.
9. Install the trailing arm in the reverse order of removal, and note these items:
^
First install all the suspension components and lightly tighten the bolts and nuts, then place a jack under the trailing arm, and raise the
suspension to load it with the vehicle's weight before fully tightening the bolts and nuts to the specified torque values.
^
Tighten all the mounting hardware to the specified torque values.
^
Before installing the wheel, clean the mating surface of the brake disc and the inside of the wheel.
^
Check the wheel alignment, and adjust it if necessary.