
TL L5-2451cc 2.5L SOHC MFI (1997)
Oil Pan: Service and Repair
Removal
Engine removal is not required for this procedure.
WARNING: Make sure jacks and safety stands are placed properly.
CAUTION:
-
Use fender covers to avoid damaging painted surfaces.
-
Unplug the wiring connectors carefully while holding the connector portion to avoid damage.
NOTE: Mark all wiring and hoses to avoid misconnection. Also, be sure that they do not contact other wiring or hoses, or interfere with other parts.
1. Make sure you have the anti-theft code for the radio, then write down the frequencies for the radio's preset buttons.
2. Disconnect the negative terminal from the battery.
3. Drain the engine coolant.
-
Remove the radiator cap to speed draining.
-
Remove the intake air duct.
5. Loosen the idler pulley center nut and adjusting bolt, then remove the Air Conditioning (A/C) compressor belt.
6. Remove the A/C compressor.
-
Do not disconnect the A/C hoses.
7. Remove the front wheels.
8. Remove the damper forks.
9. Disconnect the suspension lower arm ball joints with the special tool.
10. Drain the engine oil. Reinstall the drain bolt using a new washer.
11. Drain the differential oil. Reinstall the drain plug using a new washer.
12. Attach a chain hoist to the engine.
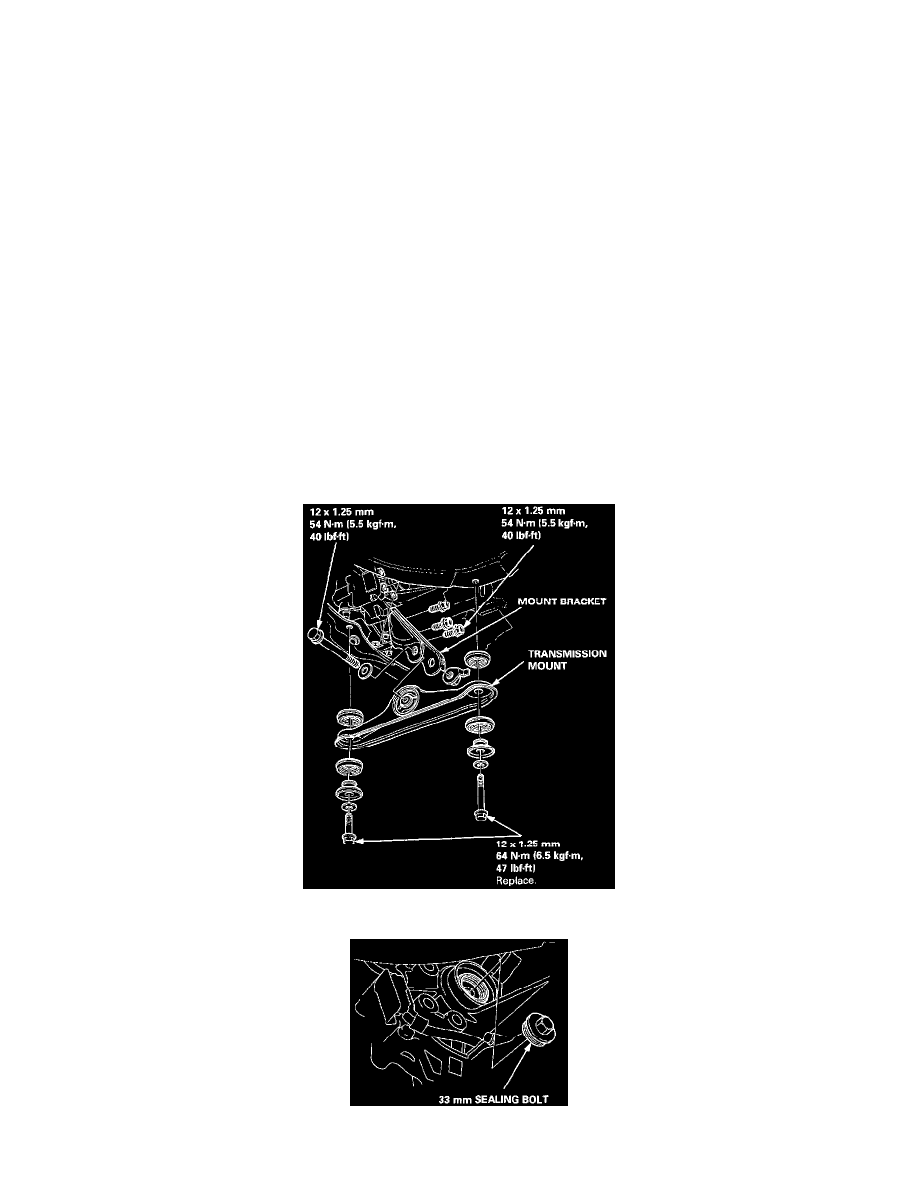
13. Remove the transmission mount and mount bracket.
14. Remove the 33 mm sealing bolt.