
TL L5-2451cc 2.5L SOHC MFI (1997)
Steering Gear: Service and Repair
Removal
NOTE: Use solvent and a brush to wash off any oil and dirt from the valve body unit, its lines, and the end of the gearbox. Blow dry with compressed
air.
1. Drain the power steering fluid.
2. Raise the front of vehicle, and support it on safety stands in the proper locations.
3. Remove the front wheels.
4. Remove the driver's airbag assembly and steering wheel.
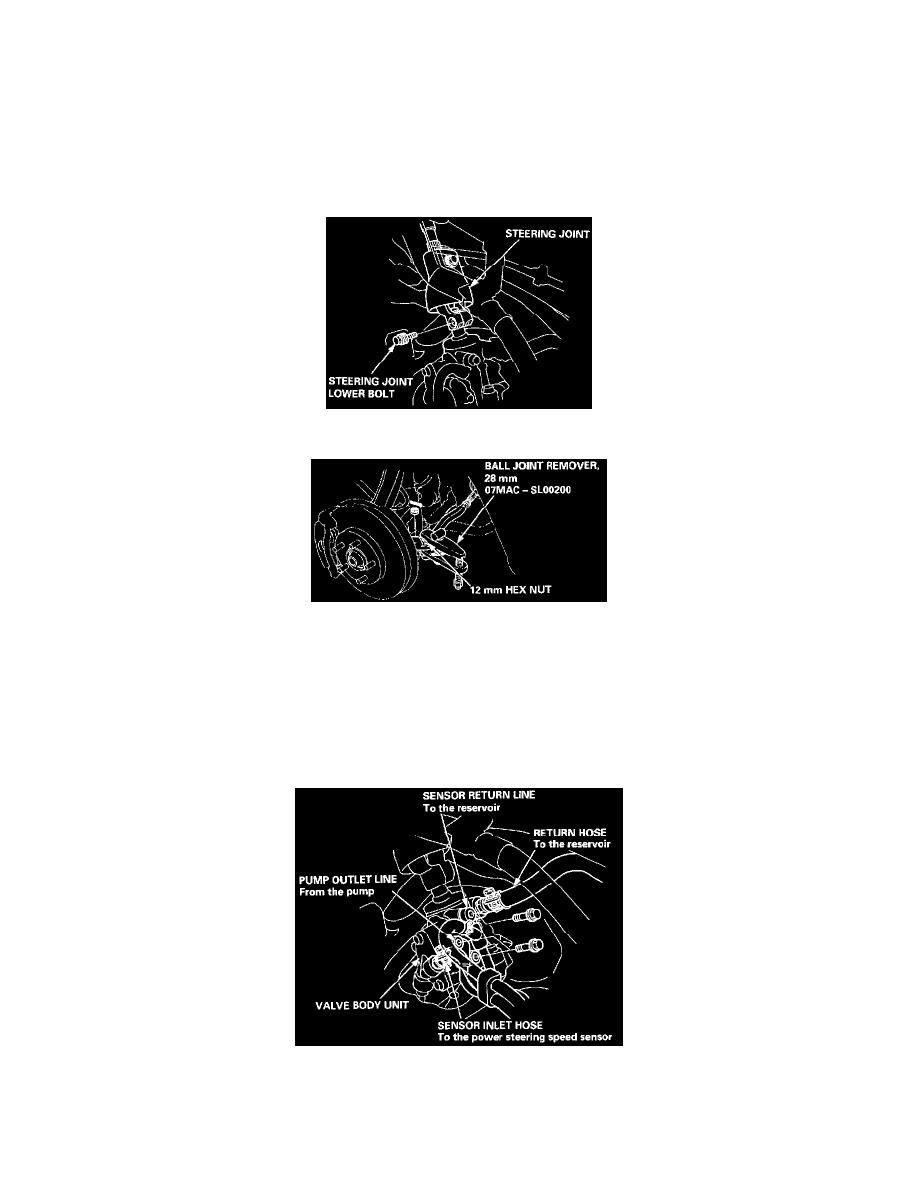
5. Remove the steering joint lower bolt from the engine compartment, and move the joint toward the column.
6. Remove the cotter Din from the castle nut, and remove the nut.
7. Install the 12 mm hex nut on the ball joint. Be sure that the 12 mm hex nut is flush with the ball joint pin end, or the threaded section of the ball
joint pin might be damaged by the special tool.
NOTE: Remove the ball joint using the Ball Joint Remover, 28 mm (07MAC-SL00200).
8. Separate the tie-rod ball joint and knuckle using the special tool.
CAUTION: Avoid damaging the ball joint boot.
9. Disconnect the two lines and two hoses from the valve body unit on the steering gearbox.
CAUTION: After disconnecting the hose and line, plug or seal the hose and line with the piece of tape or equivalent to prevent foreign materials
from entering the valve body unit.