
TL V6-3.2L (2004)
Front Fender Liner: Service and Repair
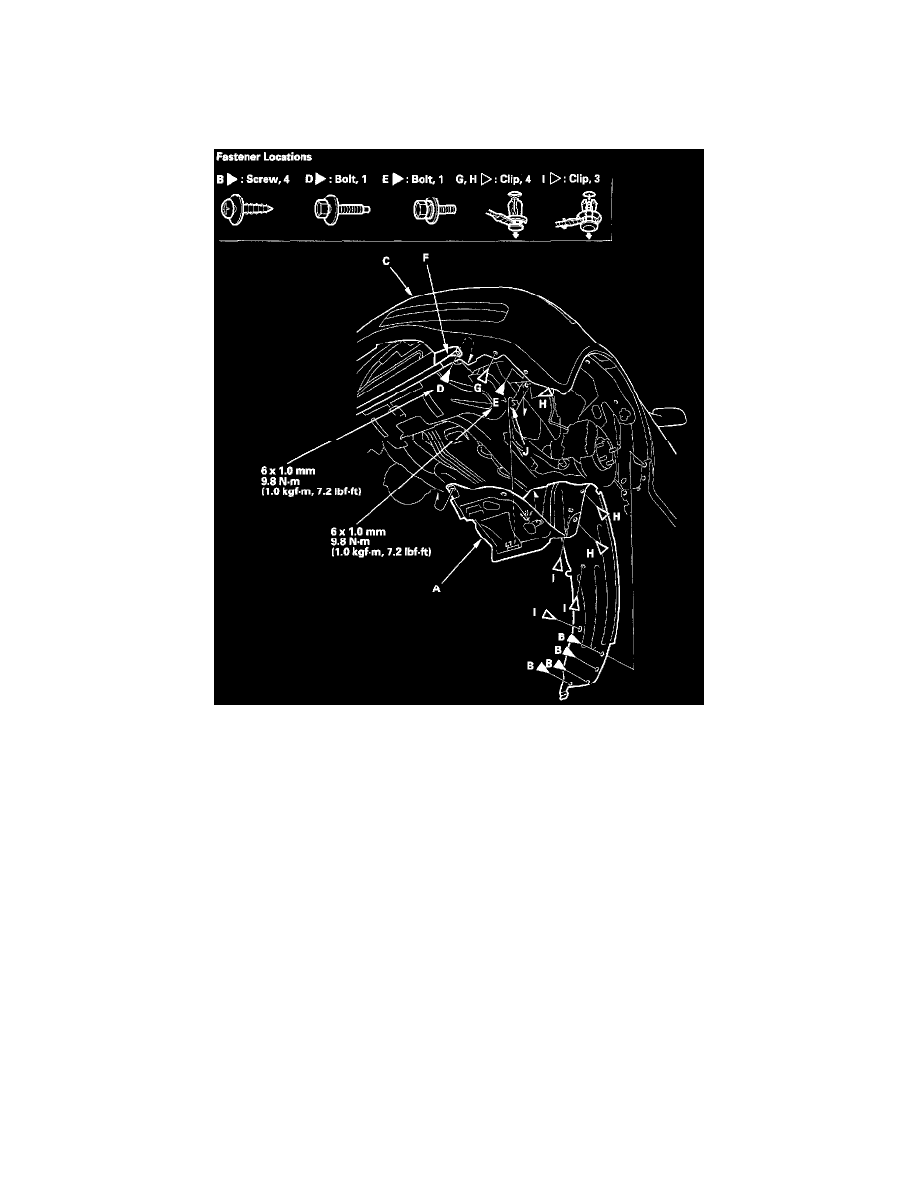
Front Inner Fender Replacement
Front Inner Fender Replacement
NOTE: Take care not to scratch the body.
1. Remove the front inner fender (A).
1. On the back of the wheel arch, remove the screws (B).
2. From under the front bumper (C), remove the bolts (D, E) securing the front bumper, front strake (F), and front inner fender, and remove the
clip (G) securing the front bumper and front inner fender.
3. From the wheel arch, remove the clips (H, I) securing the front inner fender (and splash shield) to the body.
4. Release the hook (J) of the splash shield, then remove the front inner fender.
2. Install the inner fender in the reverse order of removal, and note these items:
-
Check for damaged or stress-whitened clips, and replace them with new ones.
-
Push the clips into place securely.