
TL V6-3.2L (2004)
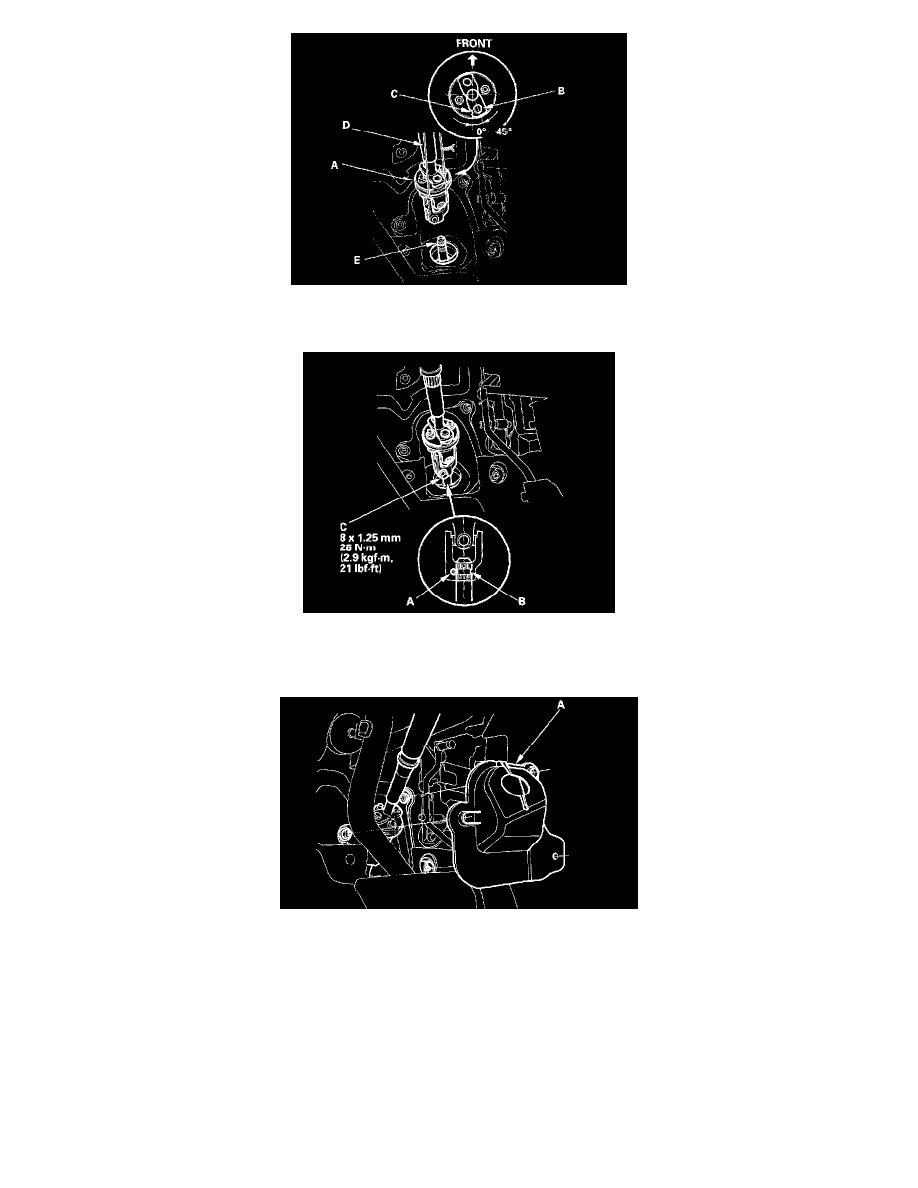
31. Position the steering column joint (A) so the bolt (B) near to the notch (C) is within the range shown.
32. With the rack in the straight ahead driving position, cut the wire (D) and slip the lower end of the steering joint on to pinion shaft (E).
33. Align the bolt hole (A) on the steering joint with the groove (B) around the pinion shaft, and loosely install the joint bolt (C). Make sure the joint
bolt is securely in the groove in the pinion shaft. Pull on the steering joint to make sure the steering joint is fully seated.
34. Tighten the steering joint bolt to the specified torque.
35. Install the steering joint cover A.
36. Install the front wheel, then set the wheels in the straight ahead position.
37. Center the cable reel by first rotating it clockwise until it stops. Then rotate it counterclockwise (about three full turns) until the arrow mark on the
label points straight up. Reinstall the steering wheel.
38. Fill the system with power steering fluid, and bleed air from the system.
39. After installation, do the following checks.
^
Start the engine, allow it to idle, and turn the steering wheel from lock-to-lock several times to warm up to the fluid. Check the gearbox for
leaks.
^
Do the front too inspection.
^
Check the steering wheel spoke angle, If steering spoke angles to the right and left are not equal (steeling wheel and rack are not centered),
correct the engagement of the joint/ pinion shaft serrations, and repeat step 37. Then adjust the front toe by turning the tie-rod ends, if
necessary.
40. Install the right side engine component cover, passenger's and driver's cowl top extensions.