
TL V6-3.2L (2004)
72. Install the cylinder lines.
Note these items during reassembly:
^
Thoroughly clean the joints of the cylinder lines. The joints must be free of foreign material.
^
Install the cylinder lines by tightening the flare nuts by hand first, then tighten the flare nuts to the specified torque.
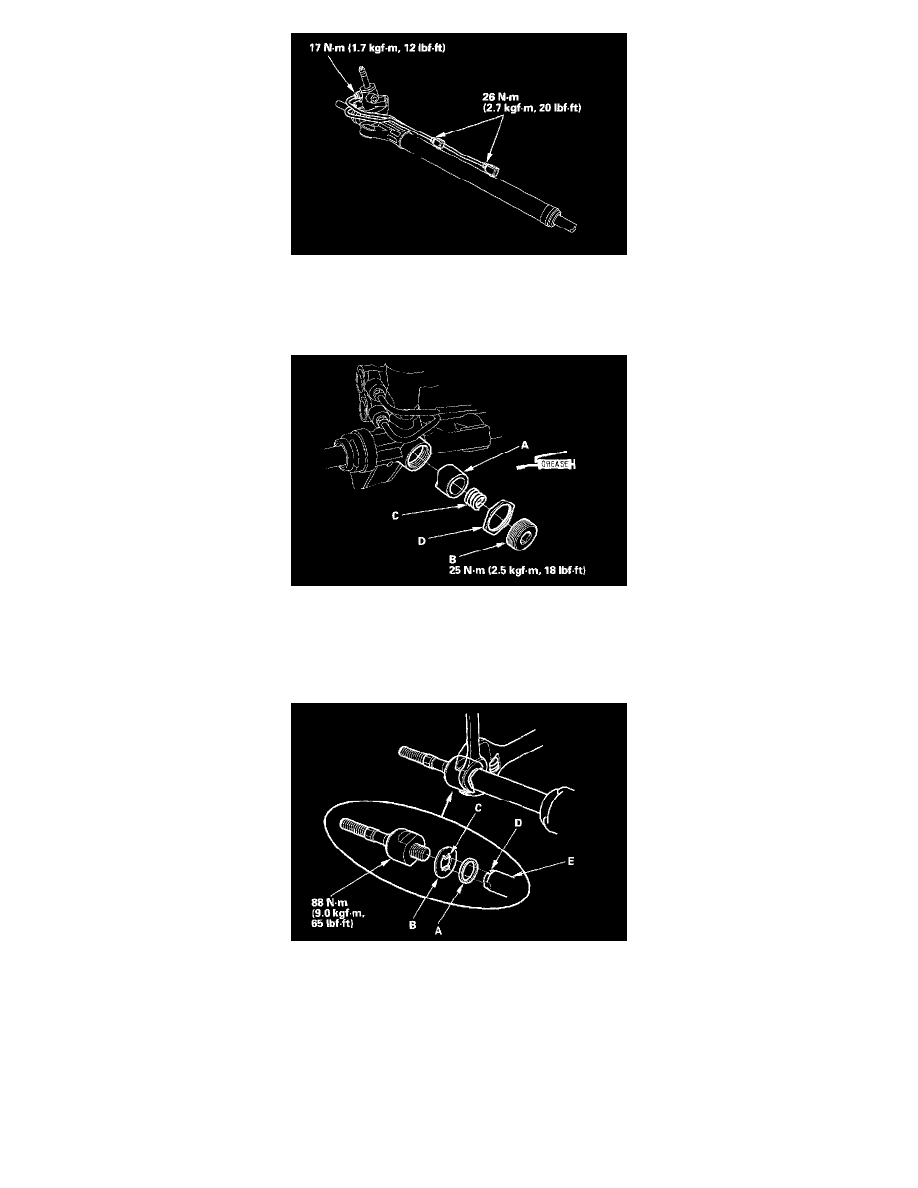
73. Apply multipurpose grease to the sliding surface and circumference of the rack guide (A), and install it onto the gearbox housing.
74. Apply new sealant (Three Bond 1215 or Loctite 5699) to the middle of the threads on the rack guide screw (B), then install the spring (C) and rack
guide screw.
75. Tighten the rack guide screw, and loosely install the locknut (D).
76. Adjust the rack guide screw. After adjusting, check that the rack moves smoothly by sliding it right and left.
77. Install a new stop rubber (A) and a new lock washer (B). Align the lock washer tabs (C) with the slots (D) on the rack end (E) while holding the
lock washer in place. Repeat this step for the other side of the rack.
78. Hold the flat surface sections of the steering rack with a wrench, and tighten both rack ends. Be careful not to damage the rack surface with the
wrench.