TL V6-3.2L (2004)

Ball Joint: Service and Repair
Ball Joint Replacement
Ball Joint Removal
Special Tools Required
-
Ball joint remover, 28 mm 07MAC-SL00200
-
Ball joint thread protector 07AAF-SEPA200
-
Ball joint remover 07AAF-SEPA100 (for the lower ball joint)
NOTICE: Always use a ball joint remover to disconnect a ball joint. Do not strike the housing or any other part of the ball joint connection to
disconnect it.
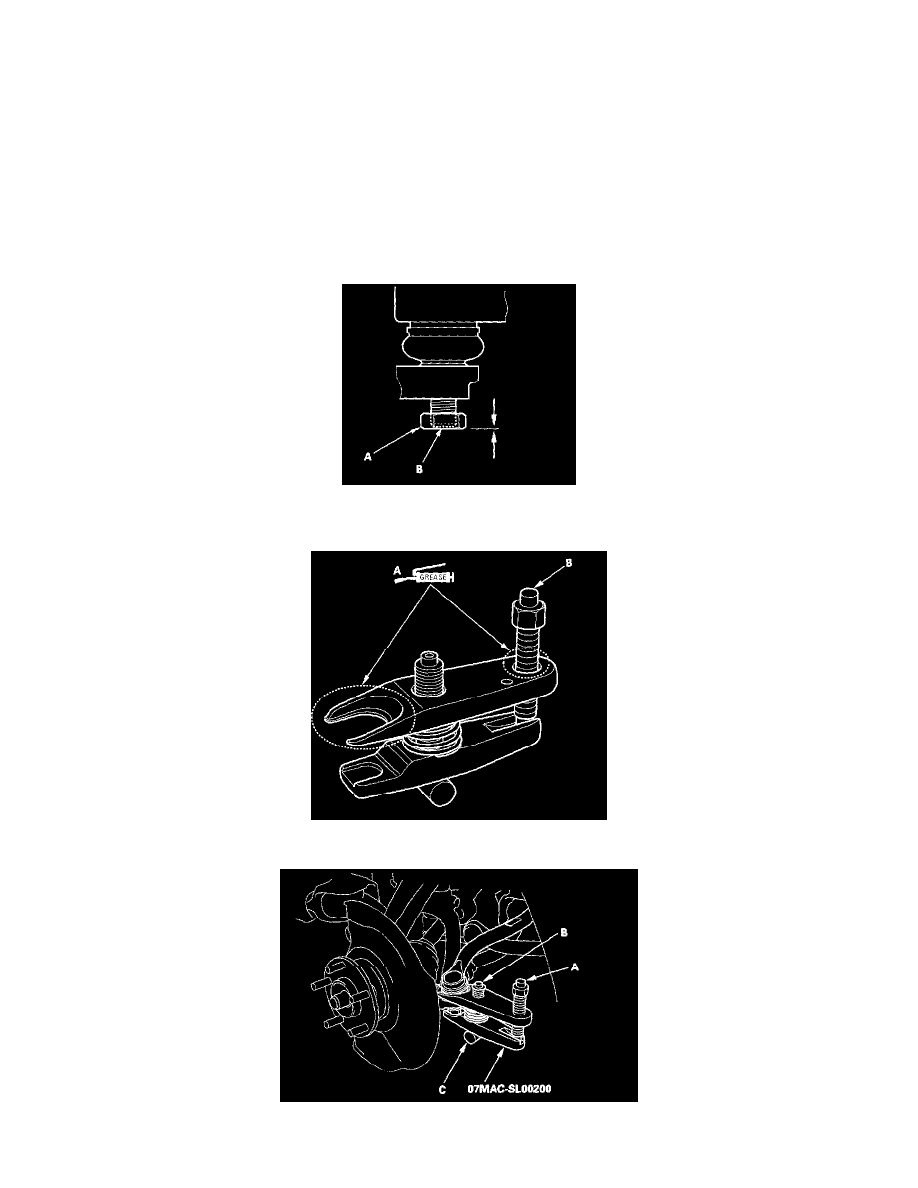
07MAC-SL00200
1. Install a hex nut (A) onto the threads of the ball joint (B). Make sure the nut is flush with the ball joint pin end to prevent damage to the threaded
end of the ball joint pin.
2. Apply grease to the special tool on the areas shown (A). This will ease installation of the tool and prevent damage to the pressure bolt (B) threads.
3. Loosen the pressure bolt (A), and install the special tool as shown. Insert the jaws carefully, making sure not to damage the ball joint boot. Adjust
