
TL V6-3.2L (2004)
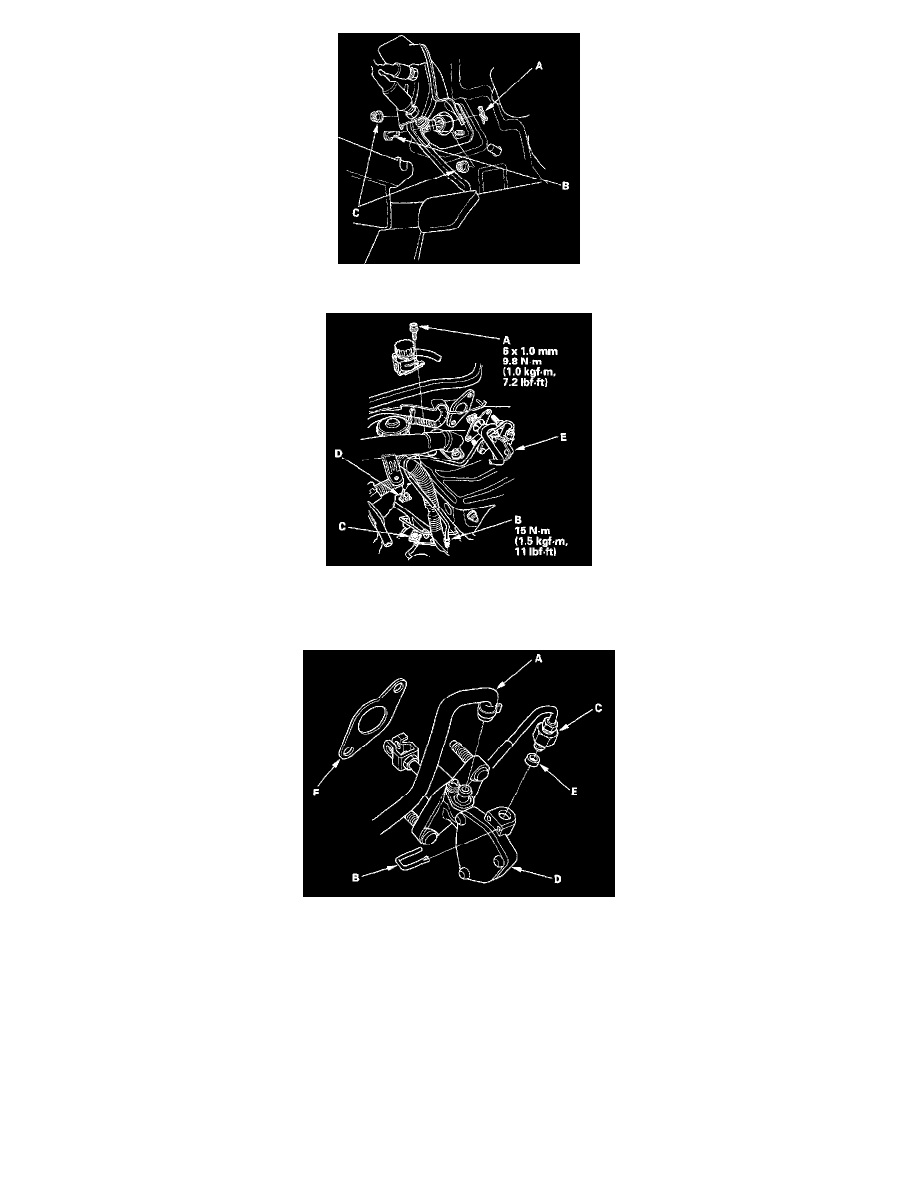
8. Pry out the lock pin (A), and pull the pedal pin (B) out of the yoke. Remove the master cylinder mounting nuts (C).
9. Remove the reservoir mounting bolt (A).
10. Disconnect the clutch line (B) from the bracket (C).
11. Remove the clutch line from the clamp (D).
12. Remove the clutch master cylinder (E).
13. Disconnect the reservoir hose (A), then remove the retaining clip (B) and remove the clutch line (C) from the clutch master cylinder (D). Plug the
end of the reservoir hose and clutch line with a shop towel to prevent brake fluid from coming out.
14. Remove the O-ring (E) and clutch master cylinder seal (F) from the clutch master cylinder.
15. Install the clutch master cylinder in the reverse order of removal, and note these items.
-
Apply brake assembly lube to the clutch line, and install a new O-ring.
-
Tighten the master cylinder mounting nuts to 13 Nm (1.3 kgf-cm, 9.4 ft. lbs.).
-
Install the driver's dashboard lower cover.
-
Install the under-hood fuse/relay box.
-
Install the battery base.
-
Install the air cleaner housing.
-
Install the battery.
-
Reconnect the battery cables; positive (+) cable first, then the negative (-) cable.
-
Install the left rear engine compartment cover and the left side engine compartment cover.