TL V6-3.5L (2007)

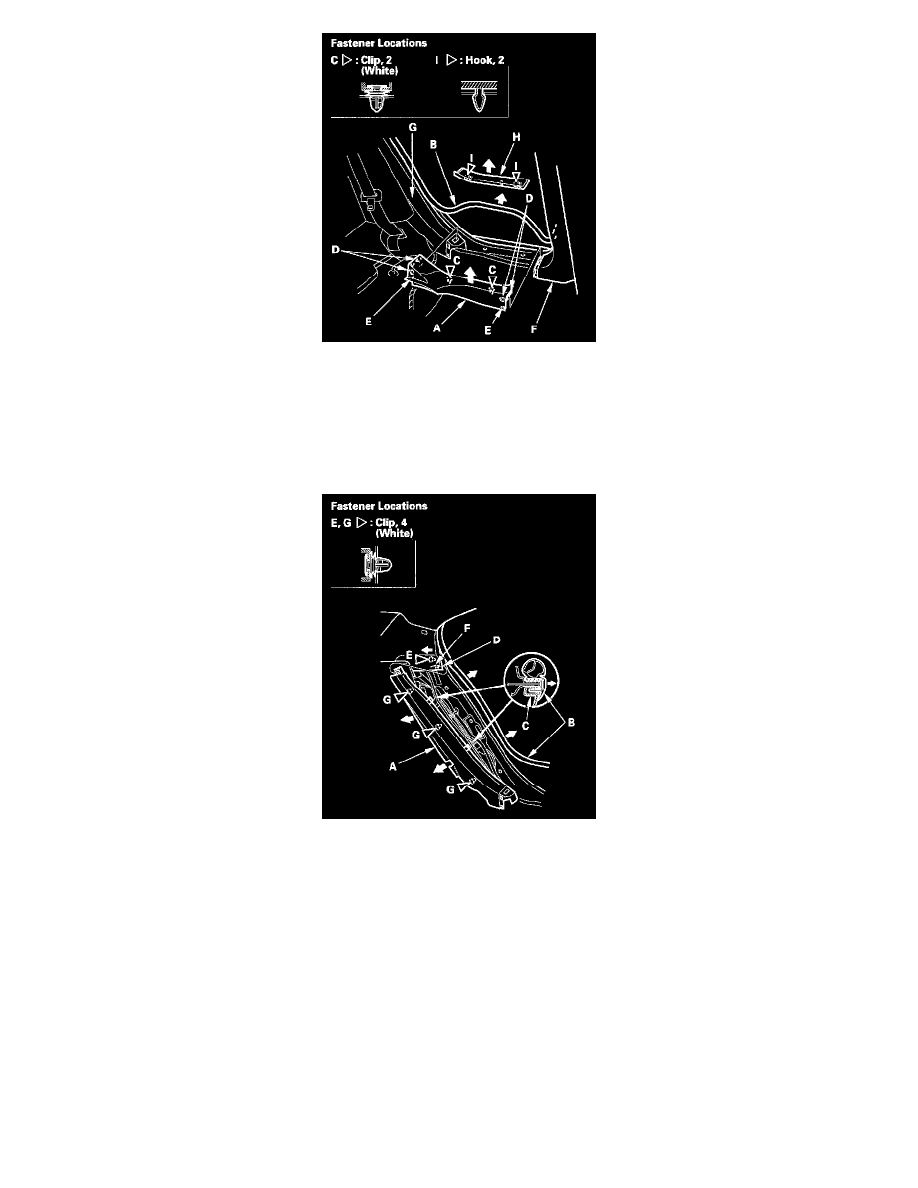
2. Remove the rear door sill trim (A).
1. Pull out the rear door opening trim (B) from the lower part of the rear door opening flange.
2. Pull the rear door sill trim up by hand to detach the clips (C), and to release the hooks (D) and tabs (E) from the B-pillar lower trim (F) and the
rear seat side trim (G), then remove the trim.
3. If necessary, pull the rear side outer trim (H) up to detach the hooks (I), then remove the trim.
4. Remove the rear seat-back.
5. Remove the rear seat side trim (A).
1. Pull out the rear door opening trim (B) from the seat side trim hooks (C) and the rear door opening flange.
2. Pull the lower part of the C-pillar trim (D) back by hand to detach the lower clip (E), and to release the hook (F) from the top of the seat side
trim.
3. Pull the seat side trim back by hand to detach the clips (G), then remove the trim.
